Affiliate disclosure: This post may contain affiliate links. If you buy through a link on this page, MOTOZMO may earn a small commission at no extra cost to you. It helps keep our guides free. How we test and choose products.
Yes, you can balance a motorcycle wheel at home, and a static balancer stand that costs less than one shop visit does the job for most street riding.
I started doing my own after a shop stacked new weights on top of the old ones without removing them. The wheel hopped at 60 mph on the ride home.
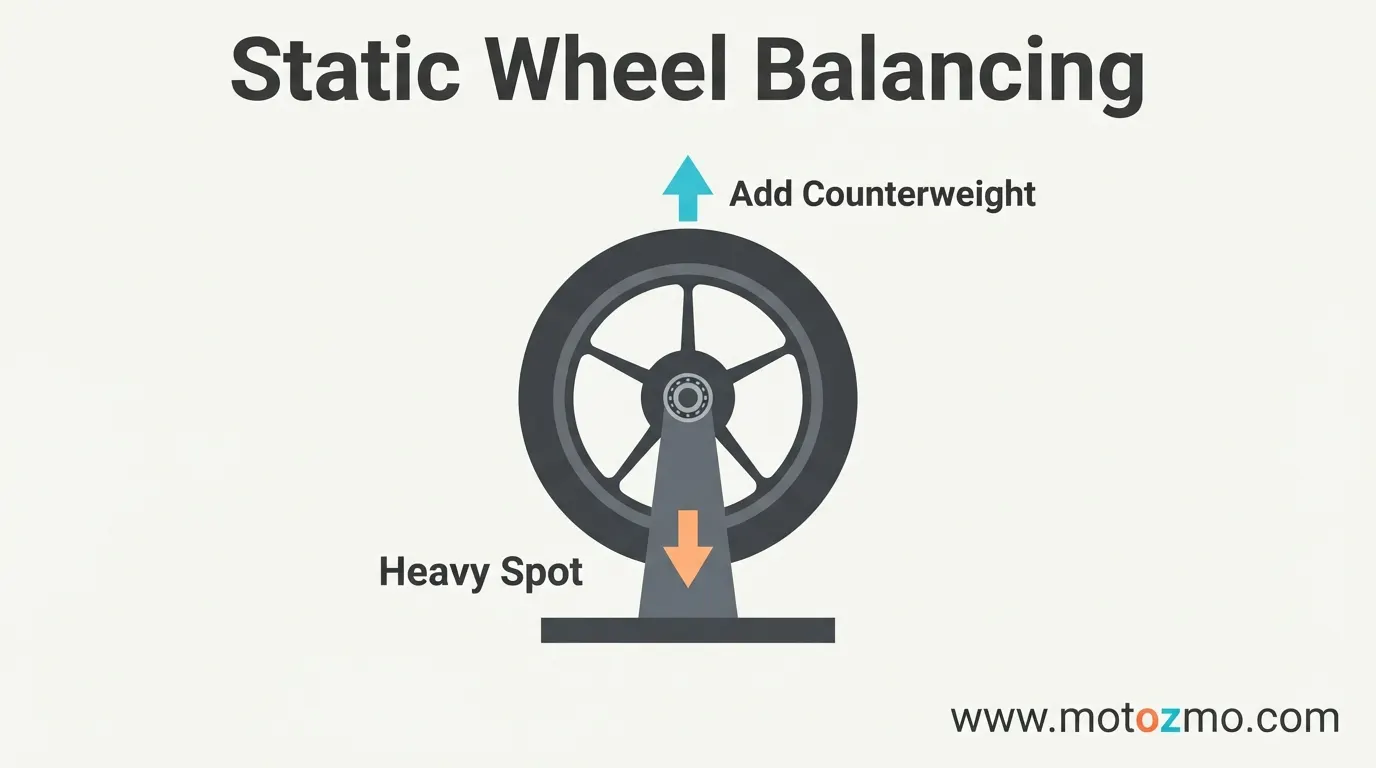
Static balancing is simple physics: hang the wheel on a low-friction axle, let gravity find the heavy spot, and put a counterweight opposite it. It takes about 30 minutes per wheel once you have done it once.
If you already mount your own rubber with a motorcycle tire changer, balancing is the natural next step. Below is when it matters, the yellow-dot trick that cuts the weights you need, and the mistakes that make home balances fail.
When Balancing Matters
Three situations call for a balance check. A new tire goes on the wheel: always balance it, because the old weights matched the old tire, not this one.
You feel a buzz or hop in the handlebars or the seat once you pass 50 or 60 mph: check the balance before you blame the tire, since lost weights cause exactly this. And you can see a weight went missing: a clean rectangle of bare rim, or a strip of old adhesive with nothing on it, means the balance changed the day it fell off.
What about a schedule? A wheel that was balanced at install and shows no symptoms does not need rebalancing on a calendar. Tires wear evenly enough that the balance barely moves over a tire’s life. If you check your tires regularly and nothing vibrates, leave the weights alone.
What You Need
You do not need a machine. A static balancer stand runs about 40 to 60 dollars and is nothing more than a shaft on low-friction bearings with cone adapters.
No stand? Two level jack stands and your own axle work, as long as the wheel spins freely. You also need the right weights, isopropyl alcohol and a rag, and tape or chalk for marking. Budget 30 minutes per wheel the first time. Half of that is setup and cleaning.
Match-Mount First: The Yellow Dot Trick
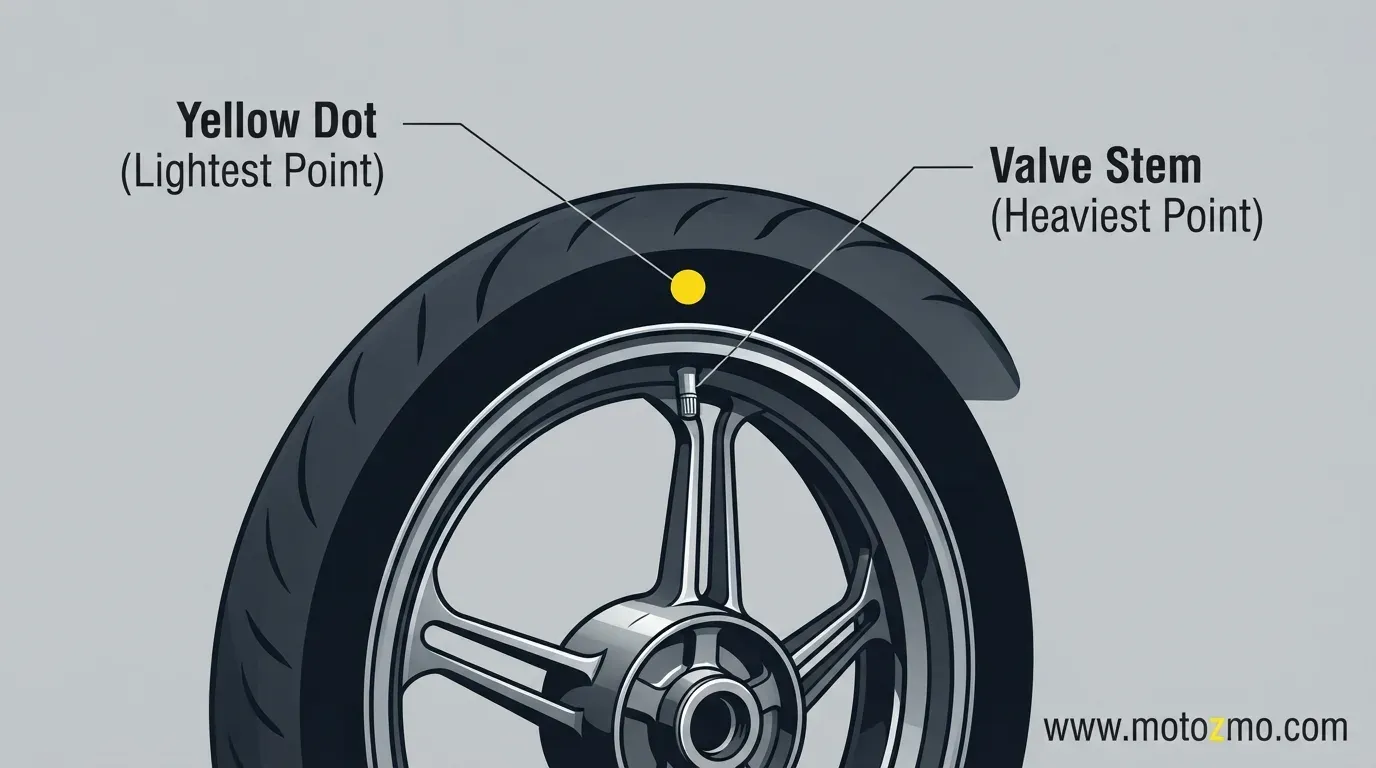
Before the wheel goes on the stand, use the free balance the tire factory gave you. New tires carry a yellow paint dot on the sidewall. That dot marks the lightest point of the tire, measured at the factory.
The valve stem area is the heaviest point of the wheel. Line the yellow dot up with the valve stem when you mount the tire and the two imbalances partly cancel each other. You will need fewer weights, and fewer weights means less that can fall off later.
You may also see a red dot. That marks the tire’s high point for radial runout, a roundness issue rather than a weight issue. For street riding the yellow dot is the one that matters. The tire dot markings are worth understanding once, because every new tire you ever mount will have them.
The Static Balance Procedure
Work indoors, away from drafts. Moving air pushes a light wheel around enough to fake a reading. Then follow these steps.
- Strip the old weights and clean the rim. Peel everything off, then wipe the inner barrel with isopropyl alcohol. The common mistake is leaving old adhesive behind. New weights stuck to old goo let go at speed, and the leftover mass throws off your reading before you start.
- Set the stand level. Put it on a flat, solid surface. The common mistake is a wobbly bench or a sloped floor. The wheel then rolls toward the low side every time and you chase a heavy spot that does not exist.
- Mount the wheel on the cones. Slide the shaft through the axle bore and seat a cone on each side, narrow end first, so the wheel sits centered. The common mistake is a cone that never seats. A crooked wheel drags on one side and gives a false reading.
- Spin gently and let it stop on its own. Give it a slow turn and walk away. Gravity settles the heavy spot at the bottom, at 6 o’clock. The common mistake is spinning it hard. Momentum carries it past the true spot and you mark the wrong place.
- Mark the top. The point at 12 o’clock, directly opposite the heavy spot, is the lightest point. That is where weight goes. A strip of tape works fine.
- Add weight in small steps. Start with 5 or 10 grams at the mark. The common mistake is slapping on one big weight. You overshoot, then spend three rounds taking weight back off.
- Test from 90 degrees. Turn the wheel so the weight sits horizontal and let go. If it rolls back toward vertical, add a little more. If it drops the other way, you added too much. Repeat until the wheel stays put in any position you leave it.
- Confirm with several spins. A balanced wheel stops in a random orientation every time. If it keeps settling in the same spot, it still needs weight there. Press the weights down hard once you are satisfied.
Stick-on Weights or Spoke Weights
Pick by rim type, not preference:
| Rim type | Use this | Why |
|---|---|---|
| Alloy or cast wheels | Stick-on adhesive weights | They sit on the inner barrel, out of the wind, and you can split them across both edges |
| Spoked wheels | Spoke weights (brass or zinc, set-screw or crimp) | Spokes flex and shed adhesive weights; spoke weights clamp on and stay put |
Skip car clip-on weights. Their profile does not fit motorcycle rim lips and they chew the finish. And whatever you use, never stack weights in one tall pile. Spread them along the rim so the load sits flat.
How Much Weight Is Too Much
A normal street wheel needs somewhere between 5 and 20 grams. If you are stacking past about 40 grams, stop adding weight. Something else is going on.
Break the bead, rotate the tire 180 degrees on the rim, and re-check. That one move often drops the needed weight back into the normal range, because you moved the tire’s heavy spot away from the wheel’s heavy spot.
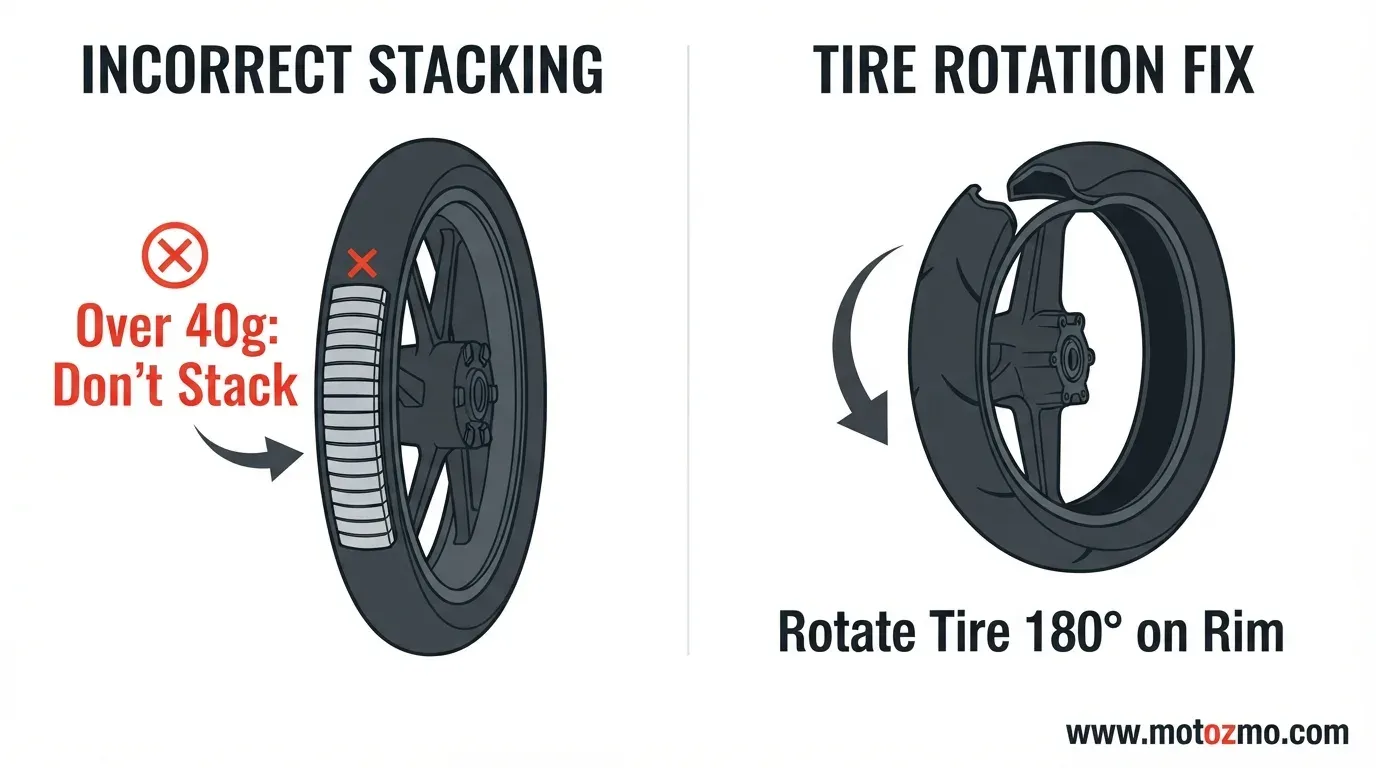
If it still wants a pile of weight after the rotation, do not mask it. Check the rim for dents and flat spots, and give the wheel a spin to look for a wobble.
A bent rim or a bad tire will never balance clean, and no amount of lead fixes a mechanical problem. That is also the moment to check whether the tire itself is due for replacement rather than rebalancing.
What Static Balancing Cannot Fix
A static stand corrects vertical imbalance: the heavy-spot hop. It does nothing for lateral wobble, the side-to-side shimmy from a bent rim or a tire with uneven sidewalls.
It also cannot fix worn wheel bearings, so check for play by rocking the wheel on its axle before you start. And it cannot fix a worn-out tire. Cupped or scalloped tread vibrates no matter how perfect the balance is.
If the vibration survives a careful balance, the problem lives elsewhere: bent rim, bad bearings, worn tire, or suspension. Work through the vibration diagnosis next instead of adding more weight.
Bottom Line
Balance every new tire, match-mount the yellow dot to the valve stem, and let gravity do the measuring. Clean rim, level stand, small weight steps, and a wheel that stops anywhere you leave it.
That is the whole job, and it beats paying a shop 25 dollars a wheel every time you change rubber. The NHTSA’s tire safety guidance backs the habit: balanced, properly inflated tires are the cheapest safety upgrade on the bike.
FAQs about DIY Motorcycle Wheel Balancing
Do balancing beads replace wheel weights?
They are a different approach, not a drop-in replacement. Beads roll inside the tire and shift against the light spot while you ride. They cannot be removed without breaking the bead, and some shops will not service a tire that has them. Static weights stay the standard home method.
Can I balance the wheel while it is still on the bike?
No. Brake drag, chain tension, and drivetrain resistance all fight the free rotation the method needs. Pull the wheel and put it on a stand or axle supports.