Affiliate disclosure: This post may contain affiliate links. If you buy through a link on this page, MOTOZMO may earn a small commission at no extra cost to you. It helps keep our guides free. How we test and choose products.
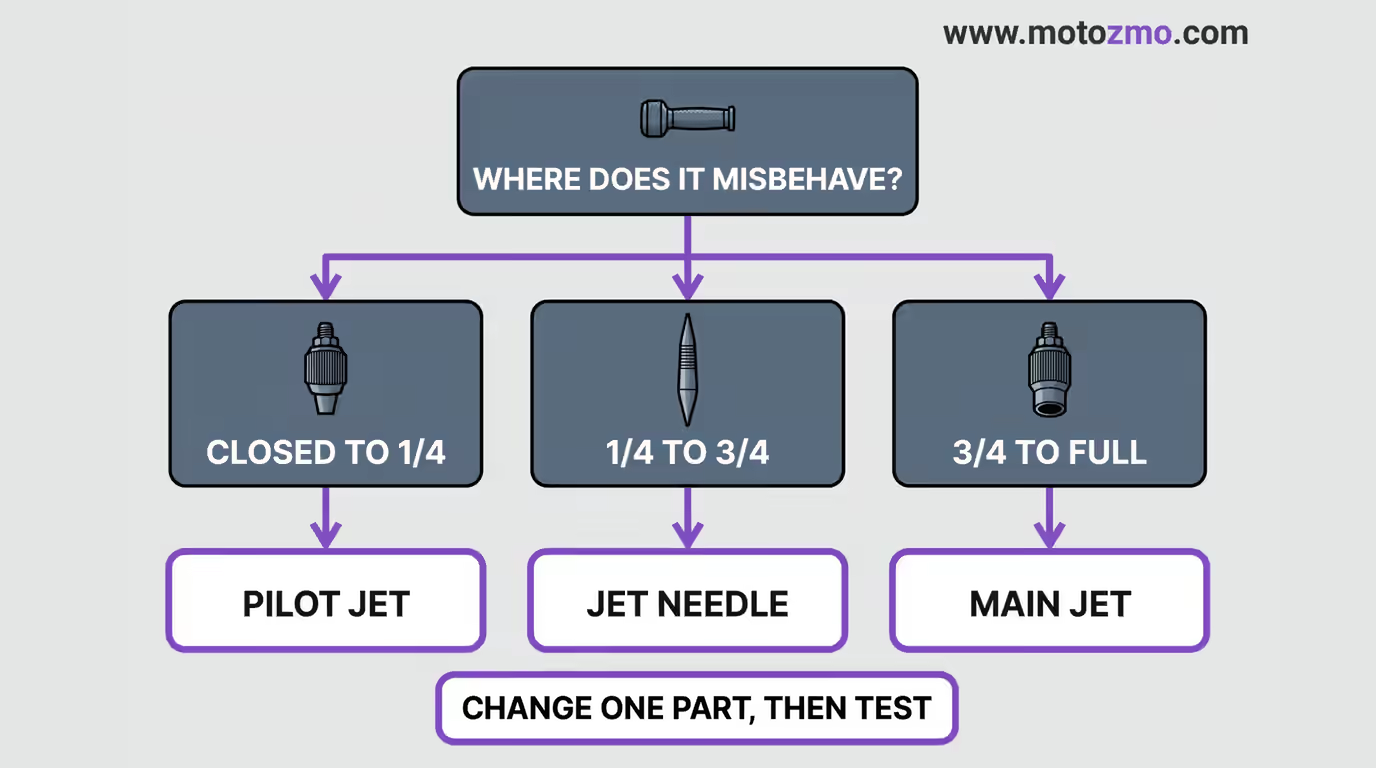
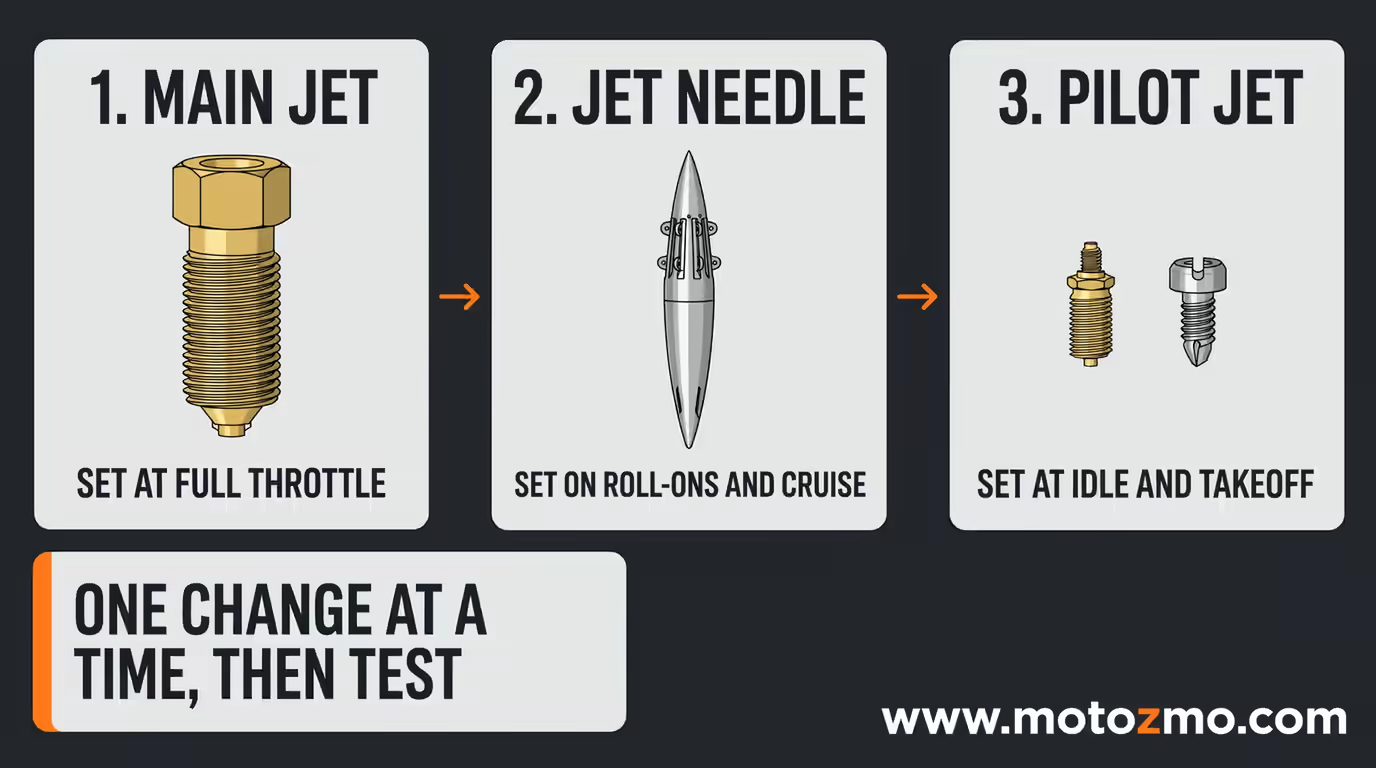
After a free-flowing exhaust or intake change, rejet in circuit order: main jet first, jet needle second, pilot jet last, and change one part at a time.
I learned this the slow way on my own bike, swapping jets in pairs and spending a weekend chasing a bog I had created myself. The pipe or filter lets the engine move more air. Fuel delivery has to catch up, and each part inside the carb feeds a different slice of the throttle.
Find the slice where the bike misbehaves and you have found the part to change. If how a carburetor works is still fuzzy for you, read that first. This guide starts where it ends.
Why an Exhaust or Intake Change Upsets the Jetting
A carburetor meters fuel against airflow. It has no sensor and no way to know you changed anything. When a freer exhaust or a high-flow filter lets the engine breathe better, the same jets now feed more air than before, and the mixture goes lean.
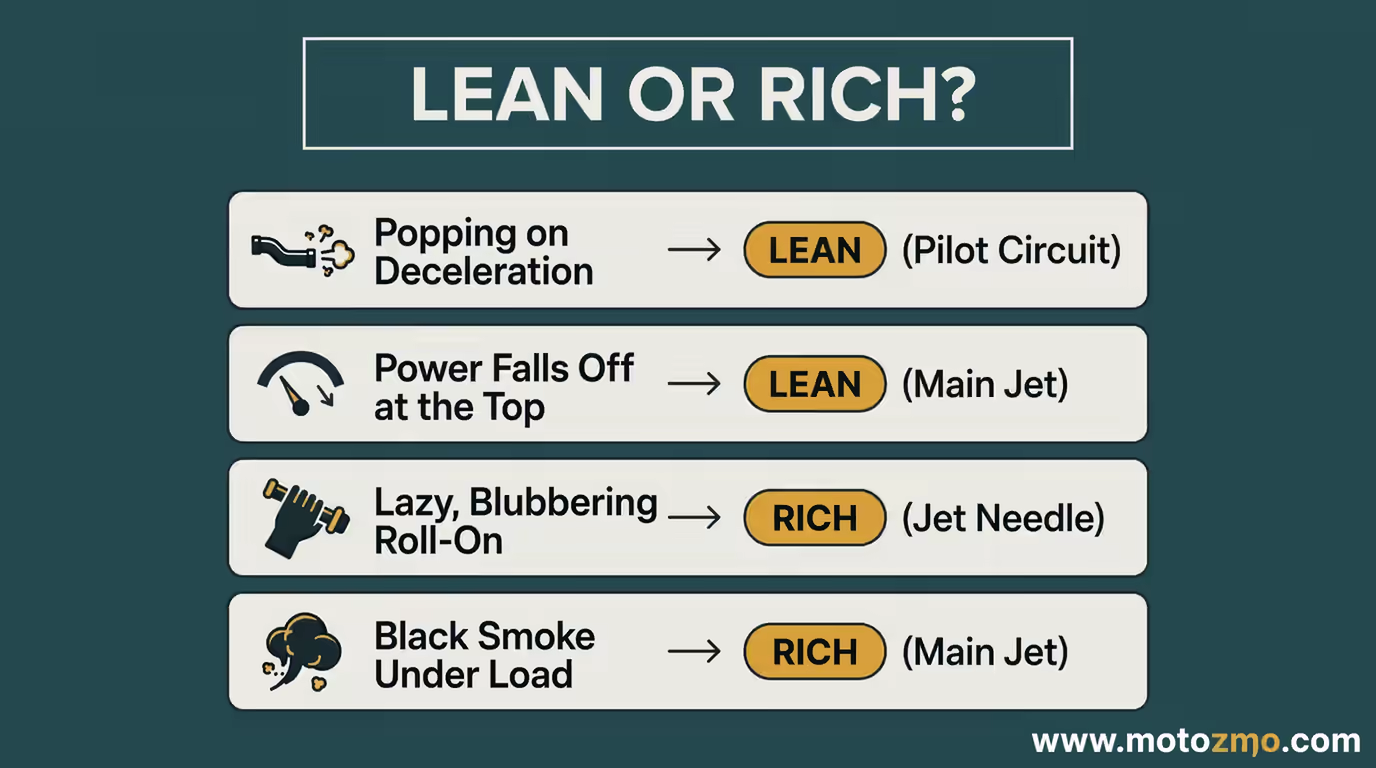
A lean engine runs hot. Riders see the signs within the first few rides: popping through the exhaust on deceleration, a surge at steady speed, header pipes taking on a blue tint, a flat spot when the throttle opens.
How much change you made decides how much jetting you owe. A stock-for-stock replacement muffler needs nothing.
A slip-on with its baffle in often needs nothing past idle, and if your only complaint is at idle and just off it, our guide to adjusting the carburetor air-fuel mixture covers that screw and nothing else in this article repeats it.
A full exhaust system, a high-flow filter, or pod filters are a different story. Those change airflow across the whole rev range, and the jets have to follow.
| What You Changed | Typical First Move |
|---|---|
| Slip-on muffler, baffle in | Often no jet change at all. Check the plug and low-speed behavior first. |
| Full exhaust system | Main jet up one to two sizes, needle raised one clip position. |
| High-flow filter in the stock airbox | Main jet up one size, then test before touching anything else. |
| Pod filters or removed airbox | The biggest change. Expect larger mains, needle work, and a long test cycle, above all on CV carbs. |
Match the Symptom to the Throttle Opening
Before you buy a single jet, ride the bike and pay attention to one thing: where is the throttle when it misbehaves? Put a wrap of tape on the grip and mark closed, quarter, half, and full against a mark on the housing.
Ride each zone on a warm engine and note what happens in each. That note is your diagnosis, and it is worth more than any forum post about your model.
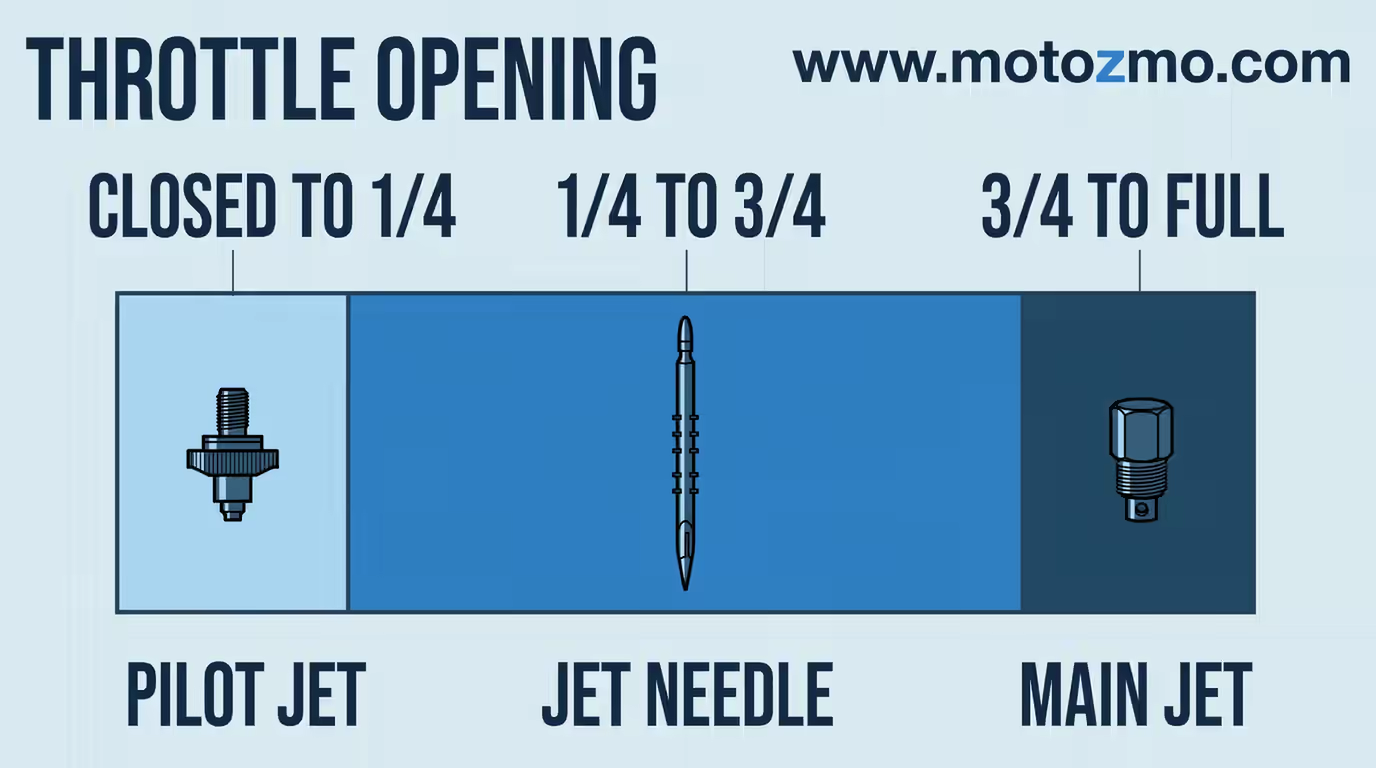
| Throttle Opening | Circuit in Charge | Running Lean | Running Rich |
|---|---|---|---|
| Closed to 1/4 | Pilot jet and mixture screw | Popping on deceleration, surging at low speed, needs choke for a long time | Lumpy idle, sooty plug after slow riding, smells of fuel |
| 1/4 to 3/4 | Jet needle | Flat spot or hesitation on roll-on, surging at a steady cruise | Lazy, blubbering roll-on that clears as revs climb |
| 3/4 to full | Main jet | Power falls off at the top, engine runs hot, plug reads pale after a hard run | Stumble at full throttle, dark plug, black smoke under load |
The circuits overlap, so treat the borders as rough. A problem that starts at half throttle and gets worse to full is a main jet problem that shows early.
A problem that vanishes past three-quarter throttle was never the main jet, no matter what size you fit. Most bad rejetting stories start with someone changing the main jet to fix a midrange bog.
Step Zero: Get a Baseline Before You Change Anything
Jetting a sick engine is wasted work. Before the first jet comes out, the engine needs clean air and a clean bill of health: fresh or clean air filter, fresh spark plugs, valve clearances in spec, no cracked intake boots leaking air, float height set to the manual. A torn intake boot leans the mixture all by itself, and no jet size will tune around it.
Then write down what you have. Pull the float bowls and record the size stamped on each main jet and pilot jet, the needle clip position counted from the top, and the mixture screw setting in turns out.
Keep the stock parts in a labeled bag. Every change from here gets logged with the result of the test ride. If a change makes things worse, the log is how you walk back to a bike that ran.
Step One: Set the Main Jet at Full Throttle
Start at the top of the throttle, even though most riding happens in the middle. The main jet is the one circuit you can test in isolation, and the midrange test rides mean little until full throttle is right. Mikuni’s tuning manual puts the main jet in charge from about three-quarter throttle to full, with the needle running the range below it.
The honest test is a plug chop. Fit a fresh plug, warm the engine in full, then run at full throttle under load in a high gear for several seconds. At the same moment, close the throttle, hit the kill switch, and pull the clutch. Coast to a stop and pull the plug.
Read the ring at the base of the porcelain, deep inside the plug, not the tip. A light tan ring is the target. White or blistered means lean. Dark and sooty means rich. Modern ethanol-blend fuel colors plugs less than the old gas did, so weigh how the bike pulled alongside what the plug shows.
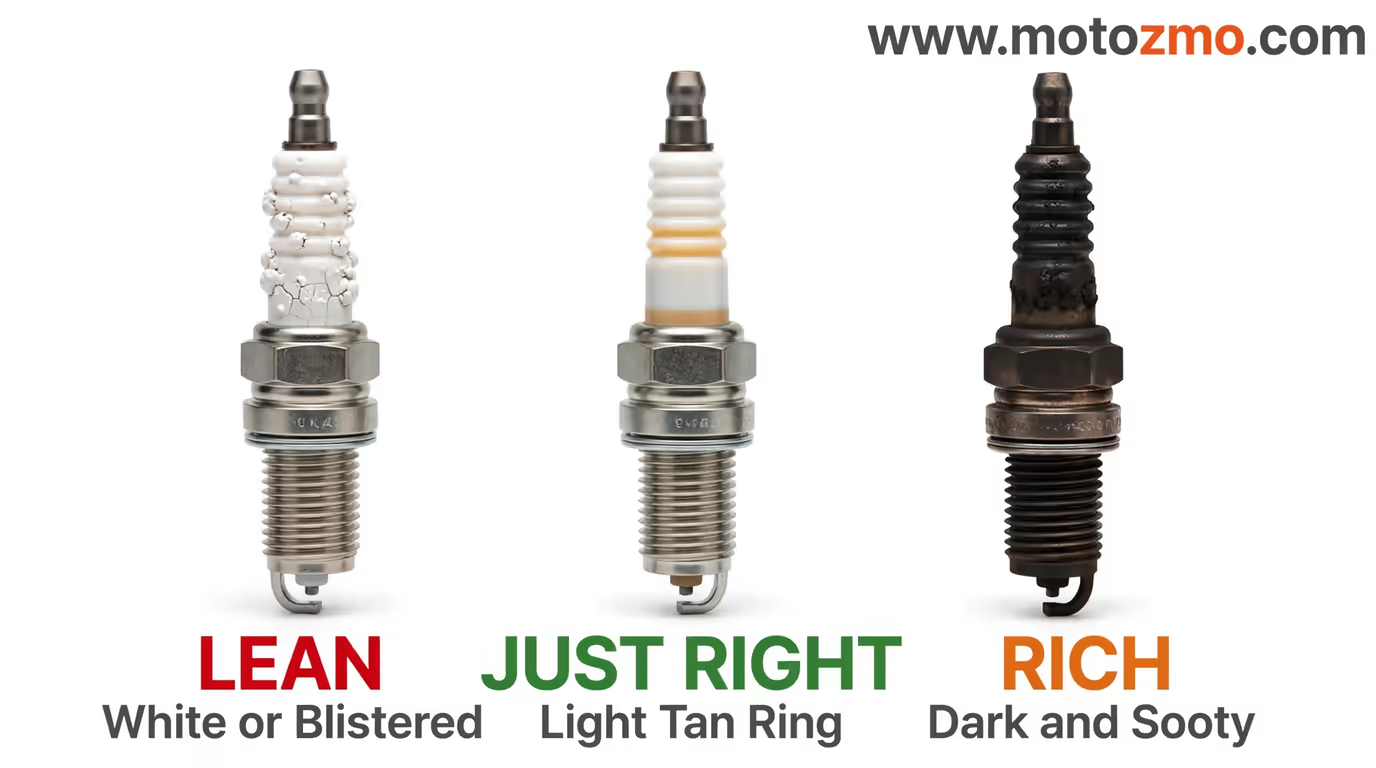
Work in single steps. For a full system or intake change, go up one or two main sizes from stock and test. If the bike stumbles at full throttle, come down one size at a time until the stumble clears, then stop.
Going one step too rich costs a little power. Going lean at full throttle costs pistons, so start from the rich side and walk down.
Step Two: Set the Needle in the Midrange
With the main jet set, test roll-ons from quarter to three-quarter throttle and steady cruising. A hesitation or flat spot as you open the throttle, or a surge at a held speed, lives here. The jet needle meters this range, and its height sets how much fuel flows around it.
The move is one clip position at a time. Moving the clip one groove toward the pointed end raises the needle and makes the midrange richer. Moving it away lowers the needle and leans it out.
Many US-market CV carbs have needles with a single groove. On those, a small washer under the needle head shims it up by about half a clip step, which is often all a slip-on needs.
Test after every move. The midrange is where street bikes live, and it is also where a half step too far turns a crisp roll-on into a blubber.
Step Three: Set the Pilot Circuit Last
The pilot circuit feeds idle and the first crack of the throttle, and it is the last thing to set because the other two circuits change how the engine behaves rolling down to idle. Work the mixture screw first.
If the best idle you can find needs the screw far outside its normal working range, roughly under one turn out or past three, the pilot jet itself is the wrong size. Go up one pilot size for a bike that pops hard on deceleration and surges at walking pace, re-set the screw, and test the off-idle pull away from a stop.
One warning before you condemn the pilot circuit: an exhaust leak at the head pipe pops on deceleration too, and it fools good tuners. Check the header gaskets and flange nuts first. If the popping arrived with the new pipe and the joints are sealed, then look at the pilot.
Jet Kit or Individual Jets: Which Should You Buy?
A model-specific jet kit buys you three things: a matched set of mains and pilots around the sizes your bike will want, needles with a taper shaped for the job, and instructions that give a tested starting point for your exhaust and altitude.
Dynojet’s instruction sheets show the pattern: one main jet call for a stock exhaust, the next size up for a free-flowing one, the needle clip set by setup. For a full system or an airbox change, that head start is worth the money.
Individual jets cost far less, and for a slip-on or a filter change they are often all you need, since the stock needles usually cover the midrange there.
Two traps wait either way. First, jet numbers are not universal: a Dynojet 124 is not the same hole as a Keihin or Mikuni 124, so never mix brands in one carb or compare sizes across brands. Second, a kit does not remove the test rides. It gives you a starting point near the answer, and the plug chops still decide.
Altitude Changes the Math
Air gets thinner as you climb, which makes a carb run richer with no parts changed at all. A bike jetted crisp at sea level will blubber on a mountain trip, and a bike tuned at 6,000 feet will run lean and hot when it comes home to the coast.
Kit makers print this right into their charts, stepping the recommended main jet down as elevation bands rise, about one size per 3,000 feet as a rough guide.
If you live high, jet for home and accept that the bike will feel rich on a lowland trip. If you tour across big elevation changes, jet for the low ground and ride the high passes knowing the bike will feel soft but safe. Lean is the direction that hurts engines, so when in doubt, leave the jetting on the rich side of the line.
Final Checks and the Mistakes That Undo Good Jetting
- Change one part, then test. Two changes at once means you will never know which one worked.
- Log every jet size, clip position, and screw setting, with a line about how the bike felt.
- On a multi-carb bike, finish by balancing the rack. Our guide to syncing motorcycle carburetors is the last step after any jet change, not an optional extra.
- If the carbs are old, dirty, or worn, jetting will not save them. Torn diaphragms and worn needle jets mimic lean running. The carburetor rebuild kit guide explains when a rebuild has to come first.
- Respect the CV carb and pod filter problem. Vacuum-operated slides lean on the airbox for their signal, and some bikes never run clean in the midrange on pods no matter which jets you fit.
- Know when to stop. If two full rounds of single changes leave the bike worse, the problem is no longer jetting. A shop with a dyno and an exhaust gas analyzer will find in an hour what a driveway can miss for weeks.
Done right, the work is slow and a little dull: one jet, one ride, one line in a notebook. That is also why it works. The riders who rejet by guesswork end up with a bike that pops, surges, and drinks fuel.
The riders who go by circuit end up with a bike that pulls clean from idle to the redline, and a log that tells them exactly what is inside their carbs. If your tastes run to fuel injection after all this, our look at carburetors versus fuel injection shows what each system asks of you.