
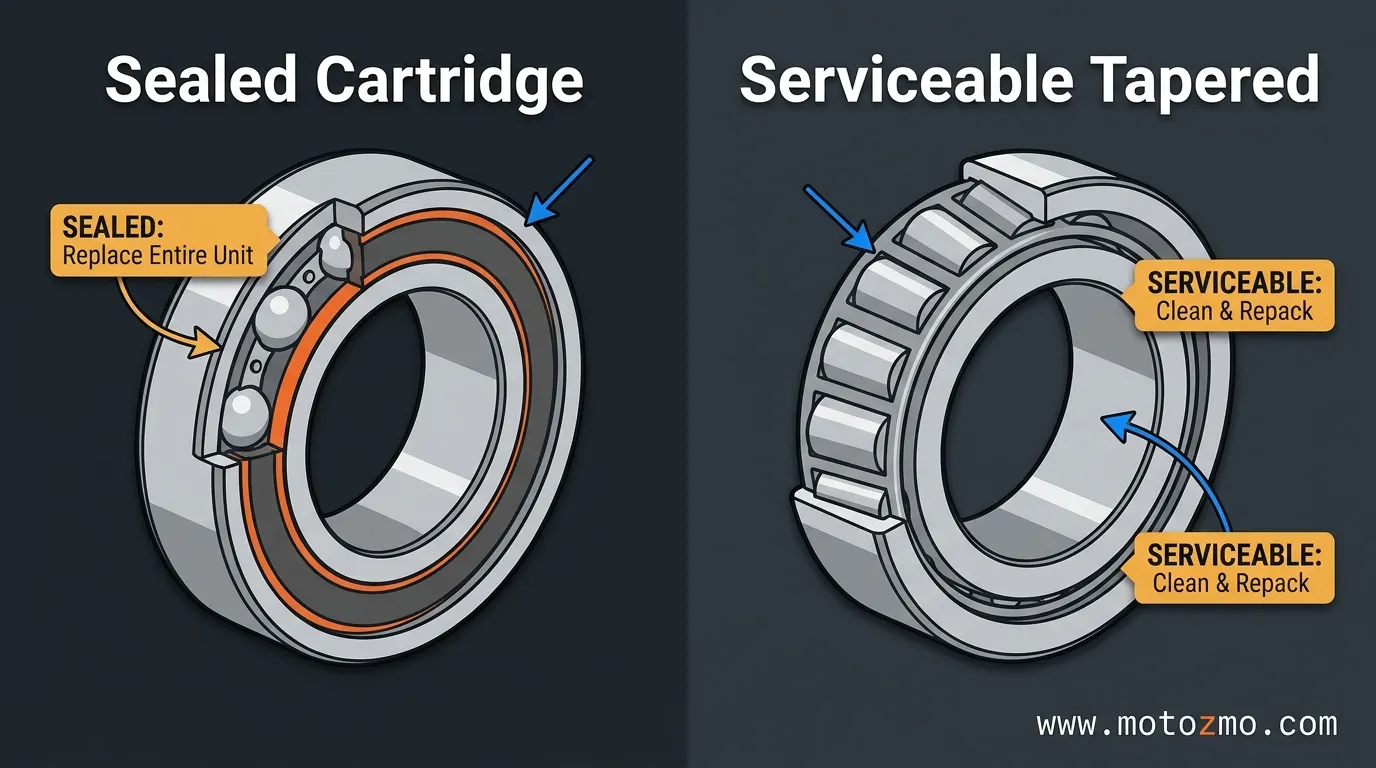
Most modern motorcycle wheel bearings can’t be repacked at all, so the honest answer starts with figuring out which kind you have. Sealed bearings, which is what most street bikes built in the last couple of decades use, get replaced outright rather than cleaned and regreased. For those, plan on 3 to 5 years or somewhere between 20,000 and 50,000 miles under normal riding, sooner if you ride in the rain, near salted winter roads, or off-road. Older bikes and some off-road models use a serviceable tapered bearing that’s meant to be cleaned and repacked on a schedule instead.
Below is how to tell which one you have, how often to check either type, and why it’s worth checking sooner rather than waiting for a symptom. For the full picture on vibration and its other causes, see our main troubleshooting guide.
Repack or Replace? It Depends What’s Inside Your Wheel
Pull the wheel and take a look at the bearing itself. If it’s fully enclosed, a smooth metal shield with no visible gap, that’s a sealed cartridge bearing. There’s nothing to open and nothing to add grease to. Trying to pry the shield off to regrease it usually just damages the seal and lets in the dirt and water it was designed to keep out. If a bearing fails, you replace the whole unit.
If instead you can see a removable rubber or metal cap over a set of tapered rollers, that’s a serviceable bearing, common on older bikes and some dirt-focused models. These are designed to be pulled, cleaned in solvent, packed with fresh grease, and put back together, typically once a year or every 10,000 to 12,000 miles.
Your owner’s manual or a parts diagram for your specific model will confirm which type you have if you’re not sure from looking. Most riders on modern street bikes will find sealed bearings on both wheels.
How Often to Check, No Matter Which Type You Have
The easiest habit to build is checking bearings whenever the wheel is already off for a tire change, since you’re not adding any extra work. If you don’t change tires often enough for that to happen at least once a year, check anyway. A wheel bearing that’s starting to go doesn’t always announce itself early, and catching it at the noise stage is a lot cheaper than catching it at the grinding stage.
The check itself takes a few minutes: lift the wheel off the ground, spin it by hand, then grab it top and bottom and try to rock it side to side. Any play or noise means it needs attention now rather than at the next scheduled check. Our full test walkthrough covers exactly how to do this step by step.
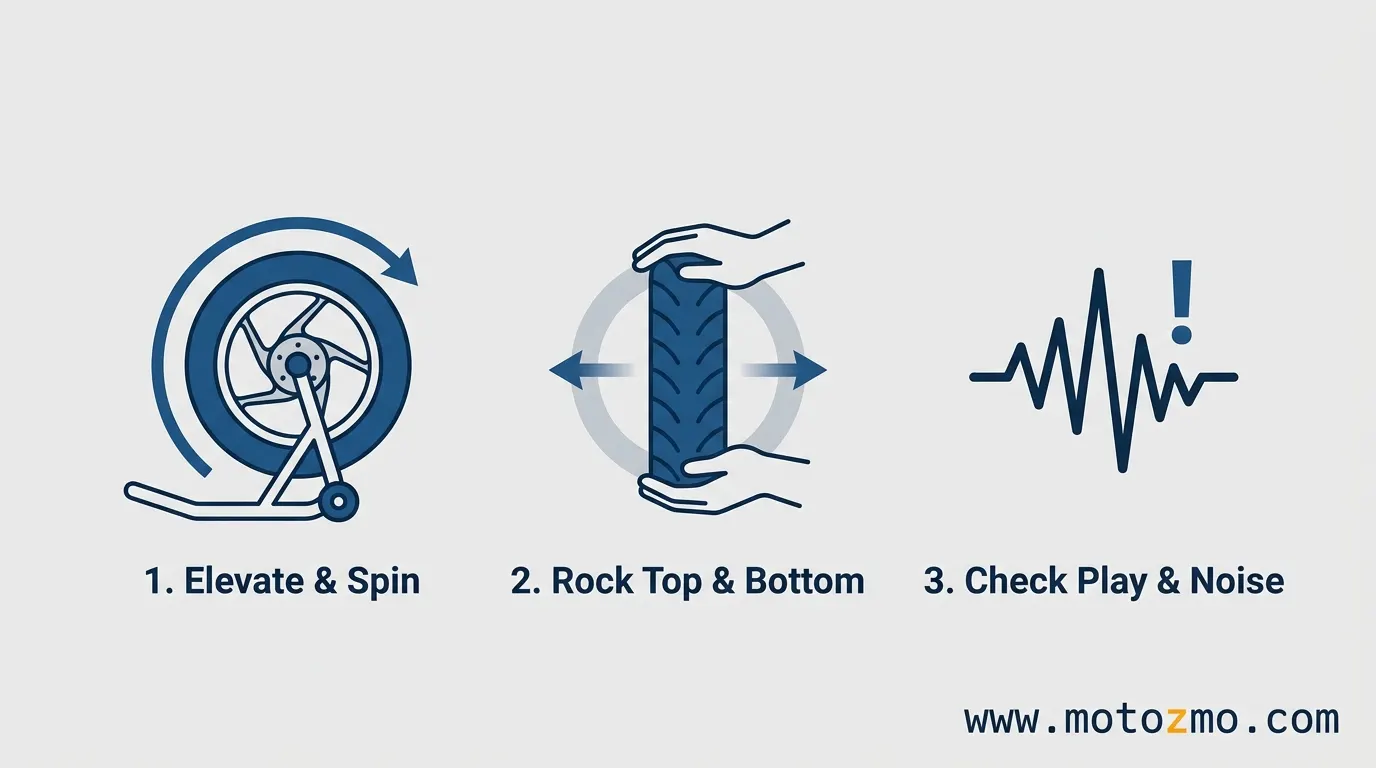
Making it a habit alongside a normal pre-ride walkaround, similar to what the Motorcycle Safety Foundation’s T-CLOCS checklist recommends for tires and wheels generally, is enough to catch most problems before they turn into a breakdown.
How Long Sealed Bearings Last
There’s no single mileage where a sealed bearing is guaranteed to fail, and riders report a wide range of real-world results. Some replace their first set well past 90,000 miles with no issues. Others, especially riders who commute in wet weather or ride through mud and water regularly, need to check far more often than the mileage alone would suggest.
Timken, a bearing manufacturer, notes that a lot of bearing failure comes down to contamination and how the bearing was installed rather than simply running out of miles. That matches what shows up across owner reports too: a bearing installed slightly crooked, or one that’s been exposed to a lot of water and road salt, tends to fail well before a bearing that’s been kept dry and installed correctly, even at similar mileage.
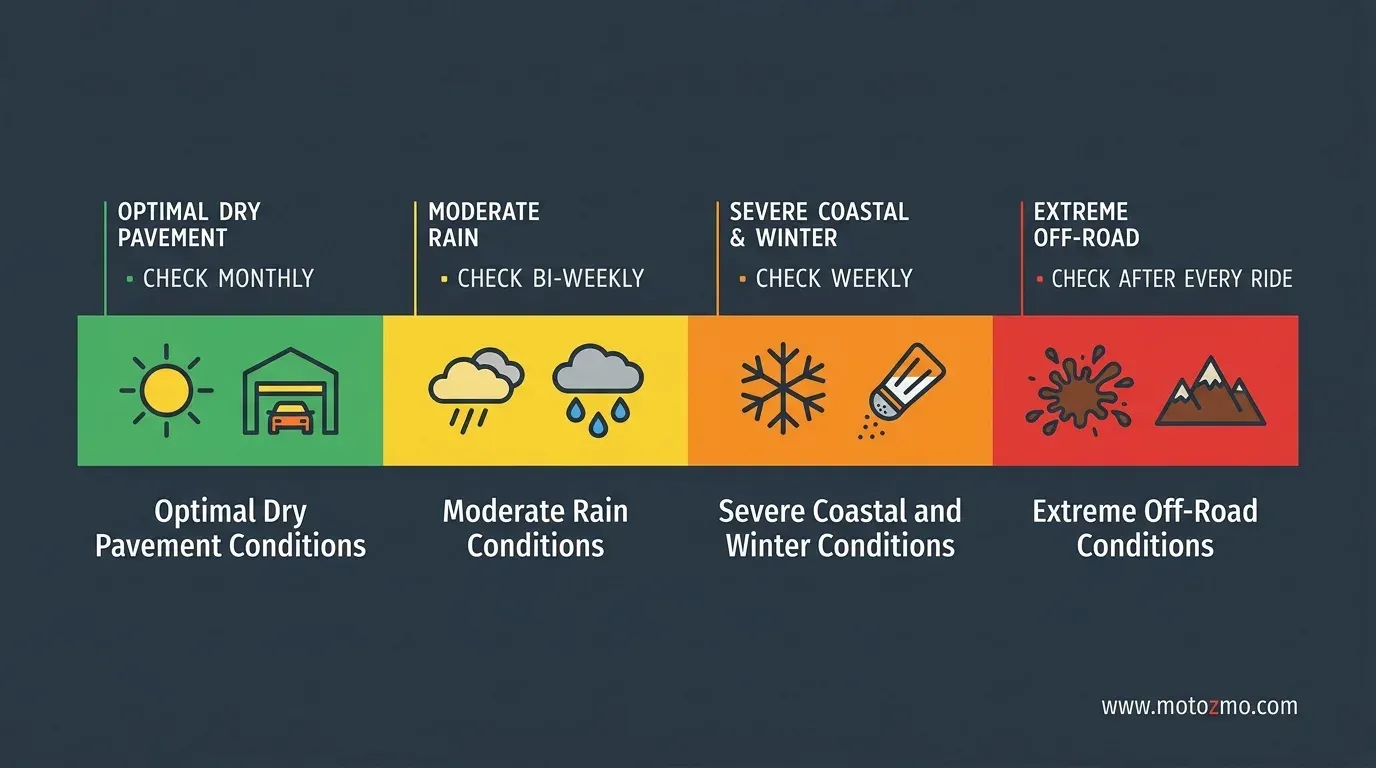
Riding Conditions That Shorten the Interval
| Riding conditions | Effect on bearing life |
|---|---|
| Mostly dry pavement, garage-kept | Can reach the long end of typical service life |
| Regular rain or wet commuting | Moisture works past the seals gradually, shortens life somewhat |
| Coastal areas or winter roads treated with salt | Speeds up internal corrosion, often the biggest single factor |
| Off-road riding, mud, or water crossings | The most demanding conditions; check every few months rather than by mileage alone |
Replace One Bearing or Both?
Each wheel holds two bearings with a spacer between them, and they wear at close to the same rate since they’re doing the same job under the same conditions. Standard practice is to replace both bearings in a wheel together even if only one shows play or noise, rather than replacing just the bad one and leaving the other to fail a few months later.
The labor to pull the wheel apart is identical either way, so there’s little reason to do that job twice. If you’re doing the work yourself, a wheel bearing puller and driver kit makes removing the old bearings and seating the new ones straightforward.
Why It’s Worth Doing Before You’re Forced to
Since pulling the wheel is the same job whether you’re checking, repacking, or replacing, tying bearing maintenance to tire-change time saves you from doing that job twice within the same year or two. It’s also worth remembering that mileage-based intervals only apply when nothing unusual has happened to the bike.
A hard hit on a pothole or curb can damage a bearing well ahead of schedule, regardless of how many miles are on it. If that’s what led you here, our guide on vibration that shows up all of a sudden covers that situation directly. A basic tool kit and a stand to get the wheel off the ground is really all it takes to stay ahead of this one.