
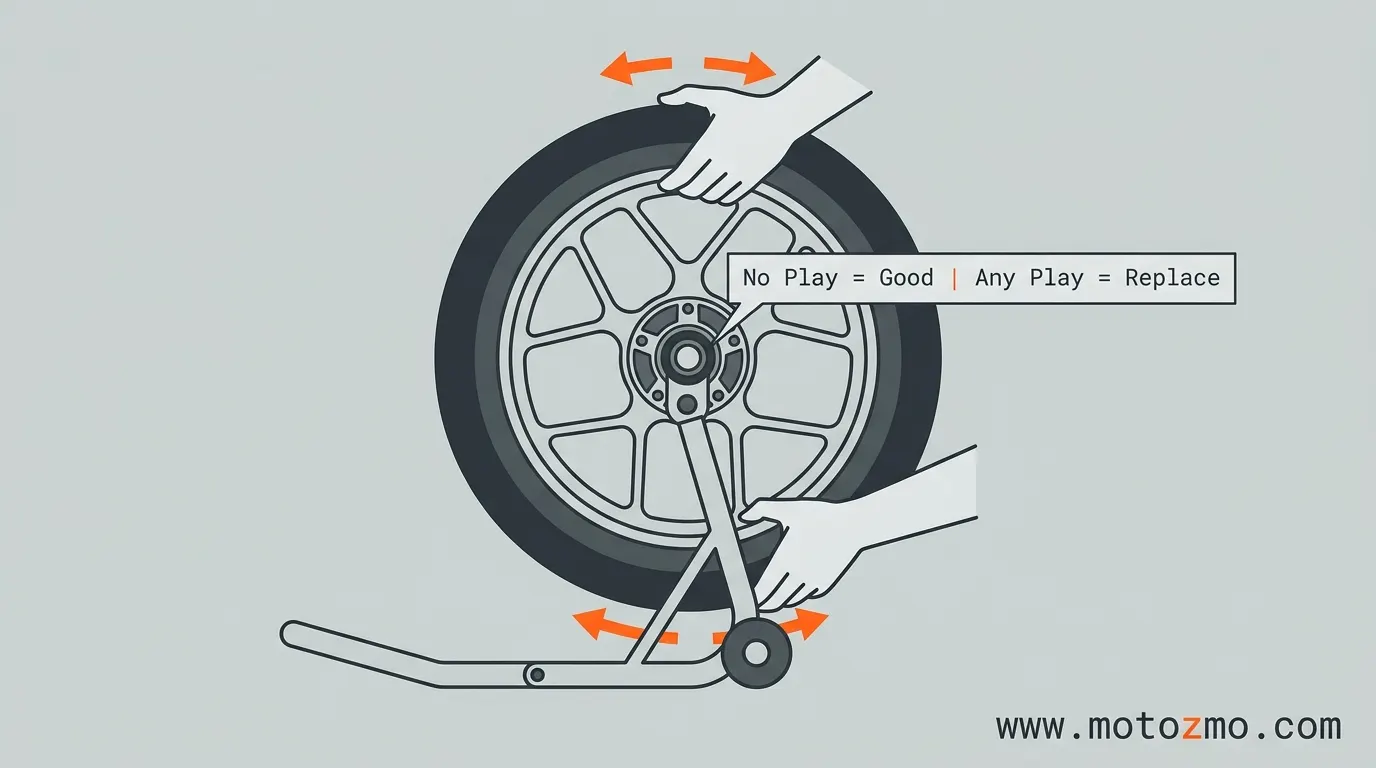
The fastest way to check a wheel bearing is to lift that wheel off the ground, grab it at the top and bottom, and try to rock it side to side. A good bearing won’t move at all. Any looseness, clunk, or play means the bearing is worn and needs attention. That’s the short version, often called the jack-up-and-rock test.
Below is the full step-by-step version, what a bad bearing sounds and feels like, how to tell a front bearing problem from a rear one, and how to avoid mixing this up with a few other problems that feel similar. For the wider picture on vibration and its other causes, see our main vibration troubleshooting guide.
Get the Wheel off the Ground First
You can’t do this test with any weight on the tire, since the bearing needs to be free to move for play to show up. Use a motorcycle stand, a paddock stand under the swingarm or front forks, or the center stand if your bike has one and it lifts the wheel you’re checking clear of the ground. Make sure the bike is secure before you start pulling on the wheel. If you don’t already own one, a basic tool kit with a decent stand is worth having for this kind of check alone.
Test the front and rear wheels separately. A problem in one doesn’t mean the other is fine, and you want to know which wheel you’re dealing with before you start ordering parts.
The Test: Step by Step
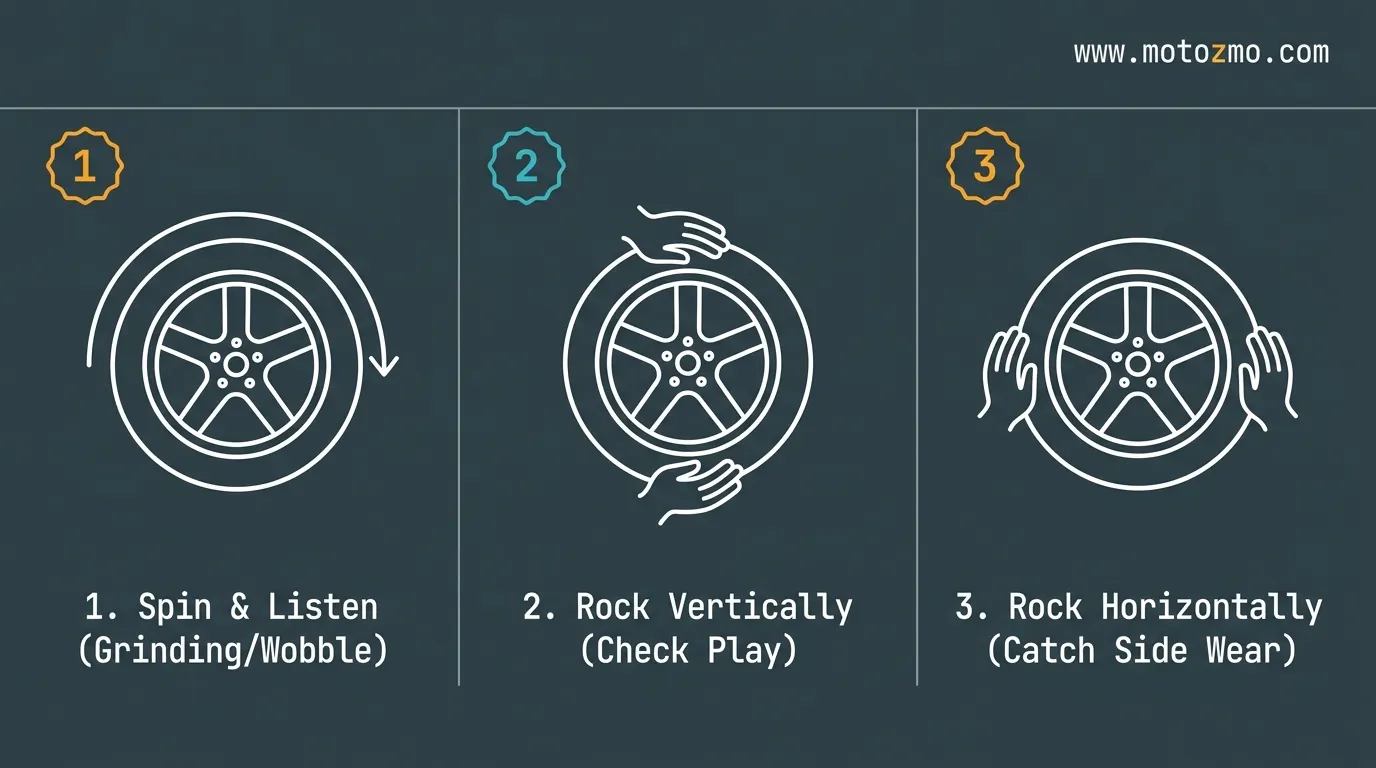
- Spin it first. With the wheel off the ground, give it a spin by hand. It should turn freely and quietly, with only mild resistance from the grease inside the bearing. Listen for any grinding, clicking, or roughness as it spins, and watch the wheel from the side for a wobble. A wheel that wobbles as it spins may point to a bent rim or a loose spoke rather than a bearing. Our guide on spoked wheel safety covers what to check there if that’s what you’re seeing.
- Grab it at 12 and 6 o’clock. With the wheel stopped, put one hand at the top of the tire and one at the bottom, like you’re about to squeeze it top to bottom.
- Push and pull, don’t spin. Try to rock the wheel side to side, pushing the top one way and the bottom the other. You’re checking for play, not trying to turn the wheel.
- Pay attention to any movement at all. A healthy bearing gives you nothing here. No clunk, no wobble, no give. Any looseness you can feel, even a small amount, means the bearing has worn enough to matter.
- Repeat at 3 and 9 o’clock. Grab the sides of the tire and try the same side-to-side push. This checks for play in a slightly different direction and can catch wear the first test misses.
- If you’re still not sure, pull the wheel. With the wheel and axle out, put a finger into the bearing and turn it by hand. It should feel smooth all the way around. Any grinding, rough spots, or binding confirm the bearing is done.
What a Bad Bearing Sounds and Feels Like
Noise is usually the first sign, and it tends to show up before the play does. A bearing that’s starting to wear often makes a low hum or rumble that builds with speed, sometimes described as sounding like something is loose and rolling around inside the wheel. As it gets worse, that hum turns into a grinding or growling sound that’s hard to miss, and the vibration that comes with it can be felt through the handlebars, the pegs, or the seat depending on which wheel is affected.
Heat is another clue. After a short ride, carefully feel the hub area near the bearing (not the brake rotor, which gets hot on its own). A bearing that’s running rough generates extra friction, and a hub that’s noticeably hotter than the other wheel’s is worth a closer look.
Front Bearing or Rear Bearing? They Don’t Feel the Same
Knowing which end is affected saves you from pulling apart the wrong wheel.
| Symptom | Usually points to |
|---|---|
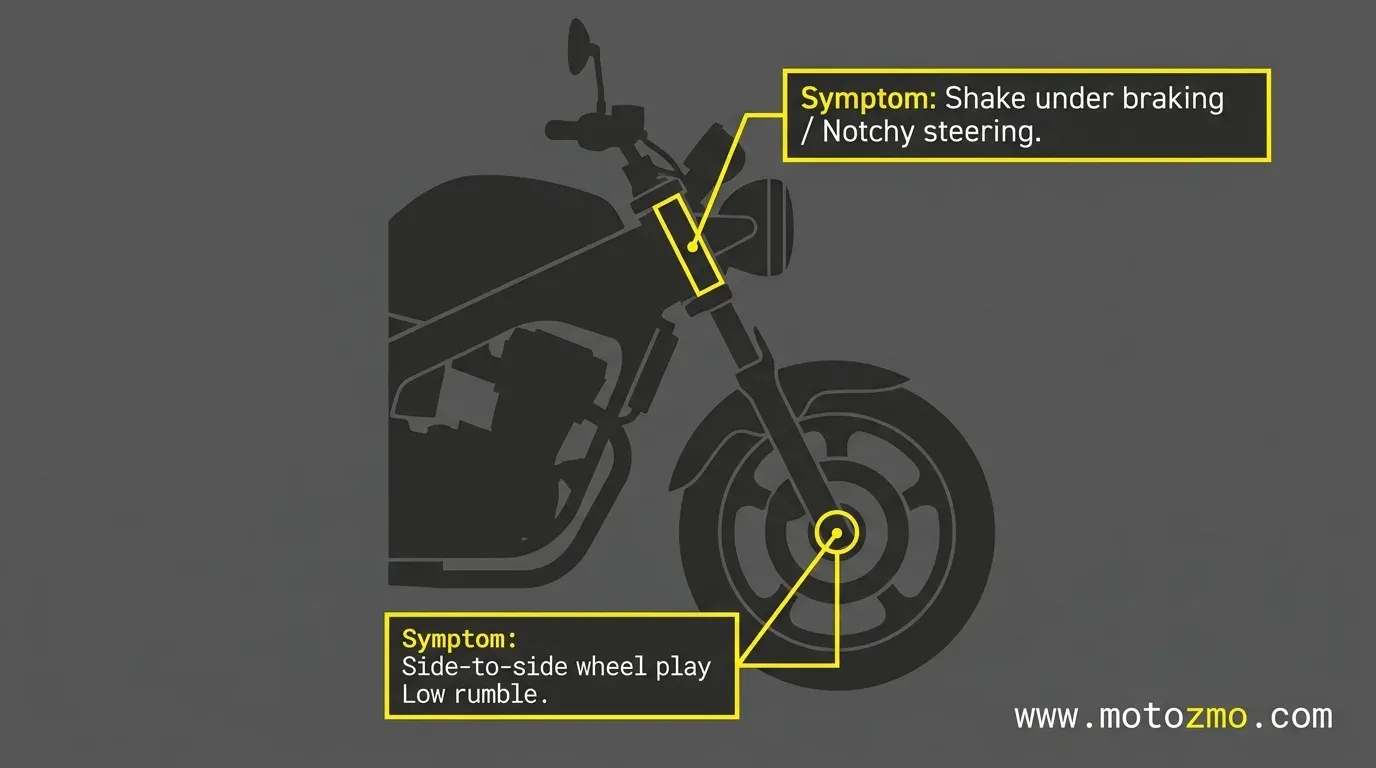
| Vibration or a slight shake felt through the handlebars, especially under 35 mph | Front wheel bearing (or a steering head bearing, see below) |
| A loose, wandering feeling in the back end, sometimes described as the rear end wanting to step out in corners | Rear wheel bearing |
| Noise that gets louder when you lean or turn one way and quieter the other way | Whichever side you’re leaning toward, front or rear |
| A steady buzz that grows the faster you go, with no looseness when you rock the wheel | Probably not a bearing at all, see the next section |
Front bearing wear tends to announce itself sooner, since the front wheel carries steering feedback straight to your hands. Rear bearing wear can go unnoticed longer because there’s more weight over the back wheel and less direct feedback, which is exactly why it’s worth checking both wheels on a schedule rather than waiting for a symptom. Our guide on how often wheel bearings need replacing covers a sensible interval to check on.
Don’t Confuse It with These Look-Alikes
A few other problems feel or sound enough like a bad wheel bearing to send people chasing the wrong repair.
Steering head bearings. These are a separate set of bearings where the forks meet the frame, not inside the wheel. A worn steering head bearing causes a shake or looseness at low speed, especially under braking, and can feel similar to a bad front wheel bearing. The rock test above only checks the wheel bearing. If the wheel itself rocks solid but the whole front end still feels loose or notchy when you turn the bars lock to lock, the steering head bearings are the more likely suspect.
A cupped or worn tire. This causes a buzzy vibration that builds with speed, similar to a bearing, but the wheel won’t show any play when you rock it. Our guide on checking your tires walks through what worn or cupped tread looks like.
A bike that recently took a hard hit. If the vibration started right after hitting a pothole or curb rather than building up gradually, the bearing may have been knocked out of true by the impact itself rather than simple wear. Our guide on vibration that shows up all of a sudden covers that situation specifically.
Brake drag. A dragging brake pad can heat up the hub area and make you think it’s the bearing. Before you blame the bearing for heat alone, spin the wheel with the brake fully released and make sure it turns freely with no rubbing.
What to Do Once You’ve Confirmed It
If the rock test shows real play, or you’re hearing a grinding or growling noise that wasn’t there before, the bearing needs to be replaced rather than adjusted. Motorcycle wheel bearings are sealed units, so there’s nothing to tighten or repack the way there might be on an older car. Replacing one is a doable job in a home garage with a wheel bearing puller and driver kit, though it’s a reasonable first-timer job to hand to a shop if you’ve never pressed a bearing in or out before.
Bearing manufacturers like Timken note that these symptoms tend to build gradually and get worse the longer a worn bearing keeps spinning under load, so catching it at the noise stage rather than the grinding stage is worth the ten minutes this test takes. Making the rock test part of a regular pre-ride habit, the way the Motorcycle Safety Foundation’s T-CLOCS checklist recommends, is a simple way to catch a worn bearing before it turns into something you feel at speed.