
Is your motorcycle starting to sound like a horror movie soundtrack? Don’t worry, it’s probably not possessed (unless you spilled gremlins on it). It likely just means it’s due for an oil change!
Regularly changing your motorcycle’s oil is vital for keeping your engine running smoothly and extending its lifespan. But don’t fret if you’ve never tackled this task before – changing your motorcycle’s oil is an achievable DIY project, even for beginners.
In this comprehensive guide, we’ll walk you through the entire process, step-by-step. We’ll cover everything you need to know, from safety precautions and choosing the right oil to troubleshooting common issues.
How to Change Oil on Motorcycle
Changing the oil of your motorcycle is an essential maintenance task. It’s like giving your bike a refreshing spa treatment, except you’ll need some basic supplies and a little elbow grease instead of cucumber slices.
And don’t worry; it’s a straightforward process that even the most novice rider can handle.
Supplies You’ll Need
- High-quality oil
- A wheel lift or motorcycle lift stand
- Oil filter and filter wrench
- Drain pan and funnel or pour spout
- A drain plug gasket
- A socket and box wrench set
- A torque wrench
- Clean rags and nitrile gloves
The Steps to Follow
Are you ready to give your motorcycle the ultimate spa day? In this step-by-step guide, we’ll walk you through the process of changing the oil on your motorcycle, so you can give your two-wheeled beauty the pampering it deserves.
Step 1: Warm up the Engine
Before you dive into the oil change, it’s important to get the oil circulating. This will make it drain more easily and completely.
Here’s how to warm up your engine safely:
- Start the engine and let it idle for 5-10 minutes. This is enough time for the oil to warm up and thin out, but not so long that it gets scorching hot.
- Consider a short ride instead of idling. If it’s a nice day, take your motorcycle for a brief 2-3 mile cruise. This warms the oil up effectively while also giving your tires a chance to warm up for better grip.
- Avoid overheating the engine, especially air-cooled bikes. Air-cooled motorcycles rely on airflow to cool down, so idling for extended periods can actually be counterproductive. A short ride is the way to go for these bikes.

Safety Reminders:
- Hot oil can cause burns. Be careful not to touch the engine or oil filter while they’re hot.
- Keep your work area well-ventilated to avoid inhaling oil fumes.
Pro Tip: While the engine warms up, this is a good time to gather your supplies and locate the oil filter and drain plug on your motorcycle. Refer to your owner’s manual if you’re unsure of their location.
Step 2: Clean up the Bike and Work Area
Before you get down to the messy business of draining the old oil, it’s crucial to prepare your work area and motorcycle to ensure a clean and safe oil change experience. Here’s what you need to do:
Cleanliness is Key:
Grab some clean rags and wipe down the area around the oil filter and drain plug. This will help you see any existing leaks or potential issues more clearly. A dirty workspace can also introduce contaminants into the new oil.
Ensure your work area is clean and free of dirt and debris. Stray dirt can fall into the engine when the drain plug is removed, so a clean workspace minimizes this risk.
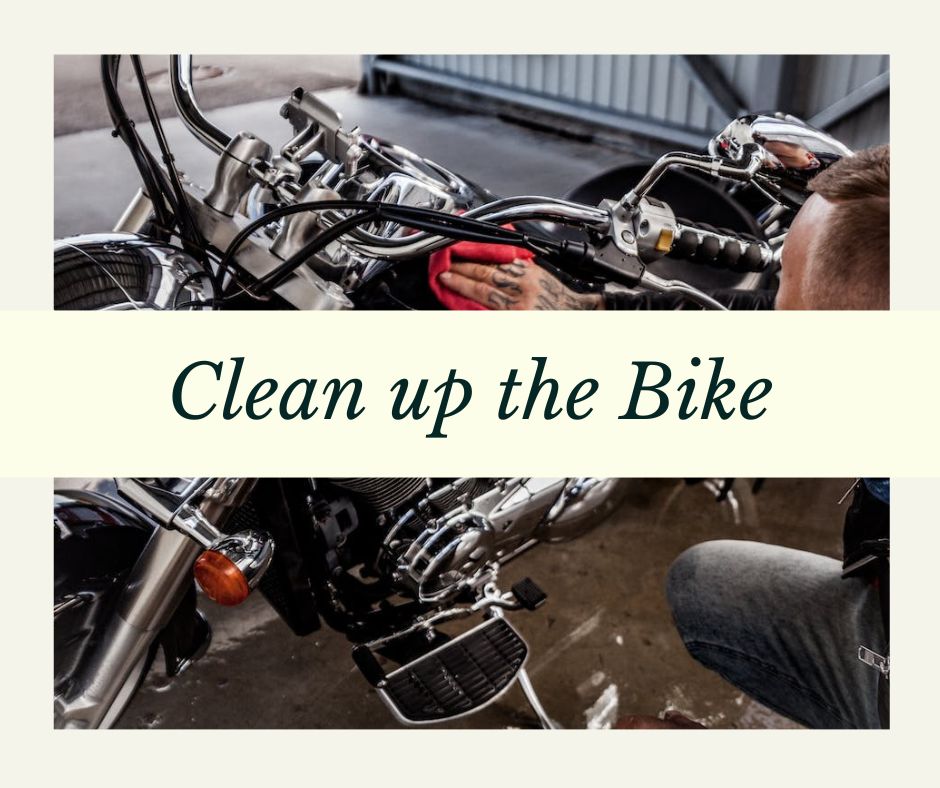
Safety Measures:
- Gear up with safety glasses and nitrile gloves. Used oil can irritate your skin and eyes, so wearing gloves and glasses protects you from splashes and accidental contact.
- Place a drain pan underneath the drain plug. The size of the pan should be enough to catch all the used oil without overflowing. Choose a pan with a wide enough mouth for easy pouring later.
- Double-check that the drain pan is positioned securely. You don’t want a wobbly pan that could tip over and cause a mess. Consider using a pan with a spout for easier transfer of the used oil to a recycling container.
Step 3: Drain Old Oil
Now that your engine is warmed up and your work area is prepped, it’s time to drain the old oil. This stage requires a bit of patience to ensure all the used oil is removed effectively. Here’s what you need to do:
Loosen the Drain Plug (But Don’t Remove It Completely Yet!):
Identify the drain plug. It’s usually a bolt located on the underside of the engine crankcase.
Use the appropriate wrench size to loosen the drain plug. Refer to your owner’s manual for the specific socket or wrench size needed for your motorcycle.
Loosen the drain plug by turning it counter-clockwise, but don’t remove it completely just yet. You want to loosen it enough to anticipate the oil flow before complete removal.
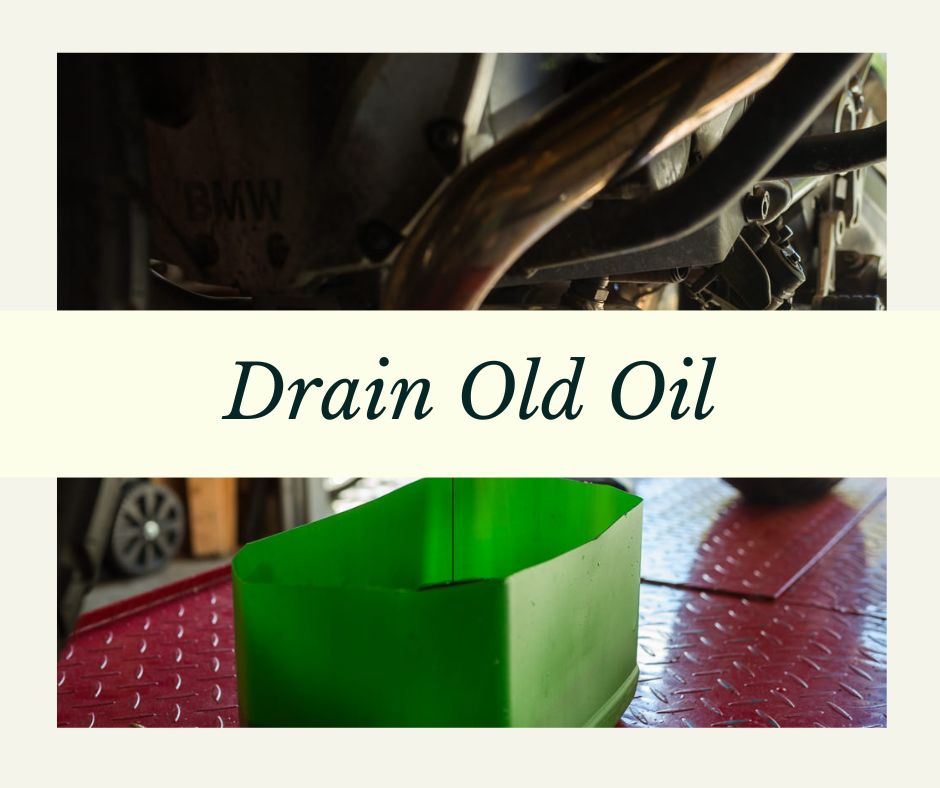
Drain the Oil Slowly and Carefully:
- Hold your drain pan securely underneath the drain plug. Be ready for the oil to flow out as soon as you remove the plug entirely.
- Once loose, carefully remove the drain plug by hand. Oil will start draining out, so be prepared to guide it into the drain pan and avoid spills.
- Let the oil drain completely. This can take several minutes depending on the viscosity of the oil and the motorcycle’s oil capacity. Tilt the motorcycle slightly if needed to facilitate complete drainage.
- Avoid removing the drain pan too early. Wait until a steady drip has turned into a trickle before removing the pan. This ensures most of the oil has drained from the engine.
Pro Tip: Hold your arm steady, so you don’t spill oil all over yourself. Have a rag on hand to wipe up any spills that might occur around the drain plug opening.
Step 4: Remove the Old Filter and Install a New One
With the old oil drained, it’s time to swap out the dirty oil filter for a fresh one. Here’s how to tackle this step:
Removing the Old Filter:
In most cases, you can remove the oil filter by hand. Simply twist it counter-clockwise until it loosens.
If the filter is stubborn and won’t budge by hand, an oil filter wrench can come in handy. These wrenches are specifically designed to grip and loosen oil filters without damaging them.
Be prepared for a mess! As you remove the filter, oil trapped inside will start to drain out. Tilt the filter slightly to drain the oil back into the drain pan you used for the engine oil.
Once the filter is loose, remove it completely and dispose of it responsibly. Don’t throw it in the trash! Used oil filters can be recycled at most auto parts stores or motorcycle shops.
SEE MORE: How Often to Change Motorcycle Oil: A Complete Guide
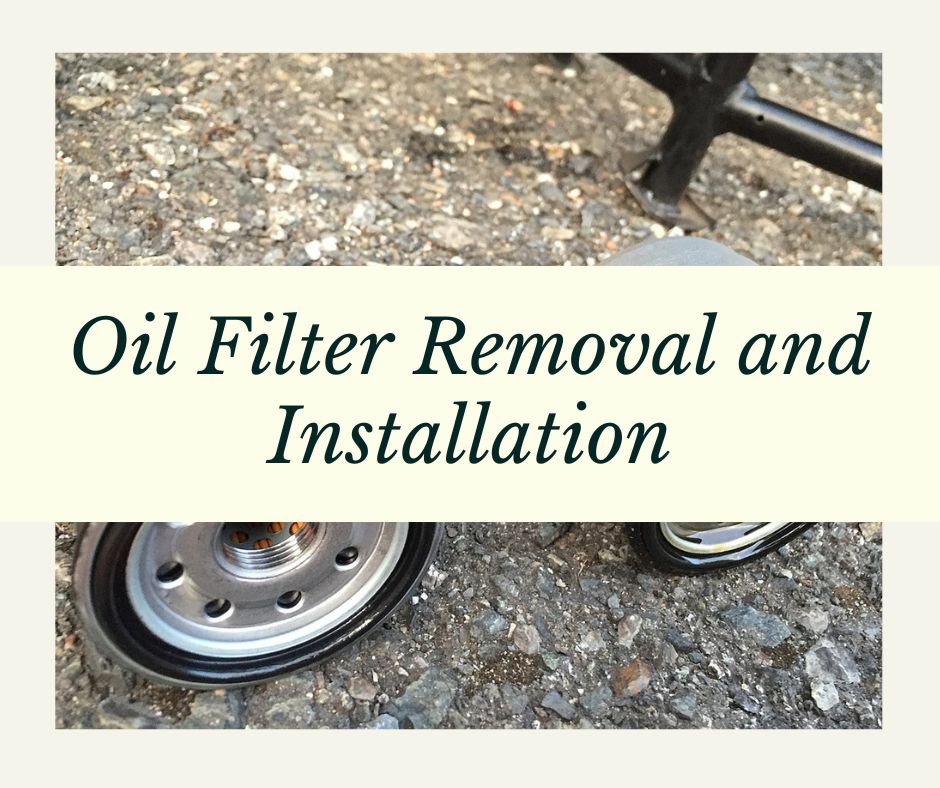
Preparing the New Oil Filter:
Grab your new oil filter. Make sure it’s the correct filter type for your specific motorcycle model. Refer to your owner’s manual if you’re unsure.
Apply a thin coat of fresh oil to the rubber gasket located on the base of the new filter. This helps the filter seal properly against the engine block and prevents leaks. You can use a little bit of the new oil you’ll be adding in the next step.
Installing the New Filter:
Screw the new oil filter onto the engine block by hand. Turn it clockwise until it makes contact with the engine block.
Once snug, tighten the filter further, but don’t over-tighten it! A strap wrench or your hand should be sufficient for tightening. Over-tightening can damage the filter gasket and cause leaks.
Refer to your owner’s manual for the recommended torque specification if your manual provides one.
Pro Tip: After installing the new filter, take a moment to ensure it’s seated correctly and feels secure. A loose filter can cause leaks.
Step 5: Replace the Sealing Washer
Step 5 focuses on replacing the drain plug and ensuring a proper seal to prevent leaks. Here’s a detailed breakdown of what you need to do:
Inspecting the Drain Plug Washer:
- The drain plug relies on a washer to create a tight seal and prevent oil leaks. This washer is a small, usually crush-type washer made of metal or rubber.
- Start by removing the old washer from the drain plug. It might be stuck to the plug or the engine block, so use a rag or pick to carefully remove it.
- Carefully inspect the old washer for any signs of damage like cracks, tears, or excessive wear.
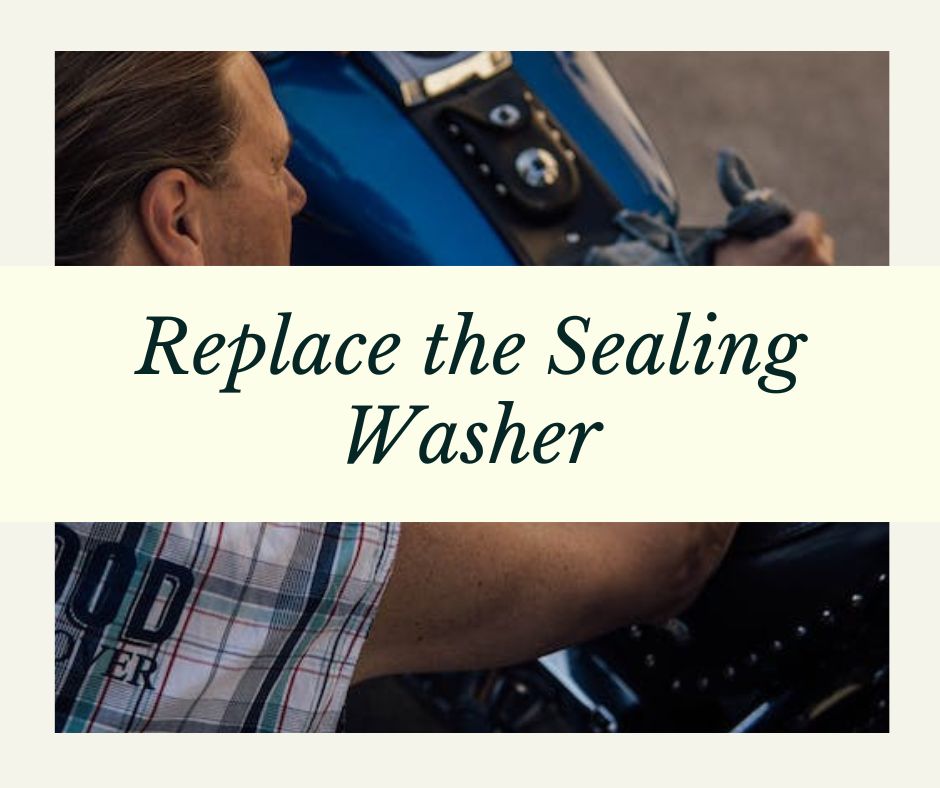
Replacing the Washer (if Necessary):
- If the washer looks damaged in any way, replace it with a new one. Using a damaged washer is a recipe for leaks. New washers typically come with the oil filter you purchased, or you can find them at motorcycle shops or auto parts stores.
- If the washer appears to be in good condition, you can reuse it. However, some mechanics recommend replacing the washer every other oil change for peace of mind.
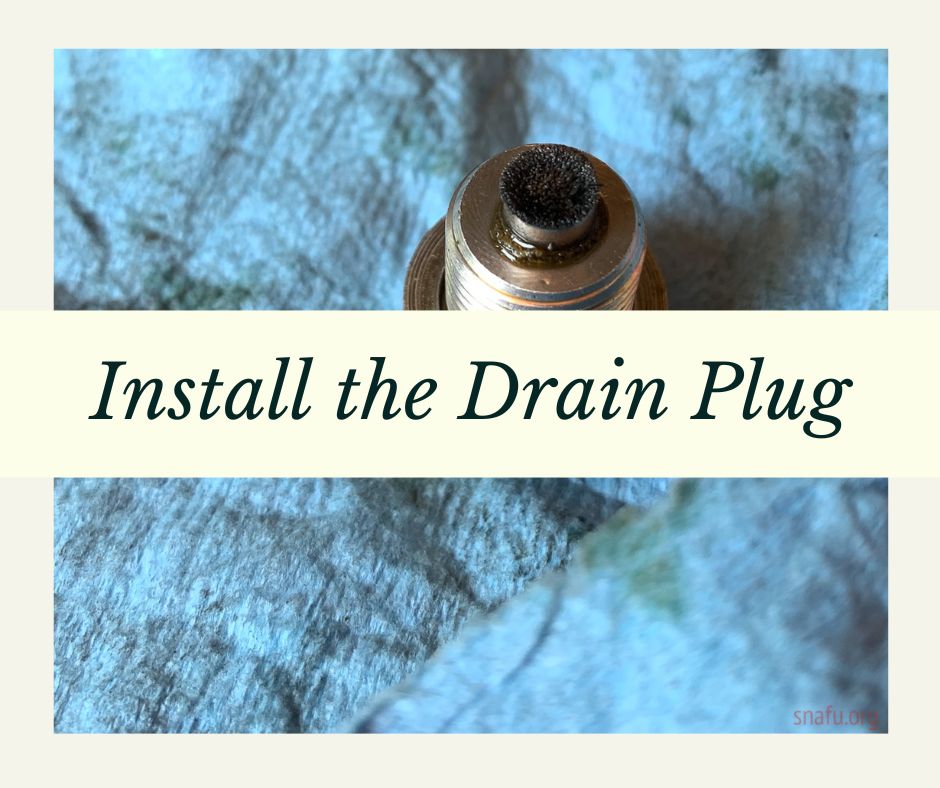
Step 6: Install the Drain Plug
Apply a thin coat of fresh oil to the new washer (or the reused washer) if you’re replacing it. This helps the washer seat properly and form a tight seal.
Screw the drain plug back into the engine block by hand first. Tighten it until it feels snug.
Use a wrench to tighten the drain plug further, but be cautious not to over-tighten it. Over-tightening can strip the threads on the engine block or damage the washer, causing leaks.
Torque It Right (Optional):
Ideally, you want to tighten the drain plug to the manufacturer’s recommended torque specification. This ensures a secure seal without damaging the threads or washer. Consult your owner’s manual for the specific torque value for your motorcycle’s drain plug.
If your owner’s manual doesn’t provide a torque value, or you don’t have a torque wrench, tighten the drain plug firmly with a wrench, but avoid using excessive force.
Double-Checking for Leaks:
After tightening the drain plug, take a moment to wipe down the area around the plug with a rag. Start the engine and let it idle for a few minutes. Observe the drain plug and surrounding area for any signs of leaks.
If you see any leaks, turn off the engine immediately and re-tighten the drain plug (be sure the engine is off and cool before touching it). If the leak persists, consult your motorcycle manual or a mechanic for further guidance.
Step 7: Add Oil
Now that the used oil is drained, the filter is replaced, and the drain plug is secure, it’s time to add fresh oil to your motorcycle. This step requires following your motorcycle’s specific oil capacity to avoid overfilling, which can damage the engine. Here’s a breakdown of what you need to do:
Know Your Oil Capacity:
This is crucial! Overfilling your engine with oil can lead to a host of problems, so it’s important to add the correct amount.
Consult your owner’s manual to find the recommended oil capacity for your motorcycle model and engine size. It’s usually specified in liters or quarts.
Preparing the New Oil:
Grab your new oil bottle and make sure it’s the correct type and viscosity recommended for your motorcycle.
Have a funnel handy to add the oil cleanly and avoid spills. Most oil containers come with a spout, but a funnel provides more control and reduces the mess.
SEE MORE: How Much Engine Oil Is Too Much for a Motorcycle
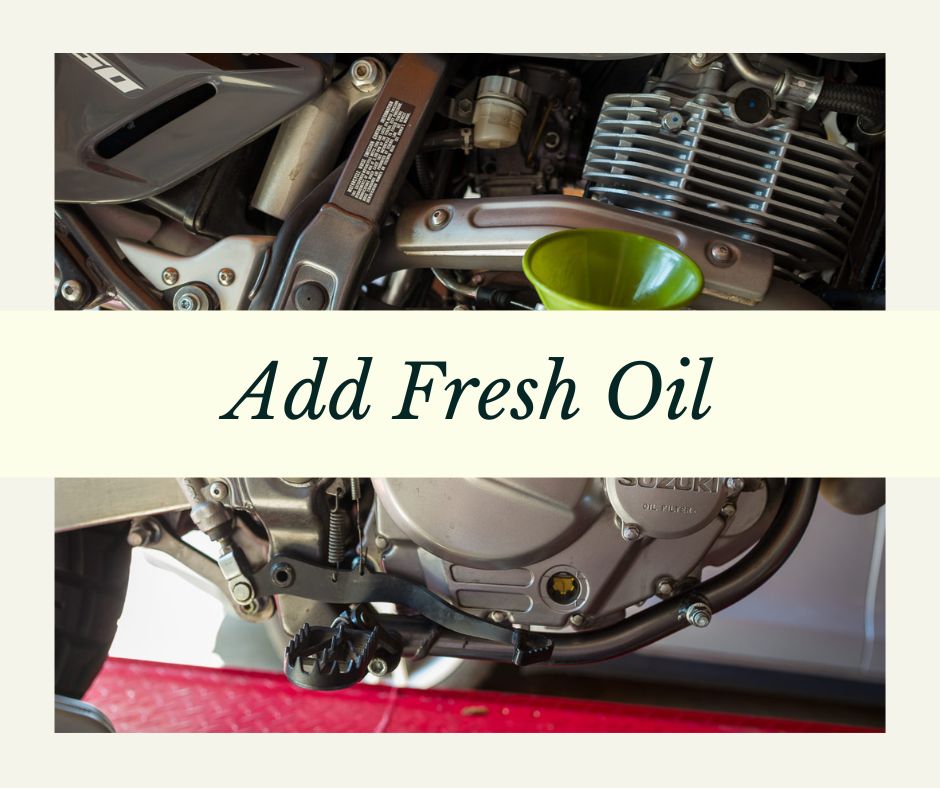
Adding the Oil Slowly and Checking the Level:
- Don’t pour the entire bottle of oil in at once! Start by adding a little less than the recommended capacity as indicated in your manual.
- After adding some oil, screw on the oil filler cap (don’t tighten it yet).
- Locate the dipstick. The dipstick is a metal rod used to measure the oil level in your engine crankcase. It’s usually located near the oil filler hole.
- Pull out the dipstick, wipe it clean with a rag, and reinsert it fully. Then, pull it out again to check the oil level.
- The oil level should be between the minimum and maximum markings on the dipstick. If it’s below the minimum mark, add a small amount of oil (250ml or half a quart is a good starting point) and recheck the level.
Taking Your Time to Avoid Overfilling:
It’s critical to avoid overfilling the engine with oil. Exceeding the oil capacity can put stress on the engine components and lead to leaks or even engine damage.
Add oil in small increments and check the level frequently until it reaches the recommended range on the dipstick. Be patient, this process can take some time.
Final Touches:
- Once the oil level is between the minimum and maximum marks, screw on the oil filler cap securely.
- Wipe up any spills with a rag.
- Visually inspect the area around the oil filter and drain plug for any leaks. Start the engine and let it idle for a few minutes to check for leaks once more.
Pro Tip: Make a note of the mileage and date of your oil change for future reference. This will help you stay on top of your motorcycle’s maintenance schedule.
Step 8: Check Your Work
You’ve reached the final step of your motorcycle oil change! Here’s what you need to do to finish up:
Proper Disposal of Used Oil and Filter:
- Used oil and oil filters are considered hazardous waste and should never be thrown in the trash or poured down the drain. Improper disposal can harm the environment.
- Find a designated oil recycling center or motorcycle shop that accepts used oil and filters. Most auto parts stores also offer oil recycling programs.
- Store your used oil and filter in a sealed container until you can take them to a recycling facility. Don’t let them sit around exposed – this can be a safety hazard and attract pests.
Double-Checking for Leaks:
- It’s always a good practice to double-check for leaks after completing an oil change.
- Let the engine idle for a few minutes after adding the new oil.
- Visually inspect the area around the oil filter and drain plug for any signs of leaks. A small drip or two is normal immediately after the change, but persistent leaks require attention.
- If you notice any leaks, turn off the engine immediately and consult your owner’s manual or a mechanic to identify the source of the leak and fix it.
Cleaning Up:
- Wipe down any spills or oil residue from your work area and motorcycle with a rag.
- Dispose of any rags used for cleaning responsibly.
Additional Tips:
- Consider keeping a record of your oil changes. Note the mileage and date of each oil change in your owner’s manual or a service log. This will help you stay on top of your motorcycle’s maintenance schedule.
- If you’re new to motorcycle maintenance, don’t hesitate to consult a mechanic if you have any questions or concerns during the oil change process.
If you prefer visual content, watch the video to see how to change oil on motorcycle.
Conclusion
By following these simple steps, you can successfully change the oil on your motorcycle like a pro. Regularly changing the oil and filter is essential to keep your engine running smoothly and prolong its lifespan. Always consult your owner’s manual for specific instructions and use only high-quality oil. And don’t forget to properly dispose of your used oil and filter at a recycling center or auto parts store.


