When the winter ends, you probably want one thing—dusting off your motorcycle and hitting the road. But your bike might not be quite ready after months of cold storage.
Neglecting proper maintenance of a bike can lead to an increase in mechanical failures. To avoid this hassle and ensure a safe and enjoyable ride, let’s dive into 10 essential maintenance checks you should perform before your first spring ride.
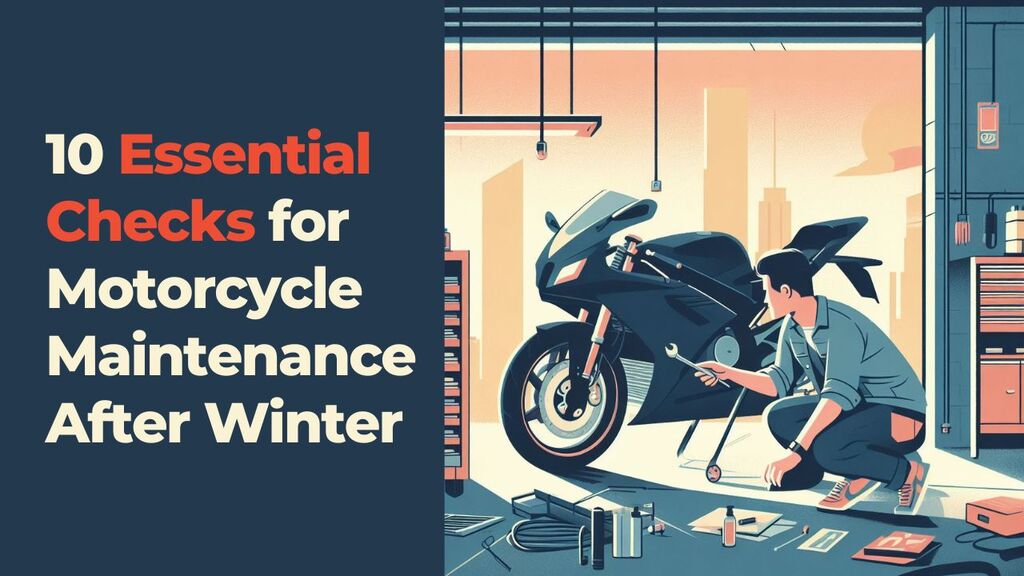
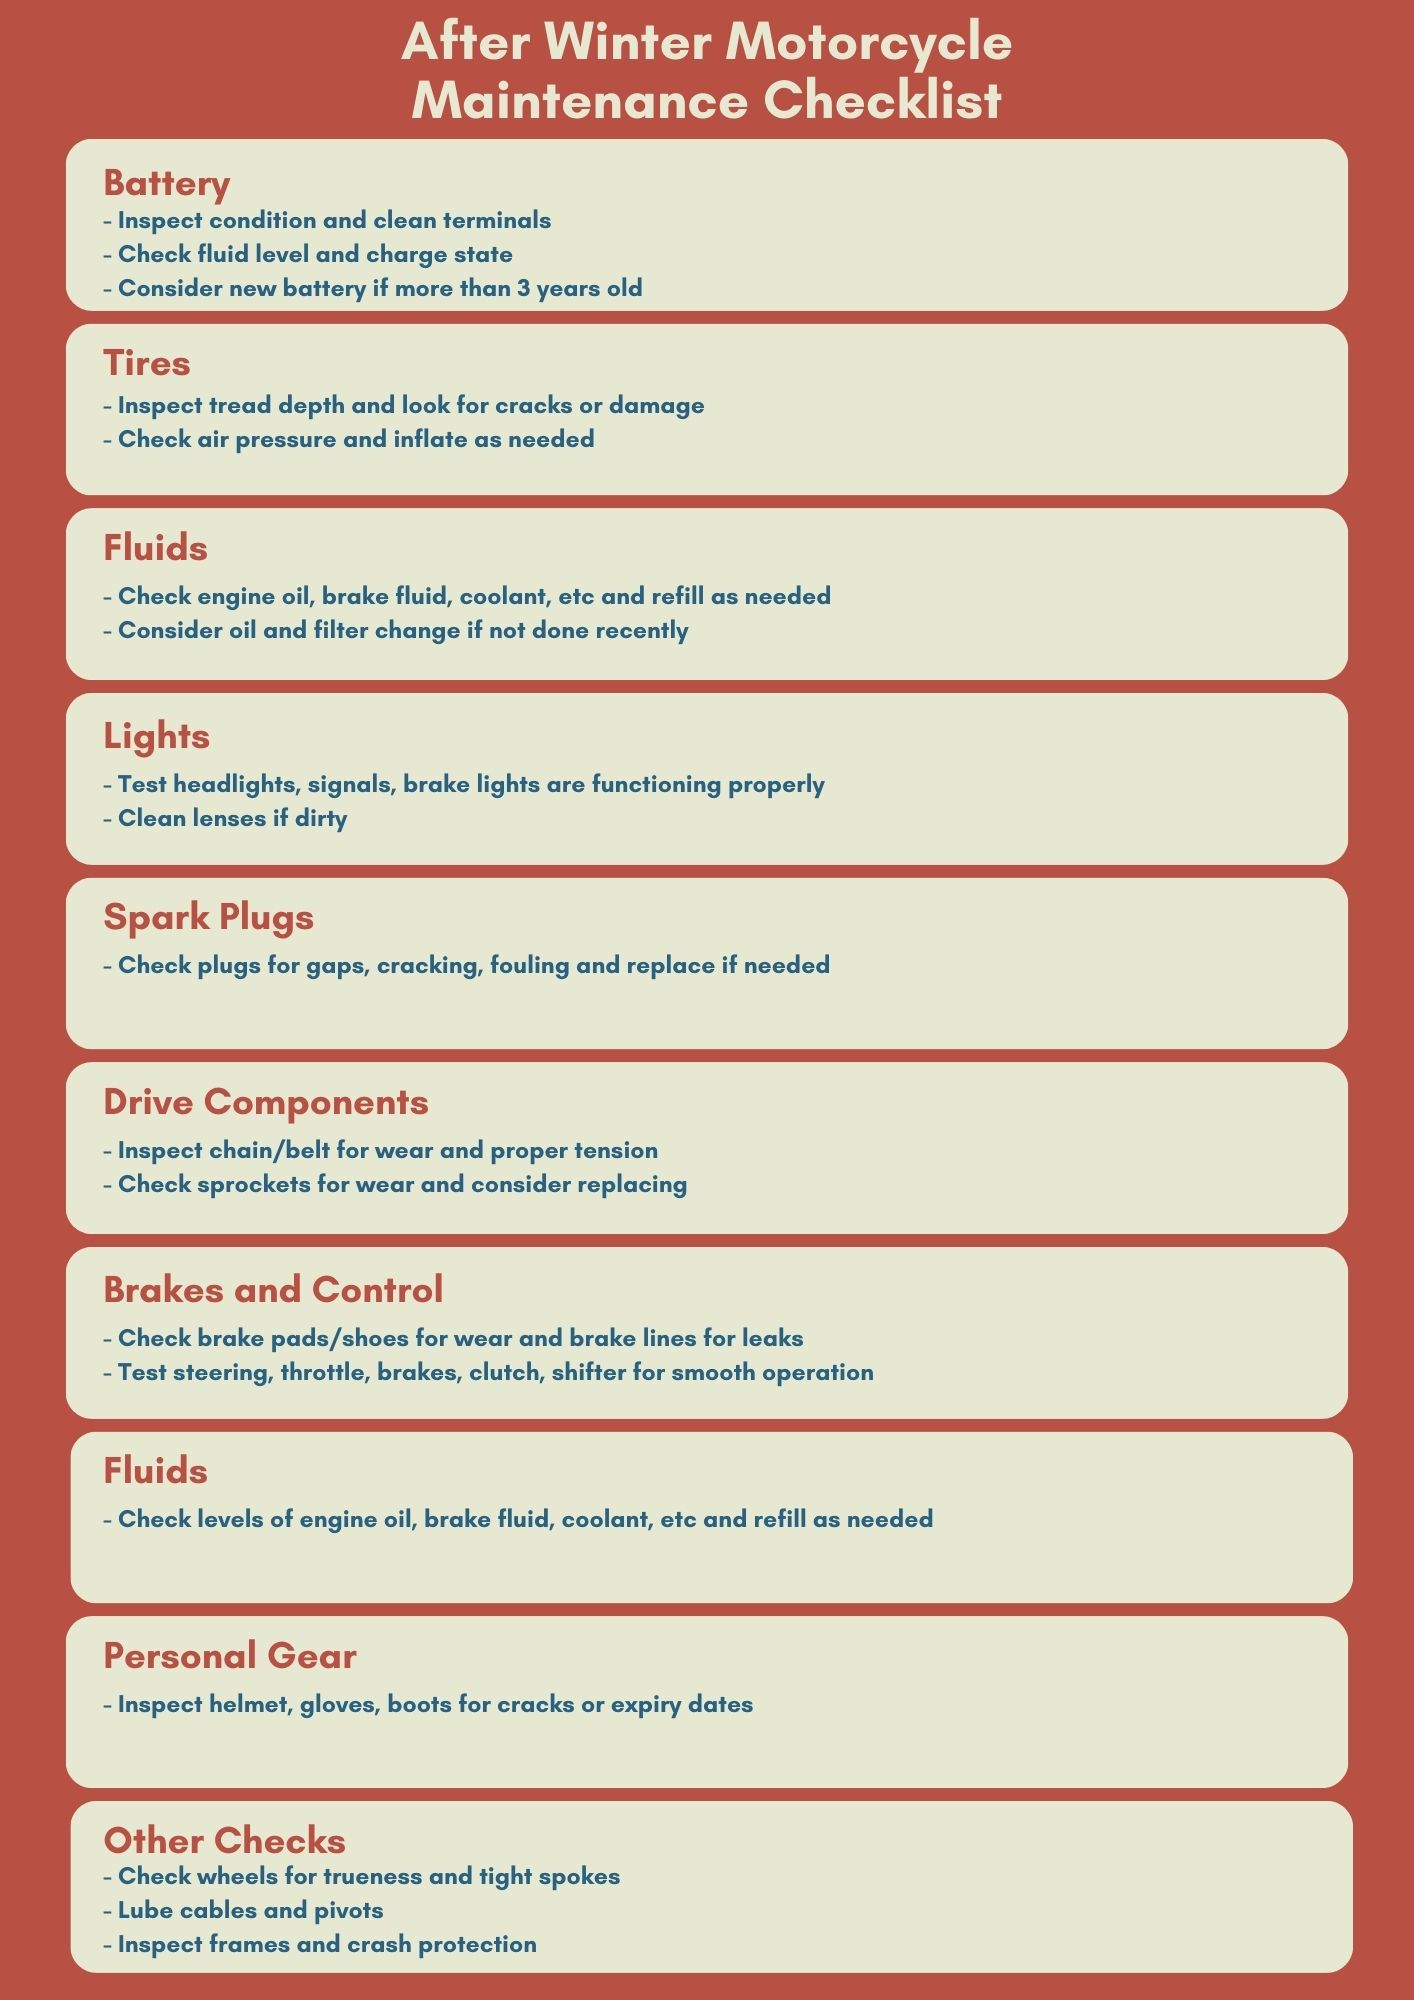
Motorcycle Maintenance After Winter: The Essential Checklist
This essential checklist guides you through crucial tasks, helping you address any potential issues and guaranteeing optimal performance for the upcoming riding season.
Please, download the full maintenance checklist from the following link:
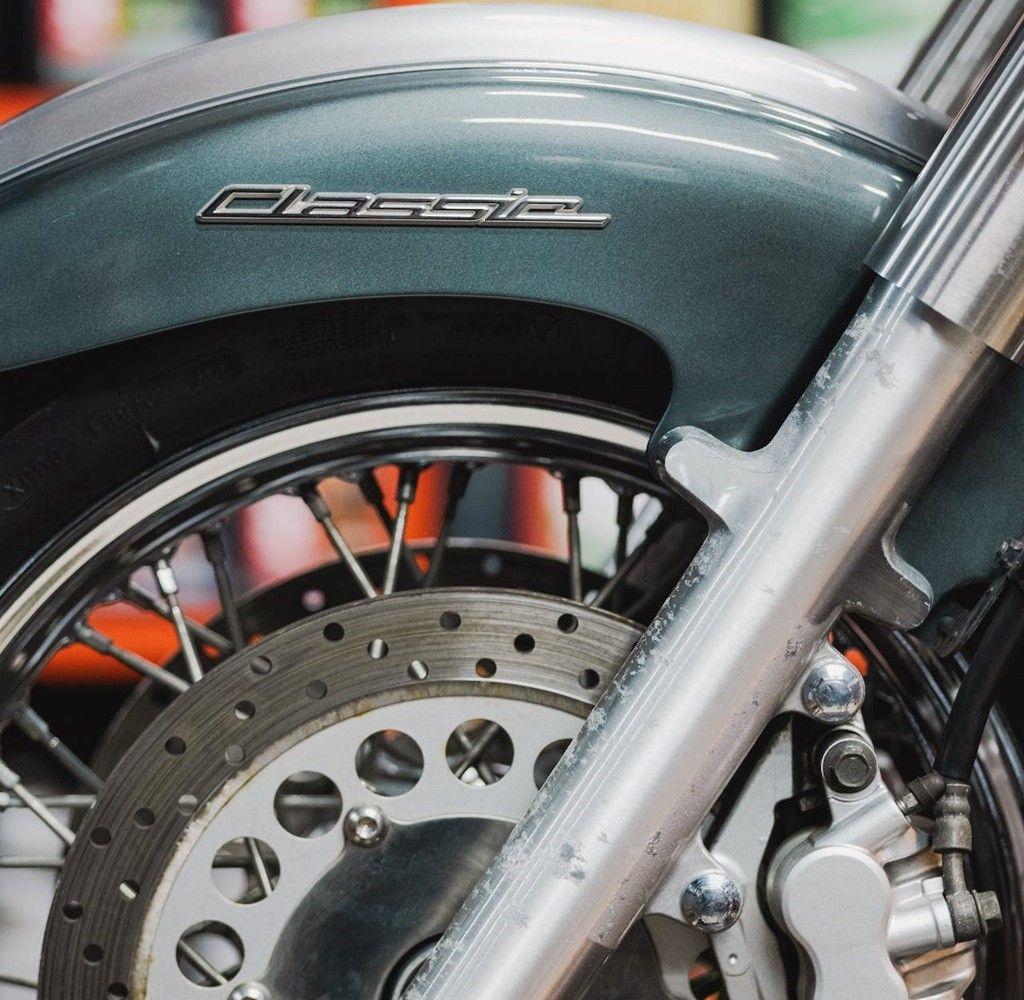
1. Brakes
Brakes are extremely important for safety, so we’ll want to give them a close look. Our braking system takes a lot of abuse over the winter sitting idle, so it’s worth taking the time to inspect everything.
i. Check brake pads
We’ll start with the brake pads. These are what create the friction to slow us down, so we need to make sure they’re working in a perfect condition.
Check for wear by feeling how thick the pads are. If they look low, it’s time to replace them.
Do You Know? The minimum thickness of brake pad friction material for a motorcycle is 1.0 mm. New pads typically have around 4.5 mm of friction material. When the pad is worn down to less than 3 mm, it’s time to consider replacing the pads.
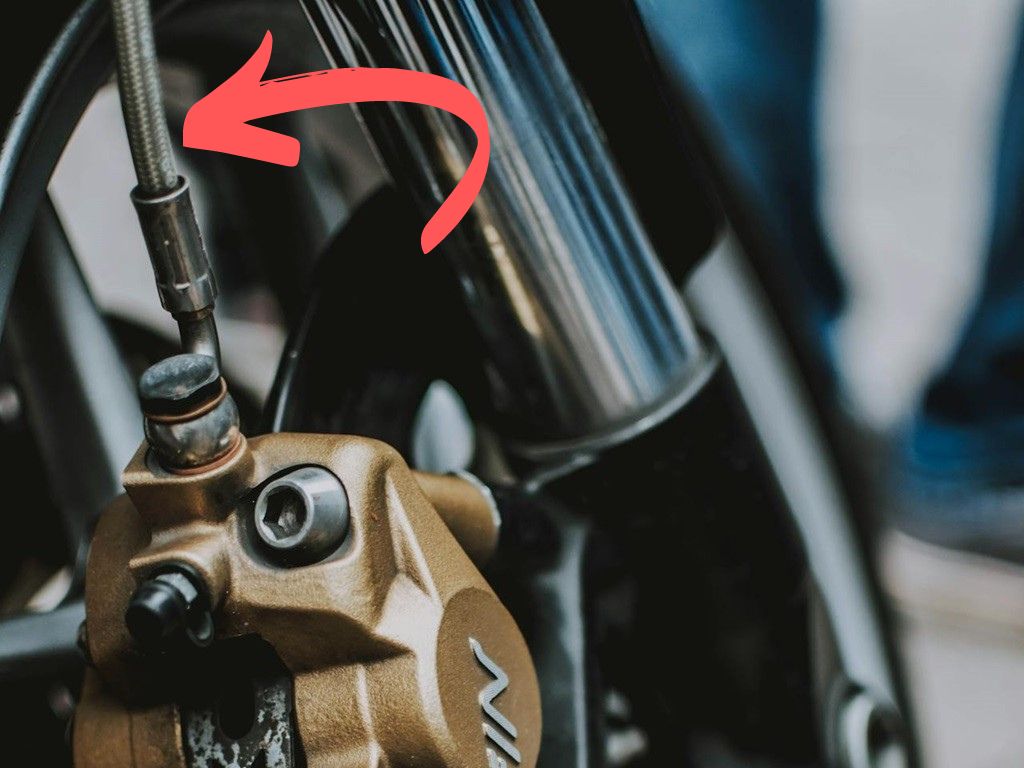
ii. Inspect brake lines
The brake lines are also something we’ll carefully examine. After months of vibration and weather, cracks can develop.
Give each line a once over, flexing and looking for any bulges or leaks. One little crack can lead to a messy problem.
iii. Do a brake test
While we have the wheels off the ground, let’s do a brake test too. With the bike in neutral, squeeze the lever or step on the pedal a few times. It should feel firm.
Watch that the rotors spin smoothly without any grabbing or pulsing. And listen closely – any squealing, scraping or grinding noises are a sign something needs adjustment.
iv. Be alert for unusual noises
Sometimes after a long winter, the first few stops might produce some odd sounds until the pads mate with the rotors again. But prolonged noises mean a deeper issue that wants addressing.
Our brakes are too important to ignore any potential trouble signs. Better to get them looked at than find out there was a problem down the road—literally!
2. Tires
Our tires are what connect us to the road, so we’ll give them a thorough checkup too.
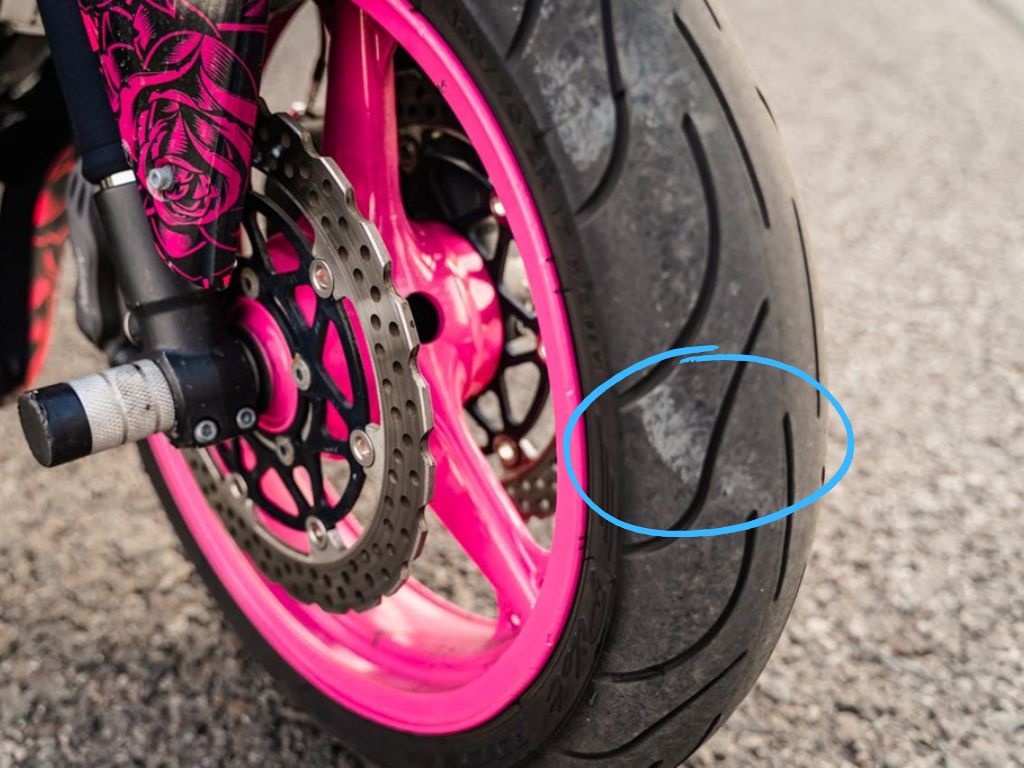
i. Do a visual inspection
First thing is a visual inspection. We’re looking for any cuts, cracks, bulges or other damage that could cause a blowout at high speed.
Rotate each tire and examine the entire tread and sidewall carefully. If things don’t look good, change them.
ii. Check the tread depth
While we’ve got the wheel off anyway, let’s also take a look at the tread depth. Use the tread wear indicators molded into the grooves to see if the tires have enough rubber left.
The minimum safe depth is usually around 3/32 of an inch, so replace them before they are thinner than that.
STUCK WITHOUT A TREAD DEPTH GAUGE? Use a penny. If Lincoln’s head disappears completely, your tires are bald and need replacing.
iii. Check tire pressure
Our last tire task is air pressure. Nothing sucks more than finding a tire is low halfway through a long ride. We always keep an air pressure gauge in our tool kit for this.
Let some air out of each tire so they’re cool to the touch, then pump them up according to what the owner’s manual says.
Now here’s a little trick – when you put the tires back on after a long winter, give them an extra few PSI. This helps the rubber re-round out from sitting flat.
Be sure to check and adjust them back to normal pressure before your first ride as the extra air can feel wobbly. A small amount of over-inflation for a day or two is a cheap insurance for tire life.
Tires are what makes the whole bike roll, so taking fifteen minutes to give them the once-over is time well spent.
DID YOU KNOW? A motorcycle’s tires lose up to 1 PSI of air pressure per month over winter. That’s why your first springtime ride might feel a bit wobbly!
3. Battery
Our battery keeps the spark plugs firing and lights glowing, so we don’t want any surprises when twisting the ignition key.
i. Inspect the terminals
Over the winter, corrosion can form if the terminals weren’t covered up. Use a wire brush or sandpaper to scrub any white or green crud away from the positive and negative posts.
While you’re at it, check that the cable connectors aren’t cracked or loose. A split second could cause all sorts of problems.
ii. Check the battery condition
The condition of the battery is important too. Look for any leaks or physical damage. If the case is cracked, it’s time for a new one.
And if it’s more than 3 years old, it’s at the end of its useful life anyway. Batteries don’t last forever, especially after a long sleep.
iii. Do a multimeter test
To get a sense of how the battery is holding a charge, use a multimeter to test the voltage. Below 12.4 volts and she’ll need a good recharge.
The best way is with a battery tender, but at minimum we should give it a few hours on a conventional battery charger set to “maintain.”
PRO TIP: A battery tender can keep the motorcycle from sulfating during the storage time.
4. Fluids
No fluids, no smooth ride – it’s that simple. So while we’ve got the bike in the garage, let’s inspect our essential lubrication system.
i. Change the oil
If the engine oil and filter weren’t freshened up in the fall, now is definitely the time. Dino juice this old could be full of sludge after months off.
We’ll drain out the dirty stuff, replace the filter, then top her back off with the amount and weight specified by the manual.
FUN FACT: Leaving your motorcycle in storage with a full tank of regular fuel is like pouring a glass of milk and letting it sit out all day – not good! You should use stabilized fuel.
ii. Check other fluids
Don’t forget to check under the plastic covers too—those transmission, rear differential, and brake fluid reservoirs all need topping off. Look for any discoloration that could indicate contamination.
While we’re at it, peek at coolant level in the radiator. Even if anti-freeze was added before storage, water evaporates over time.
For those of us with old-school drum brakes, the clutch might want some fresh hydraulic fluid too. And if you’ve got fork seals starting to leak, now is a good time to replace them.
5. Lights
You should also check the lights! Nothing ruins a fun ride faster than getting pulled over because a bulb is out.
i. Use a battery tender
The first thing we’ll do is connect a battery tender or use a helper to cycle through the high/low beams, turn signals, and brake light while we inspect each unit. Take note of any that don’t light up or flash weakly.
ii. Clean the lenses
While we’ve got good visibility, let’s also clean the lenses if they’re dirty or clouded. Nothing diminishes light output more than a layer of grime.
We usually use a 50/50 mixture of water and white vinegar for a safe, affordable cleaner. Buff it all dry afterwards so no moisture gets trapped.

iii. Examine the wiring
Don’t forget to examine the wiring too. Gently flex connections to check for cracks or looseness where moisture could seep in. A little corrosion preventing dielectric grease in winter is a nice insurance policy here.
With any bulbs found to be on their way out, put in replacements of the same wattage specified by the manual. OEM or higher quality generic parts will last the longest.
6. Spark Plugs
No sparks means no combustion, so we’ll give our spark plugs a once-over too. Checking them out only takes a minute and could save us much frustration down the line.
Using a gap tool, check that the electrode spacing on each plug is within manufacturer spec. Often this will be listed in the manual. Too wide and the spark won’t jump the gap effectively.
Next, examine the porcelain insulators and electrodes. Look for signs of damage, cracks or wear. The electrodes in particular should be sharp and free of deposits. If they look overly dirty, eroded or just old, it’s wiser to replace them.
To get a sense of engine condition, you can remove the plugs. Are the plugs rounded and discolored, or is everything looking nice and dry? Wetness could signal a underlying problem that wants addressing.
When reinstalling, a thin smear of anti-seize on the threads spares future aggravation when it’s time to remove them again. And don’t cross thread! Take your time guiding them straight back into the hole.
Fresh plugs only cost a few bucks each but can make a world of difference for restarts and overall performance.
PRO TIP: Those black, sooty deposits on your spark plugs can tell you a lot about your engine’s health. White or oily deposits, however, are a red flag!
7. Drive Components
No drive, no ride – so we’ll inspect the chain or belt next.
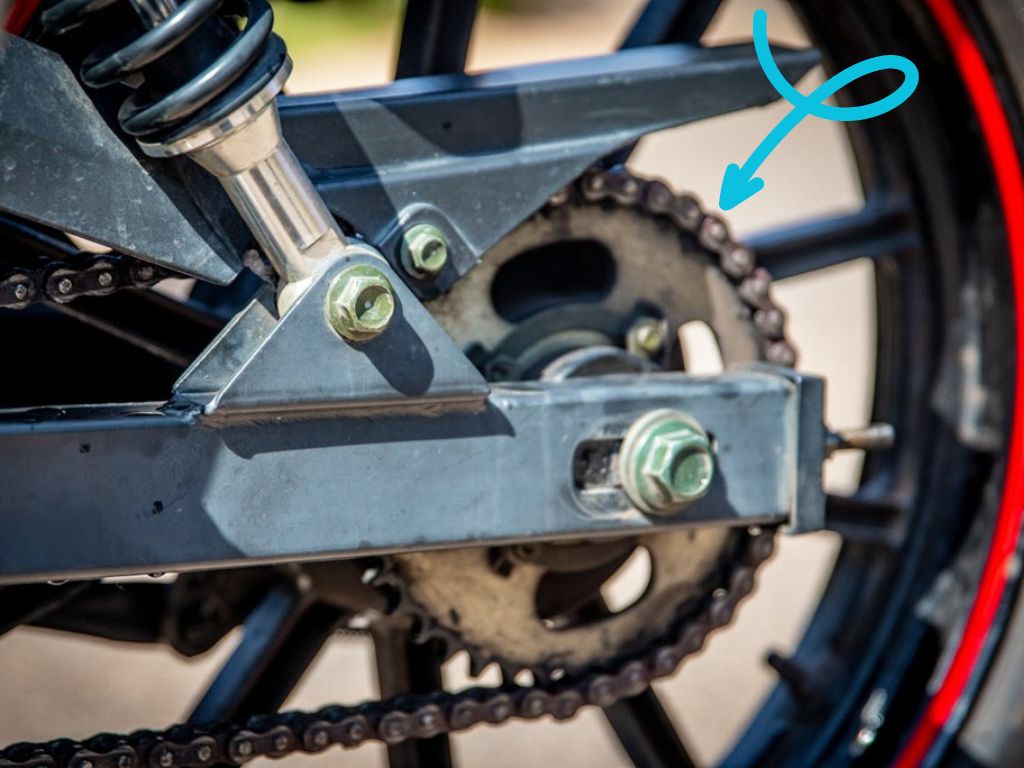
i. Check for damage
First thing is to check for any cracks, stiff links, or excessive rust that could cause failures at inopportune moments.
Spin the rear wheel by hand and closely observe chain or belt movement all around. It should flow smoothly without binding.
ii. Examines tension and alignment
The chain should have just the right amount of slack, usually around 1-1.5 inches of up-down play being ideal.
Too loose and it’ll slap around noisily. Too tight raises wear and tear. Check it against specifications if you’re unsure.
DID YOU KNOW? You can check your chain or belt tension using a dollar bill? Slide it under the slack section – it should fit snugly but not pinch.
iii. Check the sprockets
While we’re down here, peek at the sprockets too. On high milers, their teeth may be getting pointy instead of nicely rounded.
That’s a sign they want replacing to keep things running perfectly in harmony. Consider swapping both the rear and front together – that’s usually recommended.
iv. Apply lubrication
We’ll also want to lubricate the chain if it looks dry. A specialized lubricant protects components and reduces noise. After oiling, spin the wheel and spread it around thoroughly.
8. Controls
Our bike’s controls are the conduits between us and the road, so we’ll give them some attention too. It’s important that everything is operating smoothly before we set off.
i. Look into the steering
Let’s start with the steering. Give the forks and bars a twist in both directions. Everything should move freely without binding, looseness or odd noises.
Once satisfied, we can check the front brake lever next. Squeeze and release – it should feel firm with no mushiness.
ii. Examine the rear parts
Now let’s move to the rear. Work the brake pedal and give it plenty of pushes to fully return. Again, seeking a nice firm action without any strange feedback.
Check the gear lever too, making sure it shifts cleanly through all gears without grinding or popping out.
iii. Don’t forget the throttle
The throttle deserves attention as well. Twist it wide open and back to ensure smooth operation from idle to full gas. No hesitation or bumps allowed there!
And don’t forget to confirm the starter, clutch, and choke are performing as expected.
9. Personal Gear
Our gear protects us out there on the open road. Remember, you can fix a bike but you only get one you!
Let’s start with the helmet – this is the most important piece of kit. Inspect the shell for any cracks or damage, especially around the vents where the plastic is thin.
If you see any signs of impact damage, it’s expired safety-wise. Overall condition and manufacturer guidelines also hint when it’s time to replace.
DID YOU KNOW? Most helmets have a five-year lifespan, even if they haven’t been dropped. Think of it like an expiration date on your safety! Don’t be a statistic, replace that old lid. ⛑️
Gloves are next – flex the fingers and seals, checking for signs of splitting or wear. Cold cracked leather isn’t much use when you inevitably lay her down. Boots should be given the same inspection. Replace anything past its due date.
Lastly, look at suits, armor, and textiles. If they’re more patches than fabric, you’ve had some good use! Note any repairs that may have loosened over winter. Blocks and sliders also need changing periodically as plastics can become brittle with age and impacts.
10. Other Checks
Now that we’ve covered the major systems, I just have a few extra tips that don’t necessarily warrant their own sections.
First, check the wheels thoroughly. Spin them and look for any wobble front and rear. Loose spokes or cracks in the rims are no good. Also, inspect lug nuts for tightness.
Next, go over the whole bike with some general lubrication. A spray of silicone on the throttle cable helped it slide smoothly earlier. I also like to lube any brake pedal pivots, suspension joints, and anywhere two surfaces meet. A little grease prevents squeaks and corrosion.
Let’s not forget to examine protective equipment too. Replace any worn pucks or cracked frame sliders before they fail in a slide. Fenders may also want adjustment if they’re loose or dragging on tires.
Finally, consider throwing a tightening of all bolts and fittings into our spring tune-up. You never know when a loose fastener might manifest problems later on. Better to catch any weak spots now.
Well, that about covers everything important to look over before our first ride of the season! Our steed should be shipshape and ready to roll real soon.
FAQs About Motorcycle Maintenance After Winter
How often should I change my engine oil?
Most manufacturers recommend changing your engine oil every 3,000-5,000 miles. But you can also change it based on time, usually every 6 months during riding season. Using fully synthetic oil allows for longer change intervals.
What’s the best way to clean my bike?
Gentle car washing soap and a microfiber cloth are usually sufficient for a exterior clean. Avoid high-pressure washers near components. For UV-faded plastic, apply plastic cleaner or mild bleach solution. Polish paintwork for protection. Vacuum vents regularly.
How can I store my bike over winter?
Remove battery, full tank of stabilized fuel, inflate tires, clean/wax, fog cylinders. Cover seat/controls with waterproof cover. Jack stands or center stand to isolate tires from surfaces. Trickle charger on battery monthly. Check fluids every few months. Uncover in spring and start with fresh fuel.
What’s the easiest way to remove bug splatters?
For fresh bug remains, a water-soaked microfiber should lift them without damage. For dried bugs, apply a bug and tar remover and let it soak before wiping. Vinegar or goo-gone work too. Avoid scratching paint when rubbing. Rinse any residue afterward to protect the clear coat.
How do I know when to replace brake pads?
Check pads regularly for wear indicators (small tabs). Replace when they first contact the disc or drum. Glazing, excessive wear or noisy brakes are signs too. OEM or high-quality aftermarket pads will provide longest life and performance.

