
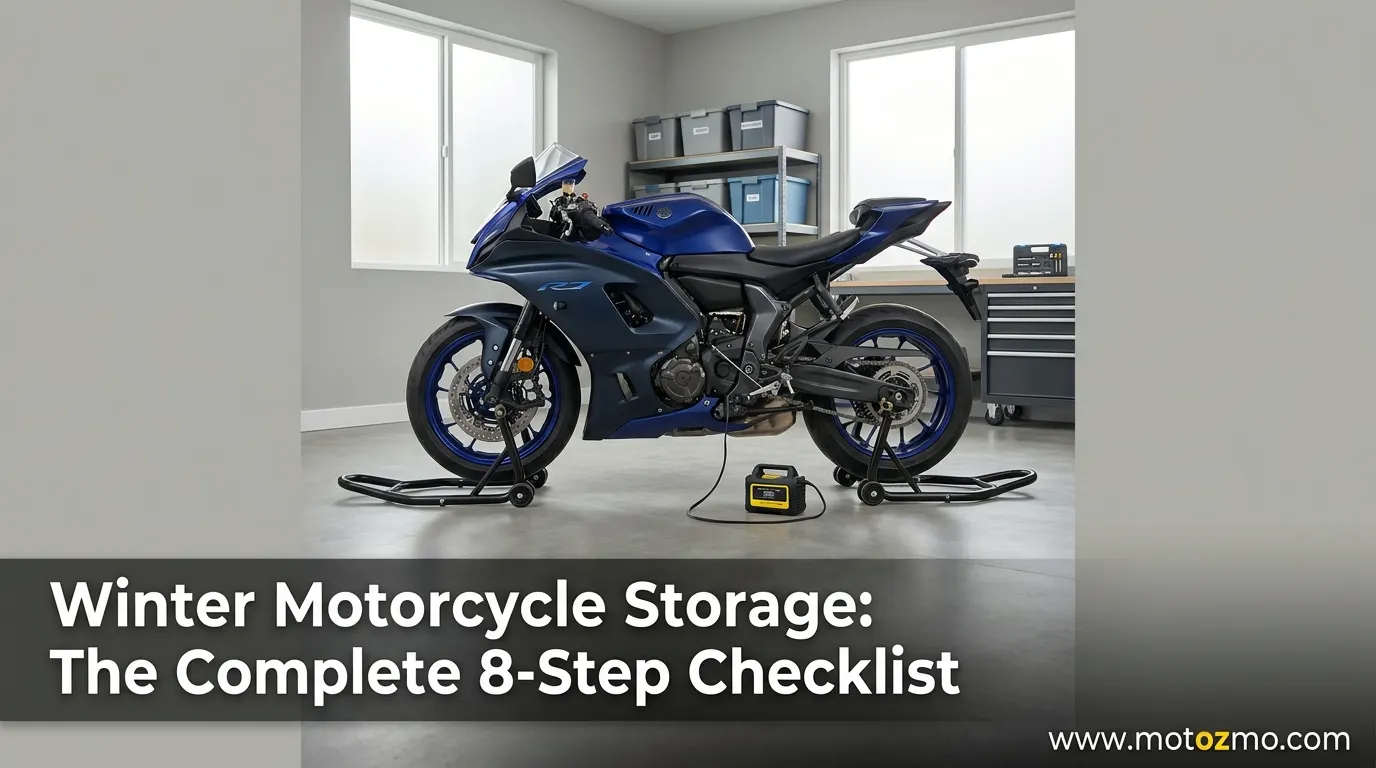
Winterizing a motorcycle means changing the oil, treating the fuel, tending the battery, getting weight off the tires, and covering it properly, roughly 2 to 3 hours of work that prevents the $200 to $1,500 in repairs a neglected bike often needs by spring.
Skip it, and the failures aren’t random: cold and stillness attack fuel, batteries, tires, and bare metal through specific, predictable mechanisms, which means each step below exists to block one of those mechanisms, not just to check a box.
Key Takeaways
- Prevention vs. Repair: Spending 2–3 hours on proper winterization prevents $200–$1,500 in spring repair bills caused by fuel breakdown, dead batteries, and dry seals.
- Core Protection Steps: Wash away salt, change contaminated oil, fill the tank to 90–95% with stabilized fuel, and run the engine to coat internal components.
- Battery & Tire Care: Use a smart tender to prevent sulfation and freezing damage. Elevate wheels on stands (or overinflate and move every 2–3 weeks) to avoid flat spots.
- Storage Environment: Always choose a breathable cover over a plastic tarp to allow condensation to escape, and plug exhaust/intake ports to keep rodents out.
Why an Idle Motorcycle Deteriorates Faster Than a Parked Car
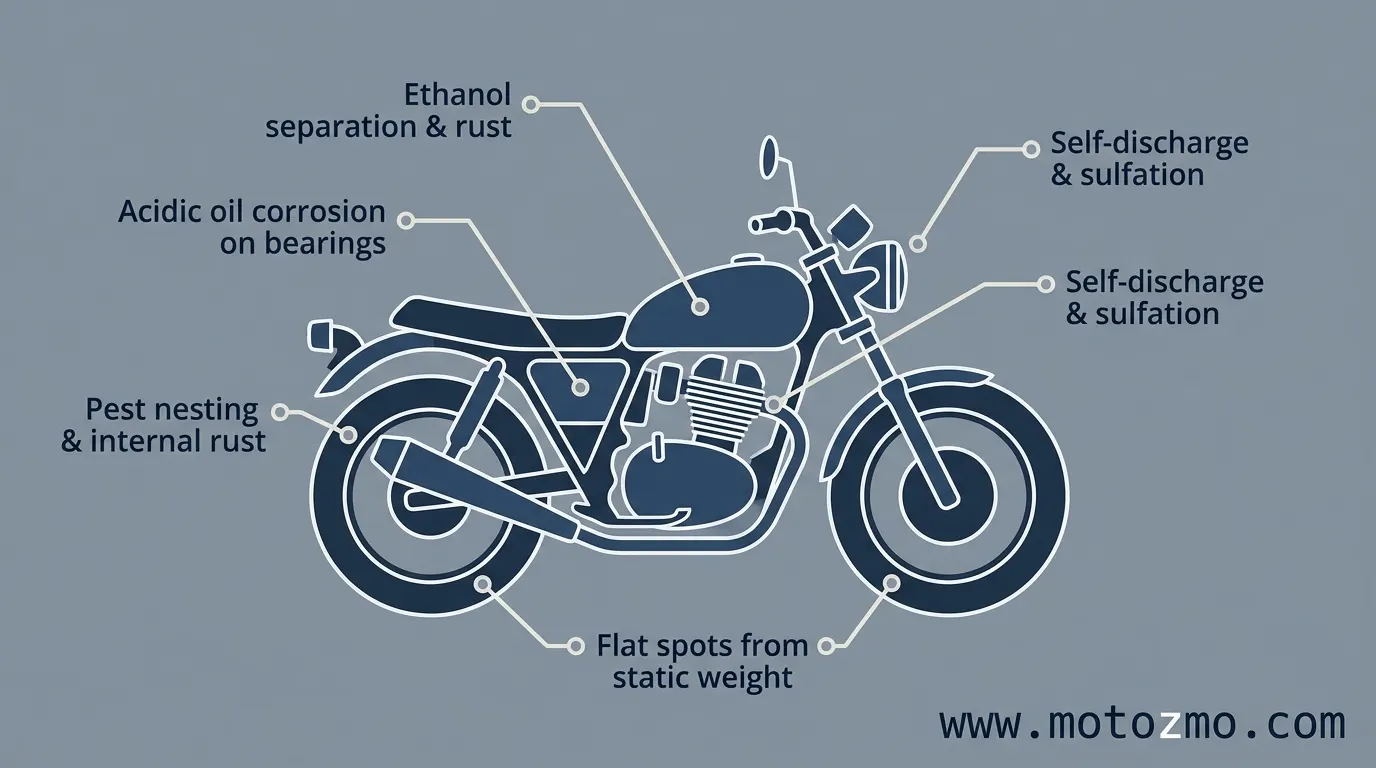
| Component | What actually happens | Result if ignored |
|---|---|---|
| Fuel | Ethanol-blended gas absorbs moisture from the air; past a certain threshold it separates from the gasoline entirely | Clogged injectors or jets, corrosive residue in the tank |
| Battery | Slowly self-discharges even sitting untouched; a fully discharged battery can develop sulfation that permanently reduces capacity | Dead cells, won’t hold a charge, may need replacing |
| Tires | Sustained weight on one contact patch compresses the rubber | Flat spots, vibration at speed until they wear back round |
| Engine oil | Combustion byproducts leave acids and moisture in used oil that sit against bearings and cylinder walls for months | Internal corrosion, accelerated wear on first start |
| Rubber seals | Dry out without the regular lubrication normal riding provides | Cracked gaskets, oil leaks |
| Metal surfaces | Moisture and leftover road salt keep reacting with bare metal under a cover | Rust on exhaust, frame, and brake rotors |
One correction worth making up front, since it’s commonly misunderstood: cold temperature doesn’t speed up a battery’s self-discharge, it actually slows it down, since the chemical reaction behind self-discharge runs slower in the cold.
What cold temperature does do is temporarily cut how much cranking power the battery can deliver right now, commonly cited around 65% of rated output at 32°F and closer to 40% at 0°F, which is a separate issue from the gradual discharge that happens over the whole storage period.
The real cold-weather danger is a battery that’s already partly discharged: a fully charged battery’s electrolyte resists freezing, but a weak or discharged one is much closer to plain water and can freeze and crack the case in a hard freeze. That’s the actual argument for a tender, keeping the battery charged protects it from freeze damage, not from some accelerated cold-weather drain that isn’t really happening.
The 8-step Checklist
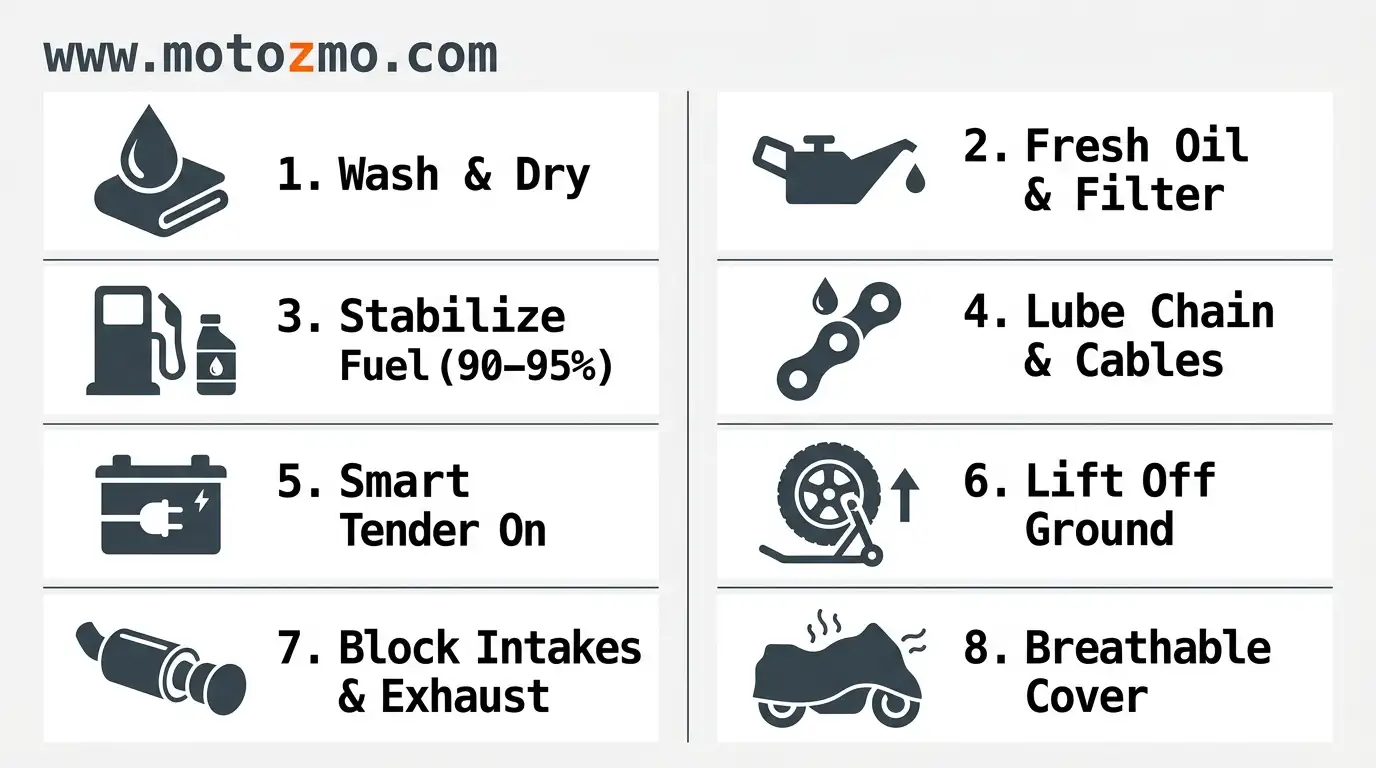
| Step | Task | Time | What you’ll need |
|---|---|---|---|
| 1 | Wash and dry thoroughly | 30–45 min | Soap, microfiber cloths, compressed air |
| 2 | Change engine oil and filter | 20–30 min | Drain pan, filter wrench, fresh oil |
| 3 | Fill tank and add fuel stabilizer | 10 min | Fuel stabilizer |
| 4 | Lubricate chain and cables | 15 min | Chain lube, cable lube |
| 5 | Connect a battery tender or remove the battery | 10 min | Smart tender |
| 6 | Inflate tires and get weight off them | 10 min | Tire pump, stands |
| 7 | Block the exhaust and air intake | 5 min | Steel wool, muffler plugs |
| 8 | Apply a breathable cover | 5 min | Motorcycle-specific cover |
Step 1: Wash It Completely
Road grime, brake dust, and any leftover salt trap moisture against metal, and that trapped moisture is what actually causes the pitting and corrosion people blame on “sitting all winter.”
Use a pH-neutral or motorcycle-specific wash soap, get into wheel wells and the underbody where salt collects, and dry every surface with a microfiber towel rather than letting it air dry. A thin coat of wax on painted surfaces adds a barrier on top of a clean, dry base.
Don’t skip this step because the bike’s going under a cover anyway; grime under a cover for months does more damage than grime exposed to open air.
Step 2: Change the Oil and Filter
Used oil carries combustion acids, moisture, and fine metal particles, and none of that does anything good sitting against bearings and cylinder walls for months with no fresh oil circulating to dilute or flush it.
Change both the oil and filter, then run the engine for a few minutes afterward to circulate the fresh oil through the system rather than leaving old oil in the lines and only fresh oil in the pan.
If your storage is going to run past roughly four to six months, this is also the point to consider fogging the cylinders, pulling the plugs, spraying fogging oil into each cylinder, and turning the engine over a few times to coat the cylinder walls, which matters for fuel-injected and carbureted engines alike, not just one or the other.
Step 3: Treat the Fuel, and Get the Fill Level Right
This is the step where a lot of storage advice overstates itself. The goal is a tank filled to roughly 90 to 95% capacity, not filled to the absolute brim.
Some room matters: fuel expands with temperature, and a tank filled with zero air space can push fuel out through the vent as the garage warms up on a sunny day.
What you’re actually trying to eliminate is the large air gap in a mostly empty tank, since that’s where moisture-laden air condenses on bare metal walls; a nearly-full tank does that job without needing to be filled past the point of leaving any expansion room at all.
Add fuel stabilizer at the ratio on the bottle, then run the engine for 5 to 10 minutes so treated fuel actually reaches the injectors or carburetor rather than sitting untreated in the tank while treated fuel never makes it past the fuel line.
Stabilizer slows oxidation and phase separation for months, generally cited around 12 months by most manufacturers, but untreated fuel can start breaking down within 30 to 60 days, so don’t skip it even for a shorter storage window.
For picking one, here’s what actually works as a motorcycle fuel stabilizer, and how long stabilized fuel actually stays good before you assume last season’s treated tank is still fine.
If your bike is carbureted, there’s an extra step, and it’s not optional even though some advice frames it as a choice. Treating the tank and draining the float bowls both matter, they’re not alternatives to each other.
Stabilized fuel protects the tank; it doesn’t fully protect the tiny passages inside a carburetor, where even treated fuel can leave varnish deposits over months of sitting still. Shut the petcock off and let the engine run until it stalls out on its own, which empties the bowls, after you’ve already run stabilized fuel through the system.
Here’s how carbureted and fuel-injected systems actually differ if you’re not sure which one you’re working with; fuel-injected bikes skip the float-bowl step entirely since they don’t have one.
Step 4: Lubricate the Chain and Moving Parts
Dry chains rust, and dry cables and pivot points bind up over a season of sitting untouched. Clean the chain with degreaser first, then apply fresh lube, and here’s the full process if you want to do it right, including which cleaners are safe for O-ring seals.
Hit the throttle, clutch, and brake cables with a cable lubricant, grease the kickstand and lever pivots, and wipe a light coat of oil on the fork stanchions to protect the chrome. Roll the bike forward and back after lubing the chain so the lube distributes along the entire loop rather than sitting only where you applied it.
Step 5: Manage the Battery Properly
You’ve got two reasonable options: leave the battery installed and connect a smart tender directly to the terminals, or remove it and store it indoors at room temperature, connected to a tender there instead. Either way, the tender needs to be “smart,” meaning it monitors voltage and only charges when needed, since a basic charger left connected indefinitely can overcharge and damage the battery instead of protecting it.
Clean the terminals with a wire brush and coat them with dielectric grease before you walk away for the season. If this has bitten you before, here’s what to do about a battery that died over winter, and how to avoid a repeat.
Step 6: Get Weight off the Tires
A tire holding the bike’s full weight in one position for months compresses that contact patch, and the rubber doesn’t always spring fully back, leaving a flat spot that causes vibration at speed until it wears back round, if it ever fully does. Best option: a front and rear paddock stand that lifts both wheels completely off the ground.
Reasonable fallback: your center stand if the bike has one, which at least gets the rear wheel up. If neither is available, overinflate 5 to 10 PSI above spec and roll the bike forward every 2 to 3 weeks to shift the contact patch to a different spot.
If you’re storing on bare concrete, put plywood or carpet under the tires either way, since cold concrete draws moisture that accelerates rubber degradation faster than a drier surface would.
Step 7: Block the Exhaust and Intake
Rodents look for warm, enclosed spaces once temperatures drop, and an exhaust pipe or airbox looks exactly like what they’re after. Stuff steel wool or a muffler plug into the exhaust outlet, cover the air intake with a plastic bag secured by a rubber band, and tuck dryer sheets into the airbox, under the seat, and in any saddlebags, since the scent is a genuine, cheap deterrent.
Write yourself a reminder to pull all of this before you start the engine in spring; forgetting steel wool in the exhaust makes for a rough, smoky surprise on the first start.
Step 8: Cover It Properly
A breathable, purpose-built motorcycle cover, not a plastic tarp, is the last layer. Breathable fabric lets condensation escape instead of trapping it against the paint and chrome, and a cover with UV resistance protects against fading even in a garage with a window. Look for a snug fit with tie-down grommets or an elastic hem so wind doesn’t work it loose over a season.
Skip the tarp entirely; it traps moisture underneath, abrades paint as it shifts in the wind, and tends to shred in a real storm rather than protect against one.
Indoor vs Outdoor Storage
| Factor | Garage or shed | Climate-controlled unit | Outdoor with cover |
|---|---|---|---|
| Rust risk | Low | Very low | High |
| Temperature stability | Moderate | Excellent | Poor |
| Security | Moderate | High | Low |
| Cost | Free, if you have the space | Roughly $50–100/month | Free |
| Recommended for | Most riders | High-value bikes, no garage access | Last resort only |
If outdoor storage is genuinely your only option, here’s what that actually requires beyond just a cover, including finding a covered area to block direct rain and snow, waterproofing electrical connections, and checking weekly rather than monthly for pooling water or a cover that’s come loose.
An Easy Way to Save Money While It’s Parked
Most insurers offer a reduced-rate policy, sometimes called comprehensive-only or a layup policy, for months you’re not riding, since it drops the liability and collision coverage you don’t need on a bike that isn’t moving while keeping theft and weather protection in place.
It’s worth a call to your provider before the season starts; the savings are real and the process usually takes a few minutes.
Five Mistakes That Undo Good Winterization
Starting the engine periodically “to keep things lubricated.” A short idle that never reaches full operating temperature does the opposite of what people intend. Combustion creates moisture, and without enough heat and runtime to fully evaporate it, that moisture condenses inside the crankcase and exhaust and accelerates the corrosion you were trying to prevent. Either ride long enough to fully warm the engine, or leave it alone until spring.
Draining the tank instead of filling it. This used to be common advice, and it’s backwards for modern fuel. An empty tank gives moisture-laden air more room to condense against bare metal walls than a nearly full, stabilized tank does.
Using a tarp instead of a real cover. Plastic traps moisture and abrades paint in the wind. A proper breathable cover costs $40 to $80 and prevents damage that costs far more to fix.
Forgetting the battery. A battery left with no tender and no monitoring can fully discharge within 30 to 60 days, and full discharge risks sulfation that permanently reduces capacity, on top of the freeze risk covered above.
Storing it dirty. Grime and road salt don’t go dormant under a cover. They keep working on paint, chrome, and bare metal for as long as they’re in contact with it, which is the entire storage period if you skip the wash.
Getting Ready for Spring
Before the first ride, run through a real pre-ride check rather than just starting the bike and heading out: battery voltage (should read 12.6V or higher) and clean terminals, tire pressure and a look for flat spots or cracking, fluid levels including oil, coolant, and brake fluid, and a function check on lights, signals, and both brakes, which may feel soft initially before use restores full response.
Pull every blockage you installed in step 7 before starting the engine, and take a short, low-speed test ride before returning to normal riding, since tires that sat all winter need a few miles to fully warm and regain their normal grip.
Here’s the complete post-storage maintenance rundown if you want the fuller version beyond this checklist.
Bottom Line
Every step here targets one specific way an idle motorcycle fails, not a generic “just to be safe” ritual. Get the fuel level and battery care right in particular, since those are the two most misunderstood steps and the two most common sources of an expensive spring surprise. For the bigger-picture decision of whether to store at all versus riding through winter, here’s the fuller comparison.
FAQs about How to Store Motorcycle for Winter
How long can a motorcycle sit without starting?
A properly winterized bike is generally fine for 4 to 6 months. With a tender and stabilized fuel maintained correctly, storage up to about 12 months is reasonable; beyond that, seals and fluids start to matter more.
Should I fill the tank completely for storage?
Fill to roughly 90–95%, not to the absolute brim. Some room for fuel to expand with temperature matters; a completely full tank can push fuel out through the vent as it warms.
Does cold weather speed up battery self-discharge?
No, it actually slows it. What cold does do is temporarily reduce the battery’s available cranking power, and a battery that’s already discharged is more vulnerable to freezing, which is the real cold-weather risk a tender protects against.
Do I need to drain the float bowls on a carbureted bike?
Yes, in addition to treating the tank, not instead of it. Stabilized fuel protects the tank, but it doesn’t fully protect the small passages inside a carburetor from varnish over months of sitting.
How often should I check on a stored motorcycle?
Roughly monthly for indoor storage, weekly if it’s stored outdoors, checking for fluid leaks, rodent activity, cover condition, and tire pressure loss.
Do I need to change the oil again after winter storage?
If you changed it right before storage and the bike sat 3 to 4 months, a spring change is optional. Past about 6 months, changing it again in spring is the safer call.