
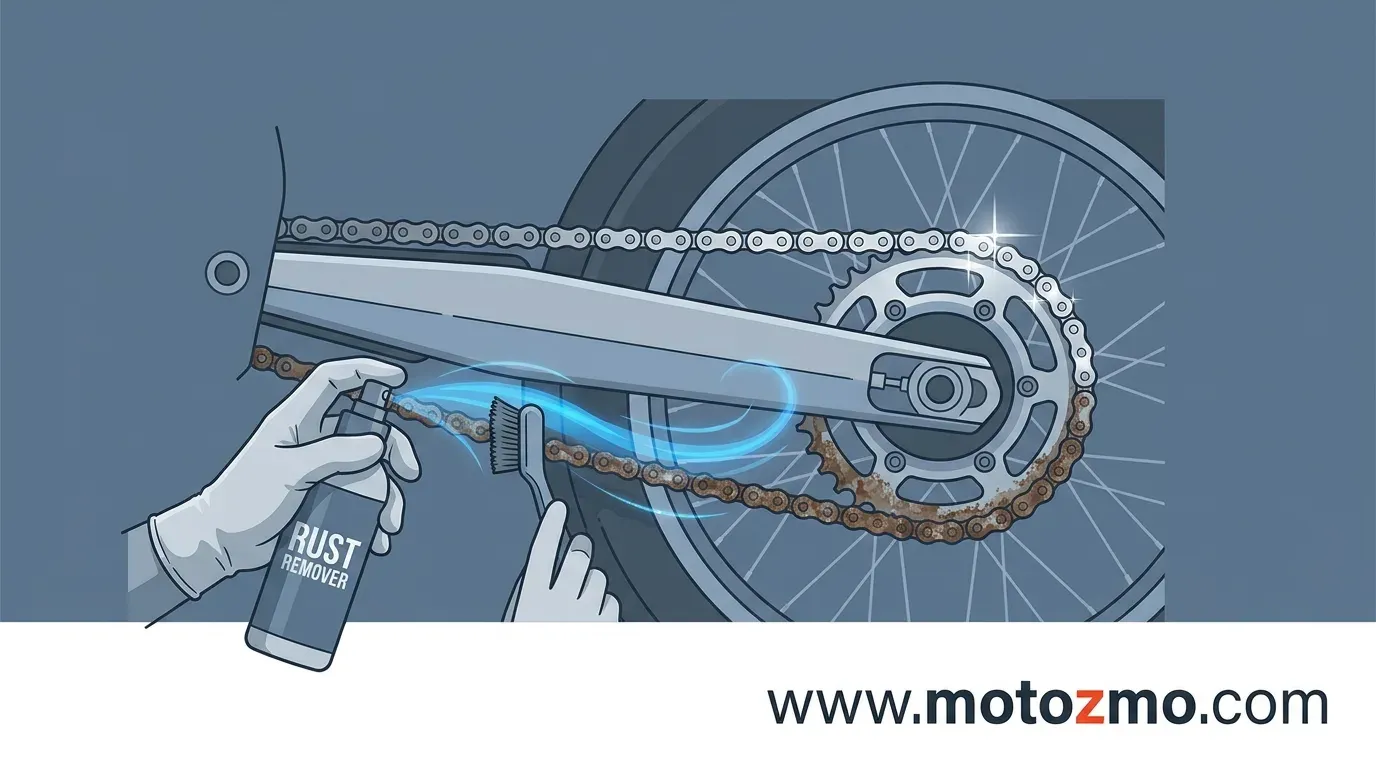
Check what kind of chain is hiding under that rust before you touch a wire brush. Most street bikes built in the last few decades run an O-ring, X-ring, or Z-ring chain, sealed with rubber rings that hold grease inside the pins and bushings, and the wrong cleaning method can tear through those seals faster than the rust itself ever would. That one check changes almost every decision that follows, from which brush belongs in your hand to whether WD-40 belongs anywhere near the chain at all.
If your chain is also skipping or running loose along with the rust, that’s a separate problem worth reading up on in our guide to chain skipping and slack; this one is about the rust itself, sealed chains and open chains both, and how to tell early surface rust from a chain that’s already done.
The Diagnostic Check: Can This Chain be Saved?
How do you know if rust has progressed enough that the chain must be replaced instead of cleaned? It comes down to physical movement and metal integrity.
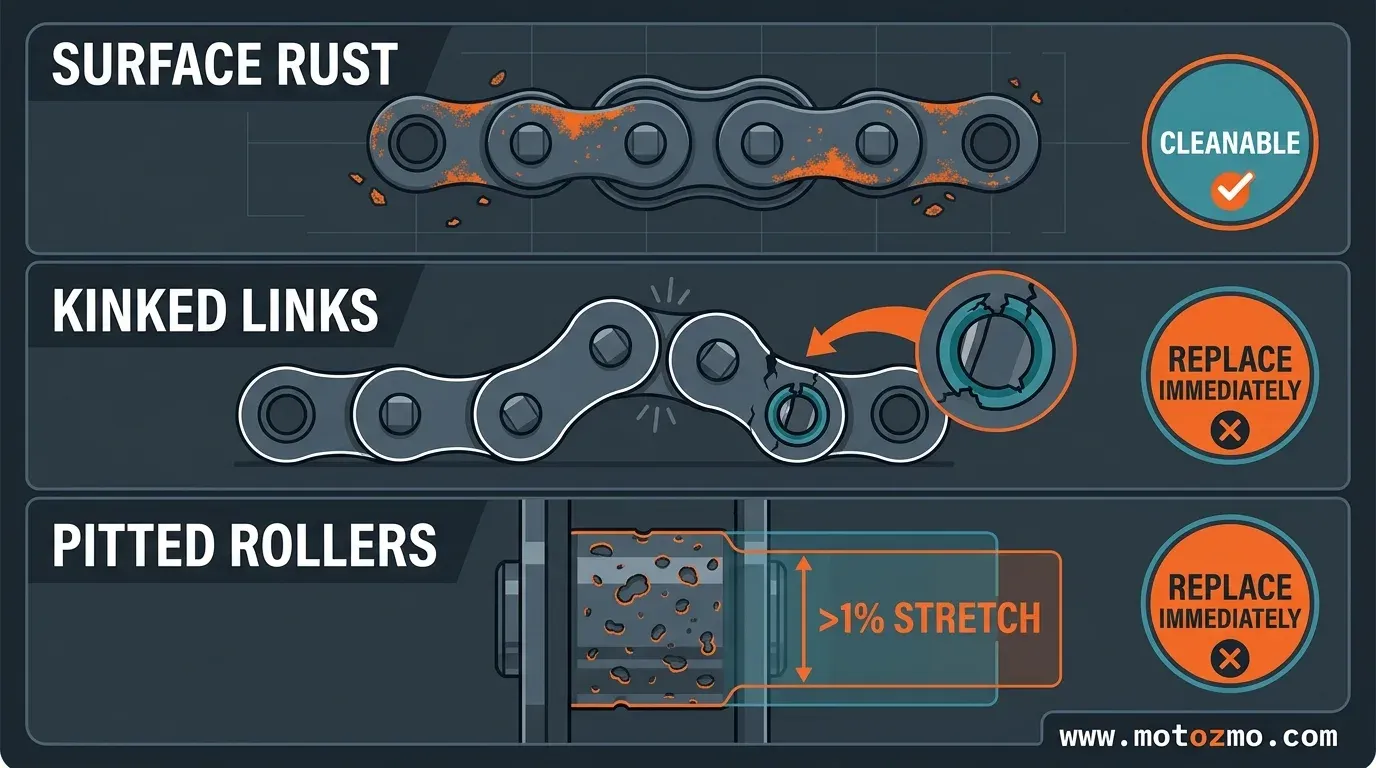
Clean the chain if:
- The rust is a light orange powder on the outer side plates.
- Every link pivots smoothly when you rotate the rear wheel.
- The chain tension remains uniform throughout a full rotation.
Replace the chain if:
- You find “kinks” or stiff links that remain locked at an angle even after a thorough cleaning.
- You see deep, dark pitting eating into the metal rollers.
- The rubber seals are cracked, missing, or hanging out of the links.
- You measure uneven tension (the chain gets very tight, then very loose) as you spin the wheel.
If your chain exhibits those severe symptoms, cleaning it is a waste of time. The Motorcycle Safety Foundation (MSF) explicitly warns that riding on a deeply compromised drive chain creates a severe safety hazard, as a snapped chain can lock the rear wheel or shatter the engine case.
If you’ve landed on the replacement side of that line, replace the sprockets along with the chain rather than pairing new links to worn teeth. A matched chain and sprocket kit is the straightforward way to buy both at once and skip the mismatch.
Step 1: Figure out What Kind of Chain You Have
Look at the outer edge of each link, right where the side plates meet.
See small rubber rings, or an X-shaped seal pressed between the plates? That’s a sealed chain: O-ring, X-ring, or Z-ring. All three do the same basic job. They keep grease locked inside the pins and bushings and keep water and grit out, they just use slightly different seal geometry to do it.
The differences matter more for your day-to-day cleaning and lubing routine than for a one-time rust job, and we get into that in our O-ring vs X-ring breakdown, but for rust removal, all three share the same rule: rubber seals that aggressive brushing or the wrong solvent will damage.
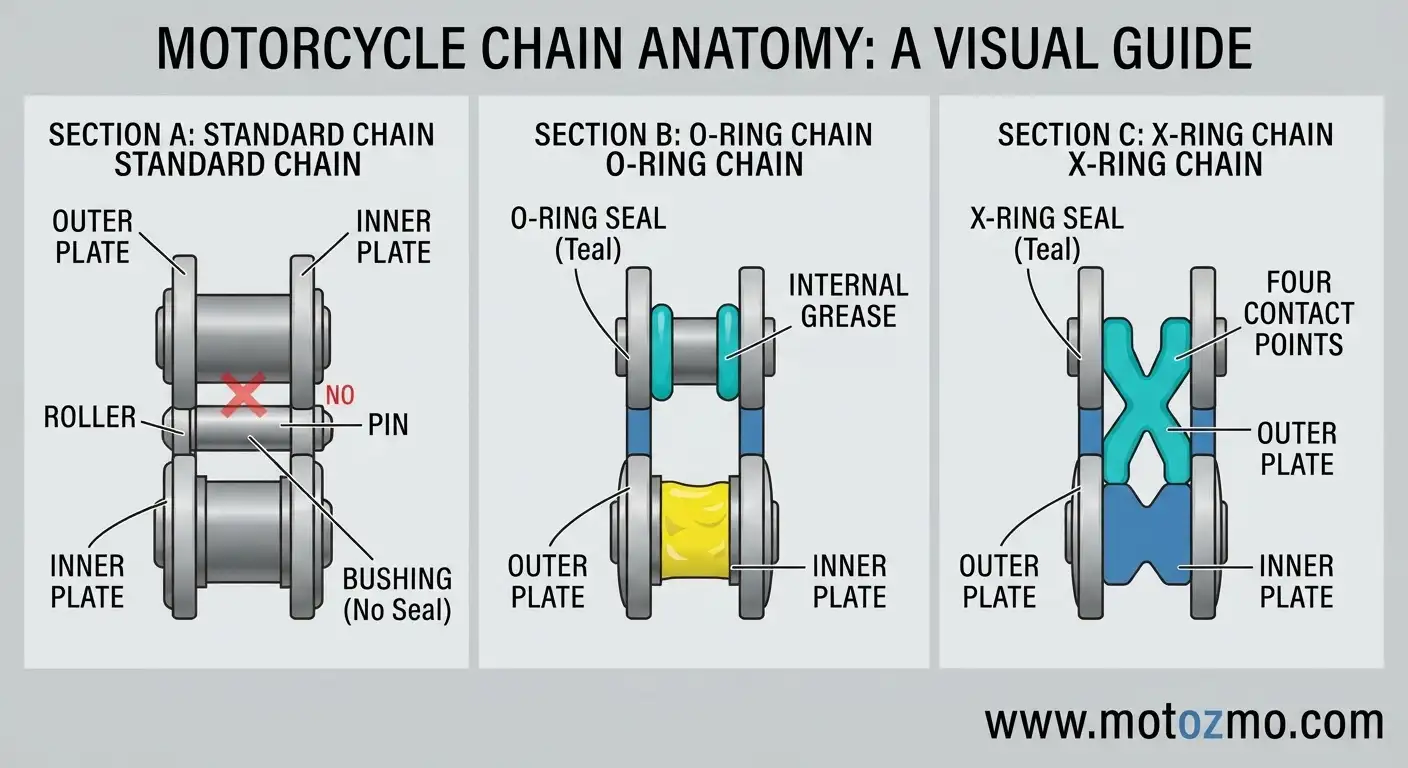
No visible seal at all? You’ve got a non-sealed chain. These show up less on street bikes these days but still turn up on some dirt bikes and older machines, and they give you a lot more room to be rough with your cleaning method.
Step 2: Get the Bike up and Your Gear Ready
Working on a chain is far easier with the rear wheel off the ground and free to spin. A bike stand, the kind that clamps or straps to the frame, lifts the wheel clear so you can rotate it by hand and reach the whole chain instead of working blind on whatever section happens to be at the bottom. If you’re building out a home toolbox anyway, our rundown of tools every motorcycle owner should carry covers a stand along with everything else worth having on hand.
Grab safety glasses too. You’ll want them for the next step no matter which chain type you have.
Step 3: Clean Rust off a Sealed Chain without Wrecking the Seals
Skip the wire brush entirely here. It doesn’t just scuff the rubber, it can tear straight through it, and once a seal’s gone the grease packed inside starts leaking out while water and dirt work their way in. A soft nylon brush handles surface rust just fine without that risk.
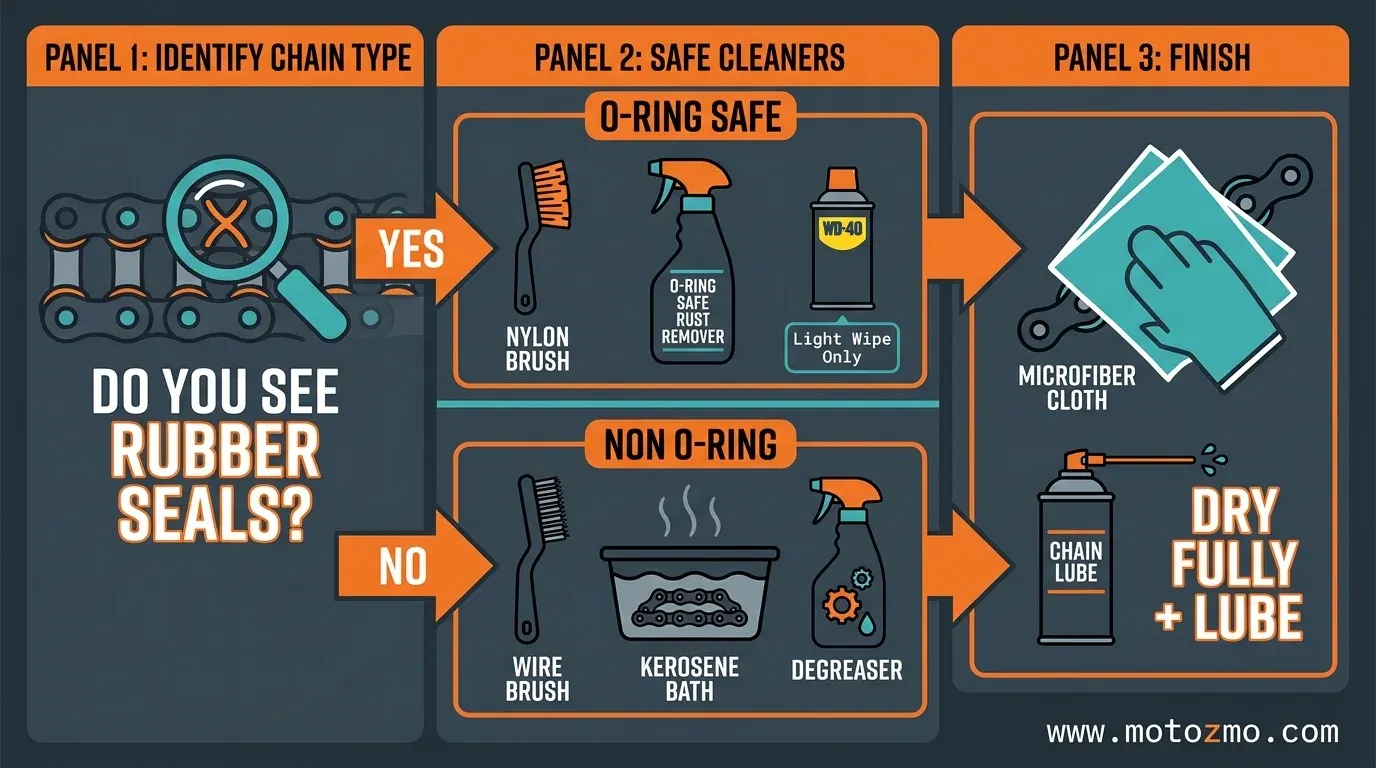
WD-40 is where this gets genuinely debated. It’s a real solvent and penetrant, and WD-40’s product pages explain how its penetrant formulas work: a light petroleum solvent breaks the bond between rust and metal, then a thin oil film left behind lets the freed parts move again. That’s useful for a quick pass. It isn’t a substitute for a proper O-ring-safe chain lubricant, and repeated heavy soaking has more chance of thinning the grease packed behind your seals than a light wipe-down does. If you use it at all, keep it brief, skip the soak, and follow up right away with a lube built for sealed chains.
For rust that’s more than a light haze, a dedicated rust remover beats solvent and elbow grease. We’ve run Rust-911 head to head against Evapo-Rust and also compared Evapo-Rust against a plain vinegar soak if you’d rather try something from the kitchen first.
Either dedicated product is formulated to be rubber-safe, and a short vinegar soak generally is too, unlike an aggressive solvent bath that can strip the grease your seals are supposed to hold onto.
| Method | Safe on sealed (O-ring/X-ring/Z-ring) chains? | Best for |
|---|---|---|
| Soft nylon brush | Yes | Light surface rust, routine cleaning |
| Wire brush | No | Non-sealed chains only |
| WD-40, brief wipe | Use with caution | Loosening light rust before a proper clean |
| WD-40, soaking | No | Avoid on sealed chains |
| Dedicated rust remover (Evapo-Rust, Rust-911) | Yes | Moderate rust, rubber-safe soak |
| Kerosene bath | No, on sealed chains | Non-sealed chains only |
Step 4: Clean Rust off a Non-Sealed Chain
Confirmed no rubber seals? You’ve got more room to work with. A wire brush is fine here, just wear those safety glasses. Brushing off rust throws small metal particles, and you don’t want one finding your eye.
A degreaser, a dish soap solution, or a kerosene bath will loosen grime before you scrub, and there’s no seal underneath to worry about damaging. Work the brush into each roller rather than just skimming the outer plates, that’s where the rust actually hides. If you’d rather skip the DIY soak entirely, a dedicated chain cleaner does the same job in one product.
Step 5: Rinse, Dry, and Lubricate Before You Ride
Rinse whatever method you used off completely and dry the chain all the way through. Any moisture left behind, especially down inside a sealed chain’s links, invites the exact rust you just cleaned off to come right back within days.
Lubrication isn’t optional, and skipping it is how a freshly cleaned chain turns rusty again in a couple of weeks. Sealed chains need a lubricant specifically labeled safe for O-ring, X-ring, or Z-ring use. A generic all-purpose oil isn’t built for the job and can degrade the same seals you just protected. Riders who spend a lot of time in wet weather tend to reach for an all-weather chain lube, while commuters who’d rather not scrub lube spatter off their rear wheel every week usually prefer a lube built to resist flinging off.
Keeping Rust from Coming Back
A clean, properly lubed chain resists rust far better than one that only gets attention once it starts looking bad. D.I.D’s maintenance guidance puts a number on this too: wipe the chain down every 300 miles or so (about 500 km) to keep surface rust from getting a foothold, more often if you’re riding through rain or dust, and check your owner’s manual for the exact interval your bike calls for.
It’s worth protecting the rest of the bike’s exposed metal the same way. An anti-corrosion spray on fasteners and other bare metal deals with the same moisture and road salt that caused the chain rust to begin with.
Bottom Line
Know what kind of chain you’re working on before you pick up a brush. Sealed chains need a gentler touch and real caution around solvents, non-sealed chains give you room to be rougher. Either way, a full rinse, a complete dry, and the right lubricant afterward is what actually keeps the rust from coming back, not the cleaning method you used to get rid of it this time.