
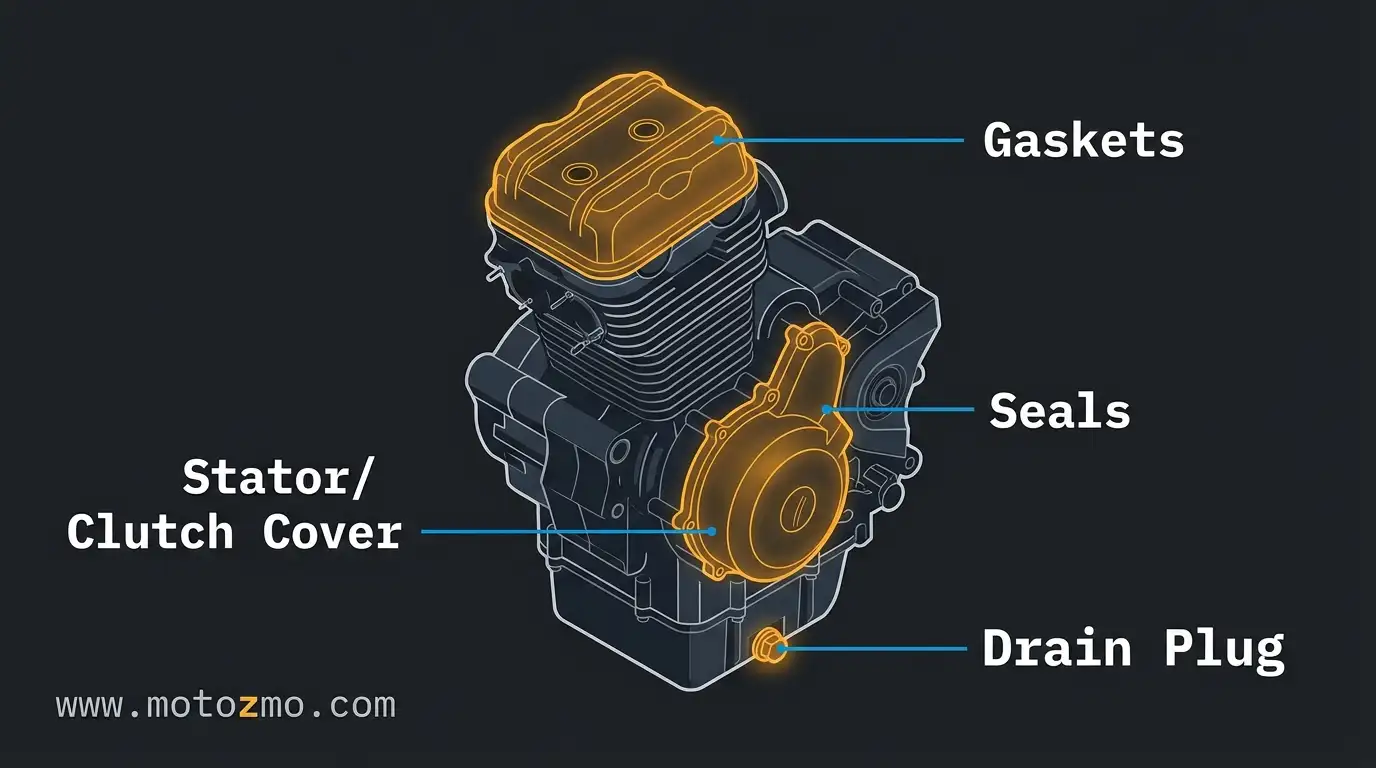
Where the oil shows up tells you almost everything. Oil pooling on top of the engine usually means a gasket. A wet spot right under the drain bolt, especially right after an oil change, means the drain plug or its washer. Oil near the front sprocket or flung onto the chain indicates to a seal.
This is a companion piece to our full guide on motorcycle oil leaks and burning oil, and it goes deeper into one specific question: once you know it’s a leak and not something burning inside the engine, how do you actually pin down which part is failing before you buy parts you don’t need?
Start with Location, Not Guesswork
Oil runs downhill once it escapes, so the wet spot you actually see isn’t always where the oil started. Trace upward from the lowest wet point and you’ll usually land close to the real source within a couple of inches.
| Where you see it | Most likely source | How to confirm |
|---|---|---|
| Top of the engine, on or near the valve cover | Valve cover or cylinder head gasket | Wipe it dry, run the engine a few minutes, and check if it weeps back in the same spot |
| Bottom of the engine, right after an oil change | Drain plug or its crush washer | Check whether the plug is torqued to spec and the washer is new, not reused |
| Side of the engine, around the clutch or stator cover | Clutch or stator cover gasket | Wipe it dry, then check for wetness spreading from the cover’s edge after a short ride |
| Near the front sprocket, oil flinging onto the chain | Countershaft (output shaft) seal | Wipe the sprocket cover dry and look for oil around the seal lip after riding |
| Around the oil filter, sometimes reaching the rear tire | Oil filter seal | Check whether the filter was over- or under-tightened at the last oil change |
The Clean and Trace Method, for When It Isn’t Obvious
If the leak is small or the engine’s already grimy, guessing from a distance won’t get you far. This is the same basic method mechanics use, and it works just as well in a home garage.
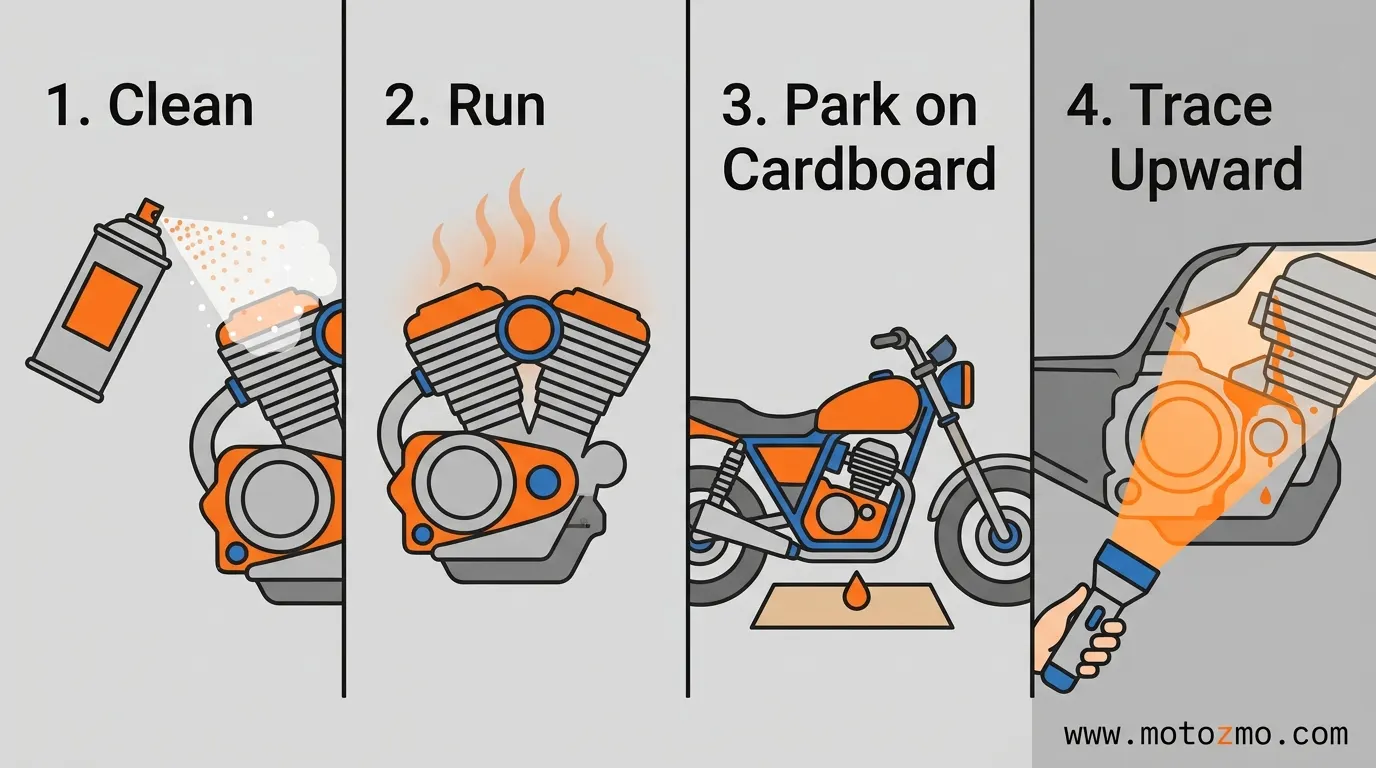
- Clean the whole lower engine with degreaser and let it dry completely. Any old residue will confuse the next step.
- Start the bike and let it idle for a few minutes, or take a short ride if the leak only shows up once the engine is hot.
- Park it on a clean sheet of cardboard or light-colored concrete and let it sit. The first wet spot to appear is your closest clue to the actual source.
- Shine a flashlight along the engine from the top down. Because oil runs downhill, the highest wet point you find is almost always nearer the source than the puddle underneath it.
For a leak that still won’t show itself after that, a UV dye kit is worth the money. You add the dye to the oil, ride the bike for a day or two to let it circulate, then check the engine under a UV light in a dark garage. According to YourMechanic, the dye glows brightly right at the source, which turns a leak that’s been driving you crazy into something you can point at in a couple of minutes.
Gasket Leaks
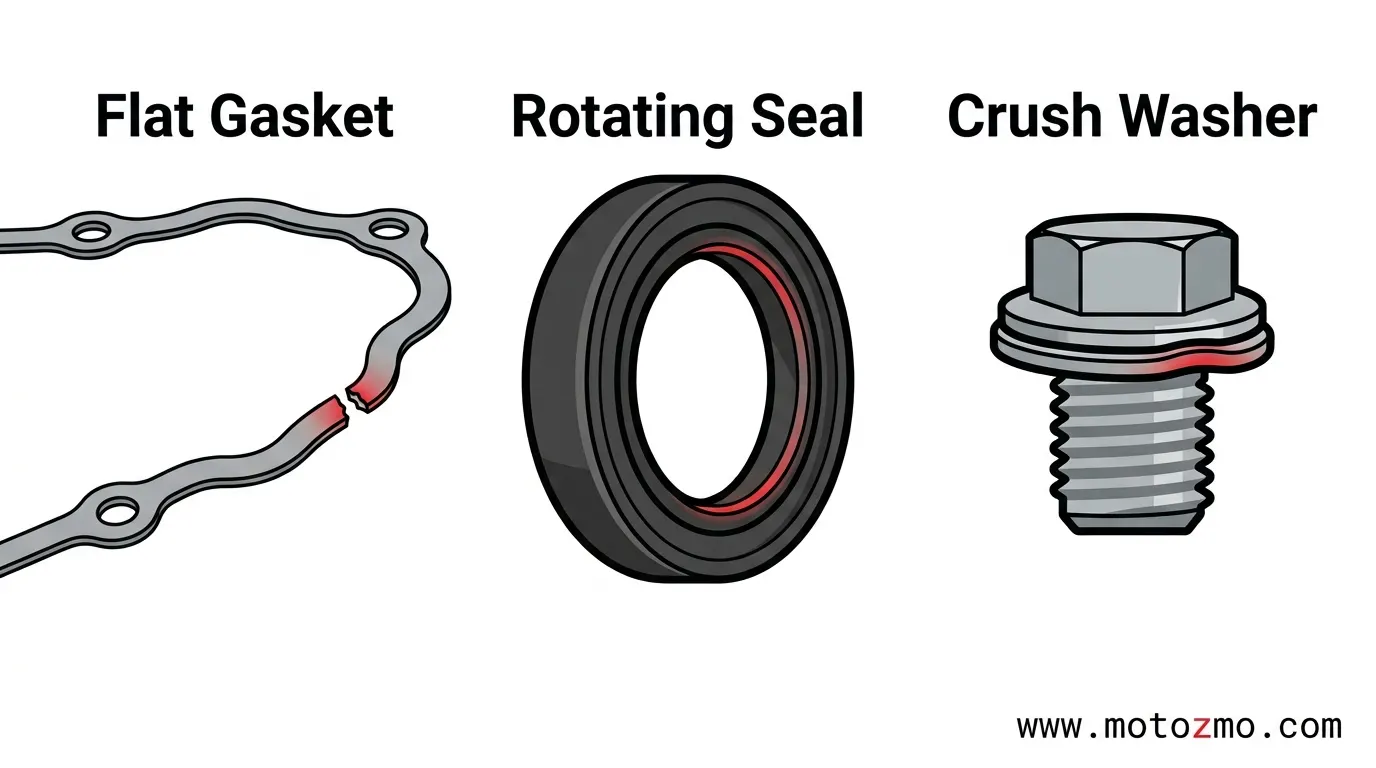
Gaskets seal the flat surfaces where two engine parts bolt together, mainly the valve cover, the cylinder head, and the clutch or stator covers on the sides of the engine. They dry out and shrink with age and heat cycles, so a gasket leak tends to show up gradually on an older or higher-mileage bike rather than appear overnight. It usually looks less like a drip and more like an oily film that spreads slowly around the edge of the cover.
Before you replace one, re-torque the bolts around it to spec first. Sometimes a gasket that’s still in decent shape just needs the cover snugged back down evenly.
If it’s worn out, a fresh gasket and a clean mating surface are usually all it takes, and for a weep that’s more annoying than serious, an oil stop-leak additive built for motorcycles can buy you time until you’re ready to do the job properly.
Drain Plug Leaks
This is the leak most riders create themselves, usually right after doing their own oil change. The drain plug seals against a crush washer that’s meant to be replaced every time, not reused. Reinstall the old one, or torque the plug down unevenly, and you’ll get a slow weep that shows up within the first few rides.
Check two things: is the washer new, and is the plug tightened to your bike’s actual torque spec, not just “tight.”
Overtightening doesn’t fix a leak, it strips the threads or crushes the washer past the point where it can seal, which turns a five-minute fix into a much bigger repair. If you want the exact torque figure and washer type for your bike along with the full oil change process, our guide to changing motorcycle oil walks through both.
Seal Leaks
Seals do the same job as gaskets but around rotating parts instead of flat joints, mainly the crankshaft and the countershaft that drives your front sprocket. A seal leak near the sprocket is worth taking seriously for a reason gasket leaks aren’t: that oil can end up flung onto your chain and, in worse cases, your rear tire, which affects both your chain’s lubrication and your grip.
Your chain looking oilier than usual lately? It’s worth checking the sprocket cover before you just assume it needs a clean and lube.
Seals are also the leak most likely to need a shop visit. Getting to a crankshaft seal usually means removing the sprocket, and sometimes more than that, so this isn’t the same afternoon job a drain plug washer is.
What Each One Costs to Fix
The gap between these three is bigger than most riders expect going in.
| Source | Typical difficulty | DIY or shop |
|---|---|---|
| Drain plug crush washer | Very easy, cheap part | DIY |
| Oil filter seal | Very easy, cheap part | DIY |
| Valve cover or side cover gasket | Moderate, some disassembly | DIY if you’re comfortable with basic tools |
| Crankshaft or countershaft seal | Harder, more disassembly | Usually a shop job |
SA1NT, which sells motorcycle gear, puts it simply from a rider’s-eye view: most minor leaks run a few hundred dollars or less to sort out, while a leak that’s turned into a real engine repair can run into the thousands. That gap is why it’s worth spending twenty minutes confirming the source before you order parts.
Are you assembling a basic kit to check torque and swap a washer yourself? Our rundown of essential tools every motorcycle owner should carry covers what gets used for jobs like this.
Not Sure It’s a Leak at All?
Everything above assumes oil is escaping from the outside of the engine. If you’re actually seeing blue-gray smoke from the exhaust with no puddle anywhere, that’s a different problem, oil burning inside the engine rather than leaking out of it, and it gets fixed a completely different way.
Our guide to motorcycle burning oil and blue smoke covers that side of it.
FAQ
How can I tell if it’s oil or coolant leaking?
Engine oil is amber to black and feels slick between your fingers. Coolant is thinner, often smells slightly sweet, and is usually green, orange, or pink depending on the brand. Wipe a bit onto a paper towel and check the color.
Can I just keep tightening the drain plug until it stops leaking?
No. Overtightening crushes the washer past the point where it can seal, or strips the threads in the case. Replace the crush washer with a new one and torque it to spec instead of cranking it down harder.