
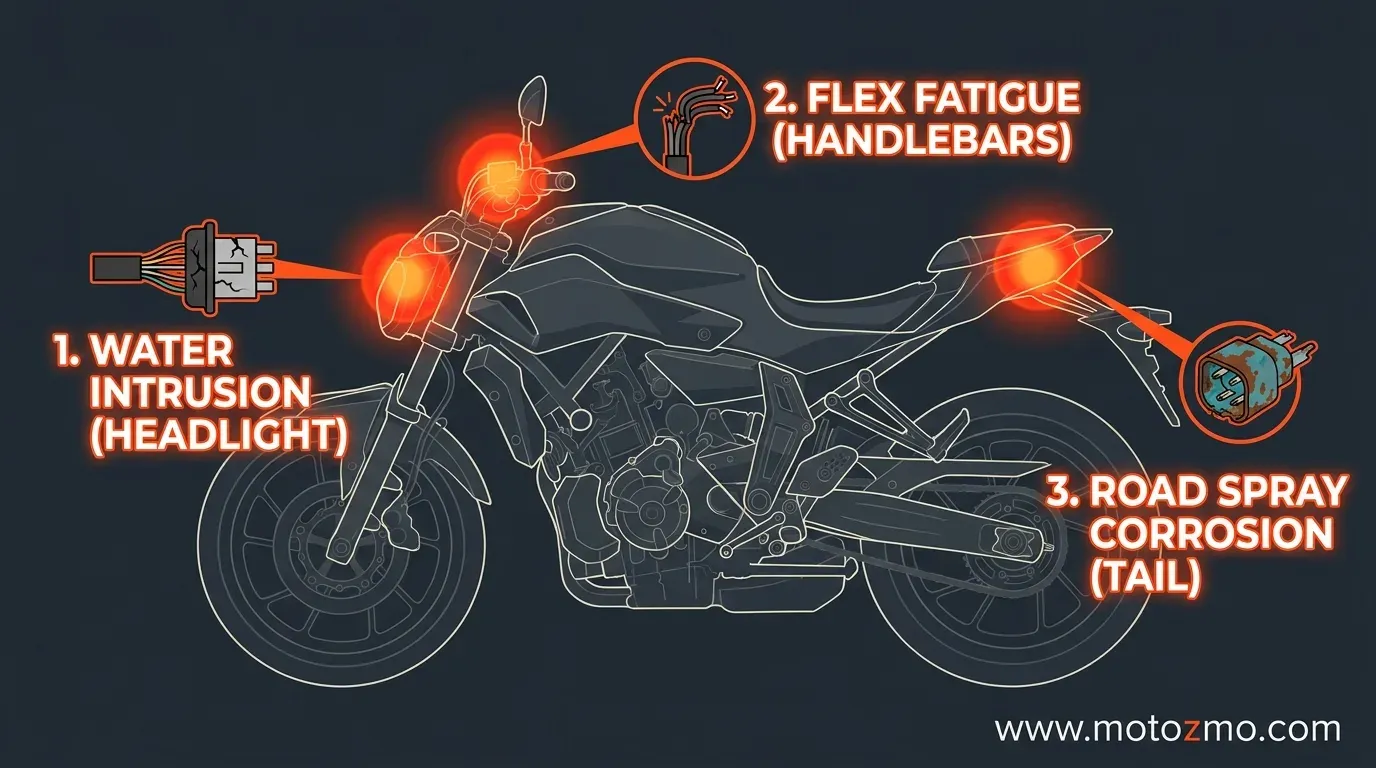
Three spots cause most motorcycle wiring failures: the headlight bucket, the handlebar switches, and the tail light. All three share the same problem, in a different form. They’re the places on the bike where wiring is asked to move, bend, or get wet more than anywhere else. Everywhere else on the bike, the harness is mostly bolted down and left alone. At these three spots, it isn’t.
This article covers why each one fails, what that failure looks like, and where to check first. For the full picture of wiring, grounds, and connectors on a bike, our full guide to wiring, grounds, and connectors is the place to start.
The Headlight Bucket: Where Everything Crowds into One Small Space
The headlight bucket is where the wiring from both handlebar switches, the headlight itself, and often the main harness all meet in one small housing. That’s a lot of connections packed into a space about the size of a coffee mug. Manufacturers seal the back of the bucket with a rubber grommet where the wires enter, specifically to keep rain and road spray out of that crowded space.
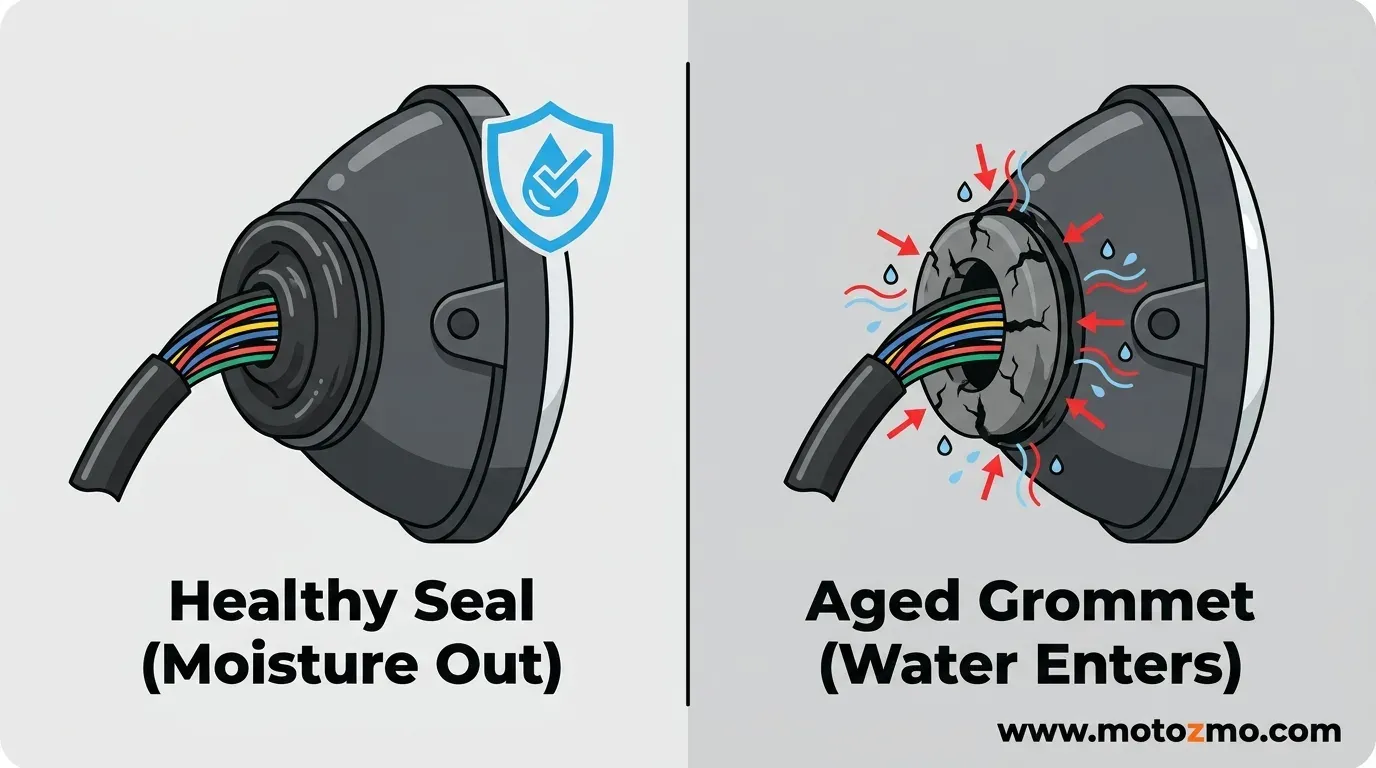
The problem is that the grommet doesn’t stay soft forever. Rubber hardens and cracks with age, sped up by years of sun and heat, and once it stops sealing properly, water gets into exactly the spot with the most connections packed together. That’s why a headlight bucket that was fine for a decade can start causing trouble all at once: the grommet crossed a line, not the wiring itself.
What to check: pull the headlight and look at the grommet where the harness enters. If it’s stiff, cracked, or doesn’t grip the wires snugly anymore, water has probably been getting in for a while, even if you haven’t noticed a symptom yet.
The Handlebar Switches: The Part of the Bike That Moves Every Single Ride
Every time you turn the bars, the wires running from the switches through the headstock flex along with them. On a normal ride, that’s hundreds of small bends before you’ve even left your street.
Bend a paperclip back and forth enough times and it snaps, even though one bend on its own wouldn’t hurt it. The copper wire inside a switch harness is going through the same kind of fatigue, just slower, and it tends to give out right where the flexible wire meets something rigid, like a connector or a solder joint inside the switch housing.
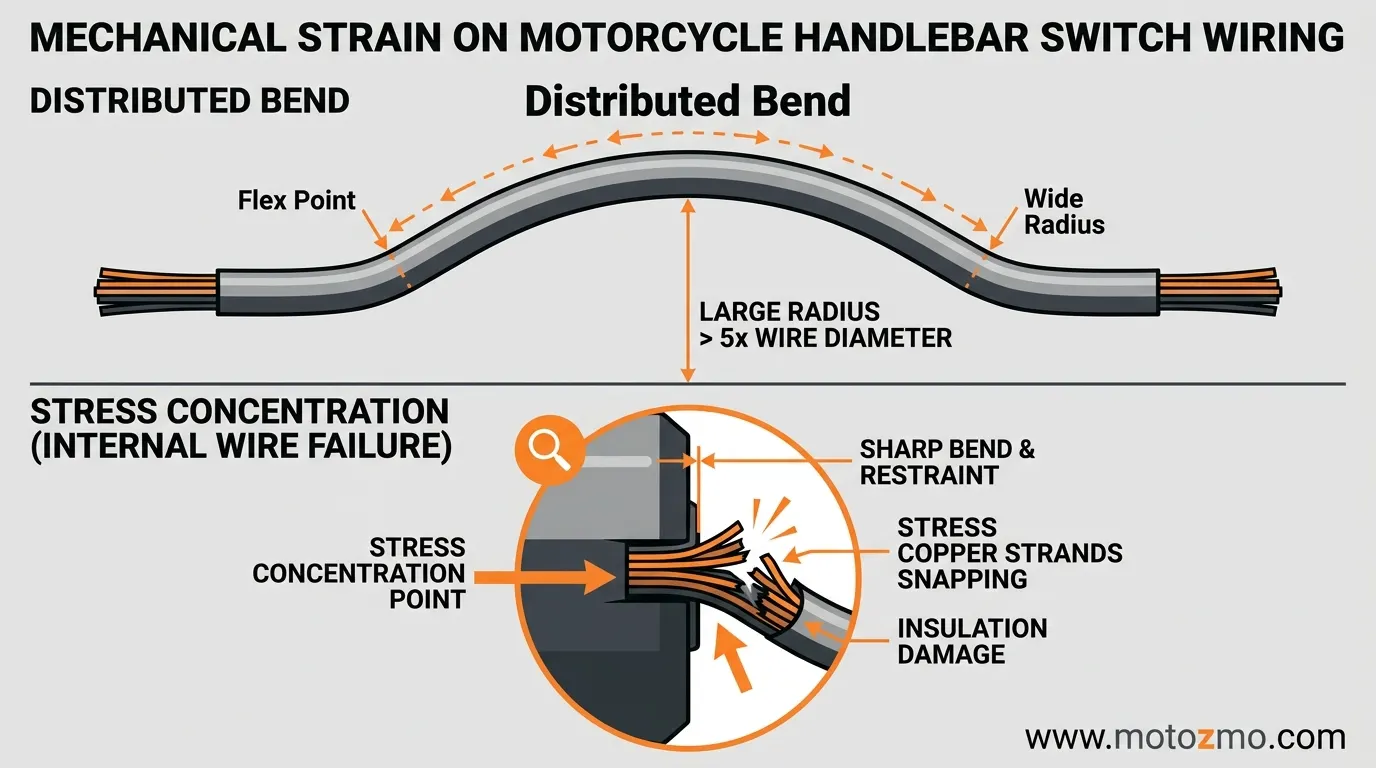
Cable manufacturer Gore’s technical documentation on flex fatigue explains that copper handles repeated bending poorly even when the stress on any single bend is small, which is exactly the situation a handlebar harness lives in for the life of the bike.
On top of that, the switch housings themselves are handled constantly and left out in the weather, so the metal contacts inside the switch, not the wire outside it, pick up dirt and corrosion over time.
What to check: a switch that works only in one position of the bars, or a wire that feels stiff or has a kink right where it enters the switch housing, points straight at this kind of fatigue.
The Tail Light and Rear Fender: The Farthest, Wettest, and Lowest Point on the Bike
The tail light sits at the end of the longest wire run on the bike, at the lowest point, and directly in the path of everything the rear tire kicks up. Any small amount of resistance anywhere along that run shows up here first, since it’s the last stop before the ground return. It’s also the spot road spray, mud, and salt reach hardest and most often.
The seal on the tail light lens is doing the same job as the headlight bucket’s grommet, protecting the bulb socket and connector behind it, and it fails the same way: hardening and cracking with age until moisture finally gets past it. A tail light that’s been fine for years can develop a corroded socket suddenly, once the seal that had been holding up quietly finally lets go.
What to check: pull the bulb and look at the socket itself for a chalky or greenish coating, and check the lens gasket for cracking or a loose fit.
| Location | Why it fails | What to check first |
|---|---|---|
| Headlight bucket | Grommet hardens and cracks, letting water into the busiest connection point on the bike | Condition of the rubber grommet where the harness enters |
| Handlebar switches | Wire flexes every time the bars turn, and the switch contacts sit exposed to weather | Wire condition where it enters the switch, and how each switch position performs |
| Tail light and rear fender | Longest wire run, lowest point, most exposed to road spray, and a seal that ages over time | Bulb socket for corrosion, lens seal for cracking |
Why a Small Amount of Corrosion Causes a Big Problem
None of these three spots need to look badly damaged to be the cause of a fault. Research on electrical contact corrosion published through AMPP, the international materials protection association, notes that the amount of corrosion product needed to cause a contact failure is exceptionally small, far less than what it takes to weaken a structural part.
That’s a different scale than most people expect. A film of corrosion too thin to easily see with the naked eye can still be enough to interrupt a low-voltage circuit like the ones running to your lights and switches, even while the same connector would look completely fine to anyone doing a quick visual check.
How to Check These Three Spots without Tearing the Bike Apart
- At the headlight bucket, pull the headlight shell and look at the grommet and the connections behind it, since this is usually a five minute job on most bikes
- At the handlebar switches, run each switch through every position while a helper watches the light or horn, feeling along the wire near the switch housing for stiffness or a kink
- At the tail light, pull the bulb and check the socket, then check the lens gasket for a snug fit
If you find a suspect connector or ground at any of these three spots, test it properly rather than assuming a clean look means it’s fine, and confirm it with the right tool once you’re ready to measure it.
Once anything is cleaned up, protecting the connection afterward is what keeps the same grommet or seal failure from causing the exact same problem again in a year or two. If a wire itself has fatigued and broken at the switch housing, that’s a repair job rather than a cleaning job.
Why Does This Cause a Fault That Comes and Goes, Instead of Something That Stops Working?
Because none of these three failures happen all at once. A grommet doesn’t go from sealed to failed overnight, a wire doesn’t go from fine to broken in one flex, and a seal doesn’t go from dry to soaked in one ride. Each one is a slow process that eventually crosses a line, and right up until it does, the connection can still work most of the time and only fail under the right combination of vibration, heat, or moisture. Why marginal connections act up in the first place covers that mechanism in more depth.
Could This be Causing My Engine to Cut out, Instead of My Lights?
Yes, if the kill switch or ignition wiring runs through one of these same handlebar switch housings, which it does on most bikes. A fatigued wire or a dirty contact right at that housing can cut ignition power for a moment instead of a light or horn. Our page on an engine that cuts out is worth a look if that matches what you’re seeing.
Do All Three of These Spots Fail at the Same Rate?
Not usually. Handlebar switches tend to show wire fatigue earliest on high-mileage bikes, since they’re flexing constantly from day one. Grommets and seals are more about age and sun exposure than mileage, so a low-mileage bike that’s spent years parked outside can have a failed headlight grommet or tail light seal well before the wiring itself shows any wear.
Will Replacing the Bulb Fix a Corroded Socket?
No, and it can make the corrosion worse temporarily, since removing and reinserting a bulb into a corroded socket often scrapes it further. Clean the socket back to bare metal first, and only then reinstall the bulb.
These three spots aren’t a coincidence. They’re the only three places on a typical bike where wiring has to move, sit exposed, or rely on a seal instead of running along the frame. Check them in that order, and you’ve covered the source of most electrical faults before you’ve touched a wiring diagram.