
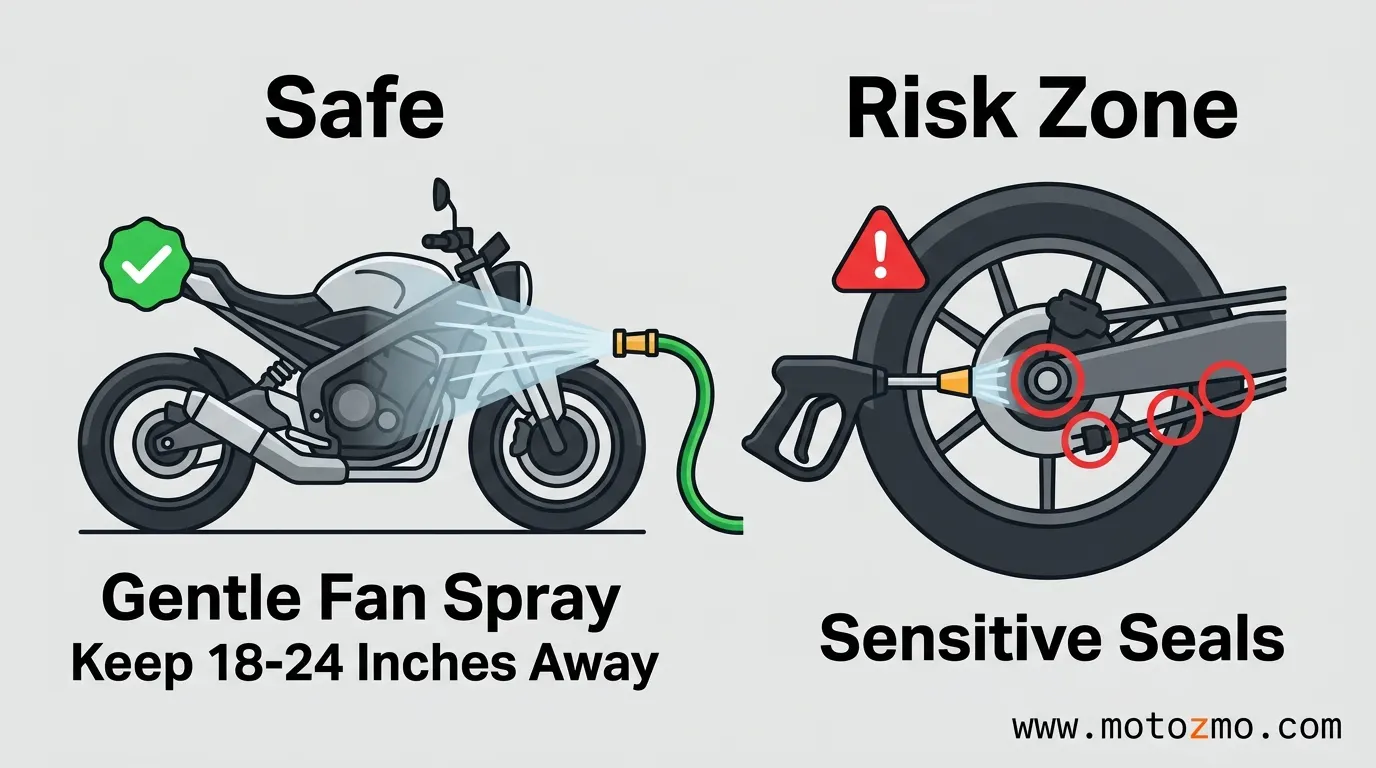
You can wash a motorcycle safely with a garden hose, a soft wash mitt, and a soap made for motorcycles, as long as you never aim strong water pressure at a seal, a bearing, or an electrical connector. A hose on a gentle setting is enough for most bikes, most of the time. If you do reach for a pressure washer, keep it under roughly 1,200 PSI and hold the nozzle at least 18 to 24 inches away from anything with a seal or a plug on it.
The damage that ruins a bike almost never comes from water by itself. It comes from water forced into a spot that was built to survive rain, not a direct blast from six inches away. That makes washing a motorcycle a different job from washing a car: a bike has far more exposed parts sitting right at the surface, from wheel bearings to an O-ring chain that depends on tiny rubber seals to keep its grease where it belongs. Here’s how to get your bike properly clean without turning a ten-minute wash into a repair bill.
What You Need Before You Start
You don’t need much. A garden hose with an adjustable nozzle, two buckets (one for soapy water, one for rinsing your mitt), a soft wash mitt or sponge, a couple of soft brushes for wheels and tight spots, a few microfiber towels, and a soap made for motorcycles rather than dish soap or an all-purpose car shampoo.
Dish soap strips wax and sealant off paint, which leaves it exposed to the next round of sun and road grime. You’ll also want a degreaser for the engine and chain area, and something to plug the exhaust opening with, even if it’s a clean rag.
If you’d rather grab everything in one box instead of searching for each item, our motorcycle wash and detailing kit picks cover the basics without the guesswork.
Which Wash Method Fits Your Bike
Not every rider needs the same approach. What you’re washing off, and how often, changes what tool makes sense.
| Your situation | Best method | Why |
|---|---|---|
| Daily commuter on dry roads, light grime | Garden hose and hand wash | Low pressure keeps seals safe, and the bike isn’t caked in enough dirt to need more |
| Off-road or adventure riding, heavy mud | Low-pressure washer, wide fan nozzle, held well back | Packed mud in the wheels and around the swingarm needs more than a hose, but still needs distance control |
| Mostly parked, short rides, light dust | Waterless wash spray and a microfiber cloth | Barely enough grime to justify getting water anywhere near the seals |
| Coastal riding or salted winter roads | Quick hose rinse after every ride, full wash weekly | Salt speeds up corrosion on any part water touches, so frequency matters more than method here |
This lines up with the general advice in Harley-Davidson’s owner resources on washing a motorcycle, which points to pressure washers as one of the more common ways riders accidentally cause corrosion, and recommends a hose with an adjustable nozzle for most washes.
Washing the Bike Step by Step
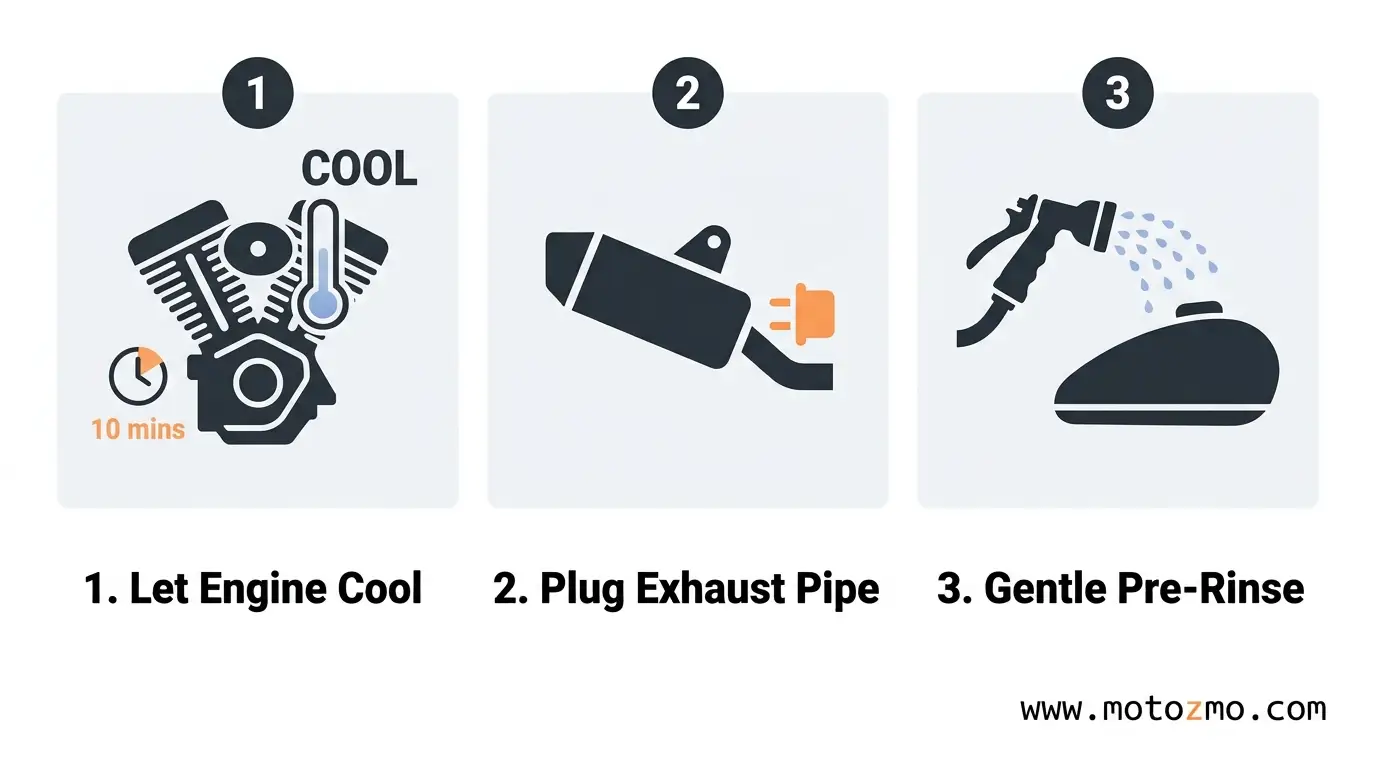
1. Let the engine cool for about 10 minutes. Cold water hitting a hot engine or exhaust can cause uneven expansion, which over time can warp metal or crack a header’s coating.
2. Cover or remove anything water shouldn’t reach. Plug the exhaust opening, tape over any exposed connectors or the ignition switch, and take the seat off if it’s a leather-covered one so you can clean it separately. If the leather is already cracked, faded, or peeling, this is also a good moment to check our guide to fixing and restoring a leather motorcycle seat before it gets wet again.
3. Pre-rinse from top to bottom. A gentle, low-pressure stream knocks loose grit off the surface before you start scrubbing, so you’re not grinding sand into the clear coat with your mitt.
4. Degrease the engine and chain area first. A proper engine degreaser does most of the hard work here, which means you don’t need to scrub hard enough to risk a scratch.
5. Wash from the top down with a motorcycle-specific soap. Working top to bottom means dirty water runs onto areas you haven’t cleaned yet, not ones you already finished. Change your rinse water when it gets visibly dirty.
6. Clean the chain by hand, not with a hose or pressure washer. Most modern chains use O-ring or X-ring seals that hold grease inside the links. Direct pressure can force that grease out, leaving the chain dry and noisy within days. Our chain cleaning and lubing steps cover the right way to do this without touching a pressure washer at all.
7. Rinse everything again, at a slightly lower pressure or greater distance than your wash. By this point the dirt is loose, so you don’t need to get close. Work top to bottom once more so soap doesn’t dry into streaks.
8. Dry it immediately with a microfiber towel or chamois. Pay attention to spots where water pools and hides: under the seat, around the fuel cap, and inside any fairing gaps. Left wet, these spots are where rust starts.
The Parts That Break If You Get This Wrong
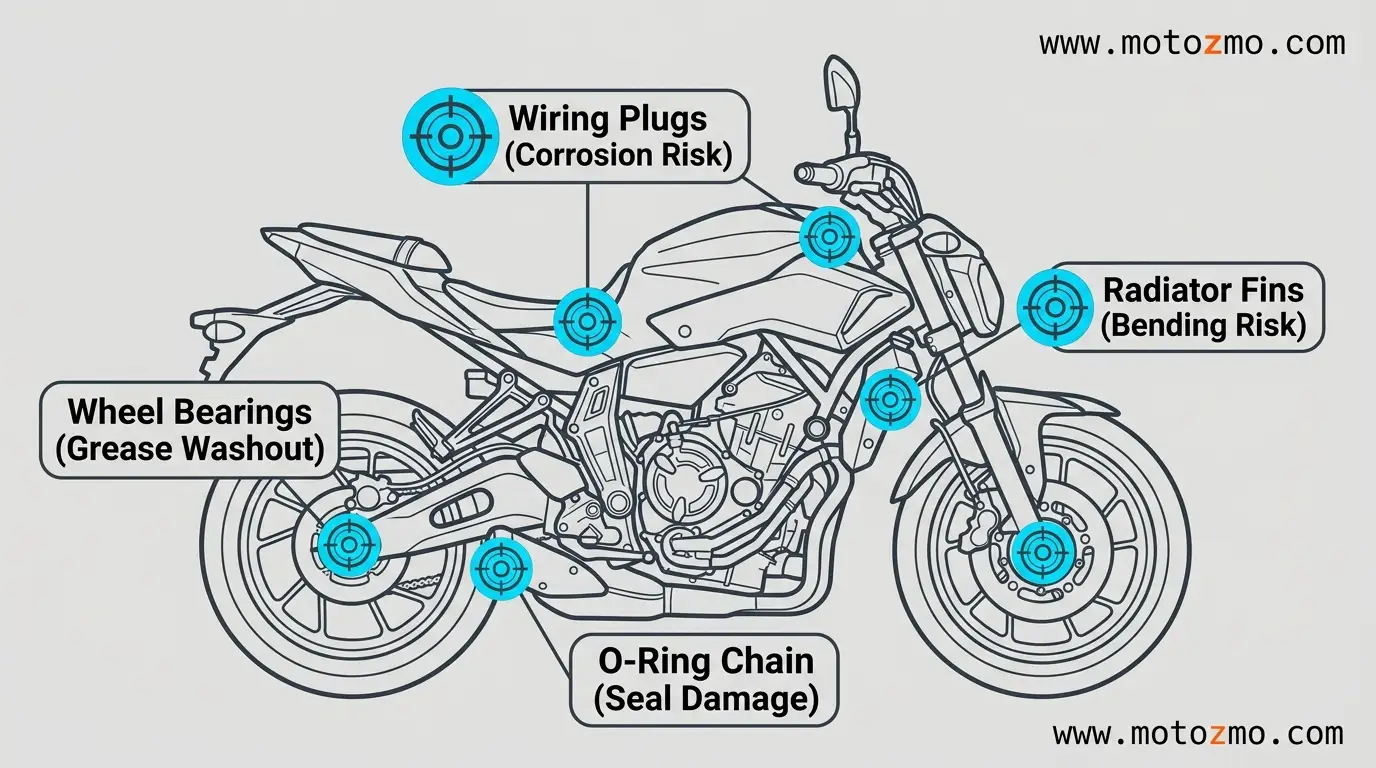
Every part on this list can handle rain. None of them are built to handle a jet of water aimed straight at them from close range.
| Part | What can go wrong | How to protect it |
|---|---|---|
| Wheel bearings and swingarm pivot | High pressure pushes past the seal, washes out the grease inside, and lets grit in | Keep any pressure washer at least 18 to 24 inches away, and never aim straight at a bearing seal |
| Wiring connectors, ignition switch | Water forced past a weatherproof seal (not a waterproof one) can short a connection or slowly corrode a contact | Cover connectors before washing; a light coat of dielectric grease afterward adds cheap insurance |
| O-ring or X-ring chain | Pressure blows grease out from inside the seals, and the chain wears out fast once it’s dry | Clean it by hand, never with direct high pressure |
| Radiator fins on liquid-cooled bikes | The aluminum fins are thin and bend flat under a close, direct blast, which blocks airflow | Rinse from a distance with a wide, gentle spray, never a narrow jet |
| Painted tank and fairings | Grit trapped in a dirty sponge scratches the clear coat while you’re scrubbing | Rinse first, use two buckets, and swap your cloth often |
How Often Should You Wash It
Washing more than you need to isn’t a problem for the bike, as long as you’re doing it the safe way. It just costs you time. Washing too rarely is the real risk, because grime holds moisture against metal and paint, which speeds up corrosion instead of preventing it.
| Riding conditions | How often |
|---|---|
| Dry pavement, occasional weekend rides | Every 2 to 3 weeks, or when it visibly needs it |
| Daily commuting on dry roads | Weekly |
| Rain, mud, or dirt road riding | After every ride, at least a quick rinse |
| Coastal riding or salted winter roads | Rinse after every ride, full wash weekly |
Protecting What You Cleaned
A clean bike doesn’t stay clean or protected on its own. Once it’s fully dry:
Apply chain lube once the chain is completely dry, not while it’s still damp, since lube on wet chain traps moisture instead of protecting the rollers.
A wax or ceramic coating on the paint and tank makes your next wash faster, since dirt has less to grip onto, and it adds UV protection the factory clear coat doesn’t have.
An anti-corrosion spray on exposed bolts, fasteners, and the underside of the seat matters even more if you ride somewhere wet or salted, since that’s where rust starts first.
If the bike is going to sit outside before your next ride, a good outdoor motorcycle cover keeps the work you just did from undoing itself in the next rain shower or dust storm.
Signs You Already Caused Water Damage
If your bike cranks but won’t start, or the electrics act up only sometimes right after a wash, water likely got somewhere it shouldn’t have. Our guide to intermittent electrical problems walks through how to track that down, starting with the connectors you may have missed covering. A chain that turns dry and noisy within a few days of a wash means it got hit with direct pressure. A quick clean and re-lube fixes it if you catch it early, but repeated pressure blasts will shorten the chain’s life for good.
Washing your bike regularly is also a natural moment to look it over. The Motorcycle Safety Foundation’s T-CLOCS pre-ride inspection checklist covers what to check on tires, controls, lights, oil, chassis, and stands, and a wash day is as good a time as any to run through it while everything’s already in front of you.
Get the technique right once, and washing your bike stops being something you have to be careful about. It becomes routine.